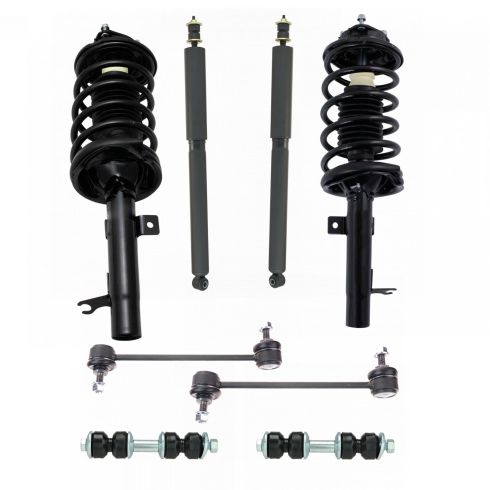
Hey friends, it's Len here at 1A Auto. Today I'm working on a 2001 Ford Focus and I want to show you how to do a rear shock. It's going to be a very easy job and I want to be the guy that shows you how to do it. If you end up needing this or any other part you can always check us out at 1AAuto.com. Thanks.
Okay, so we're inside the back of the vehicle now. We need to get this panel right here off. There's a few Phillips head screws, one, two, three. We're going to remove those. We're going to give this a little tug. There's going to be a little push clip behind this panel, but I'm pretty sure we'll be able to get it out without having to remove that panel as well.
This is what the screw looks like, Phillips head, easy-peasy. Do the same for the other ones here. So here's a hiding Phillips head. Couldn't see it from my angle. Same as the other three. I'll set it aside. Give this a little tug. That's much easier at that point. We're going to try to just pull this aside. There we are. We should be able to get a clear view.
We've got that panel out of the way. Now I'll re-situate here. This is just a little insulation. You can give it a little tug, try not to completely destroy it. This helps reduce noise and all that, so we'll try to keep it in good condition.
This nut right here, we're going to have to remove this. This rear shock does not have a coil spring around it, so you don't have to worry about removing this nut. If you were working in the front of the vehicle you would not touch this, but where we're in the rear and there's no spring around it and underneath, I'll show you what I'm talking about, we're just going to remove this. So I'll grab my tool.
So just a heads up, this is what your rear shock is going to look like. Like I was saying before, it doesn't have a giant spring running around it and, you know, a big mount and everything here. This is just a shock. It's not a strut, okay? It's easily compressed. So without having the spring we don't have to worry about taking off the nut that's located right up top. I'm just going to set this aside.
Right down here you have the 13 millimeter nut. You can go about trying to take that off with a ratchet and extension, 13 millimeter, whatever you want to do. With a ratchet it takes the chance that it's going to spin slowly and you're probably just going to spin this whole upper area as you're trying to take off the nut. If that happens, you can just try to hold it with something.
Personally, I'm going to try to use my airgun. Generally speaking it's much more effective. If you don't have access to an airgun, like I said you can try using your ratchet. You might have to use a little bit of locking pliers or something like that, or you can even try to reach around and try to somehow hold that, or have a buddy or something grab it.
Anyway, I'm going to blast this, reverse it off. So let's say that it didn't come off just like this. It came most of the way off. Maybe I could try to hit it again. Looks like we're getting close. Persistence, right? If I was doing that with a ratchet it would have been darn near impossible. I would have to get under there with some walking pliers and try to hold the... Right around here, try to hold it around the shaft area if I could find it and just try to take that off, okay?
Right now it's off, so now I'm going to get my tools out of here and I'm going to bring the vehicle up so I can get to where the lower bolt is. It comes right through here.
Okay, so we're underneath the vehicle. This right here is your shock. It comes right down and it mounts right here to the rear width lateral arm. This bolt right here is a 15 millimeter. You can use your ratchet with a 15. You can use a wrench. You can use whatever you want. I'm going to go with an airgun. I sprayed right back here where the bolt comes through. A little bit of penetrant spray generally speaking goes a long way.
I'm going to use my 15 and I have access to an airgun. I'm going to use that. Safety glasses of course. When this bolt comes out the shock is going to want to come down because we took that lower... I'm sorry, the upper nut off, so you're going to want to make sure that you're clear. You don't want it to fall down, land on your toe, hit you in the face. I don't want anybody getting hurt, so pay attention to the fact that this is going to fall down.
That's what our bolt looks like. We'll grab our shock, give it a little twist, pull it down. That's what the old one looks like. It looks like up here there's still... The boot's still attached. Pull that down. That should go somewhere like that. We'll take a peek and see if there's anything else up there. I'm sure there's a rubber bushing up inside the vehicle that needs to come out as well, but essentially this is what it looks like.
So here we are friends, a quick product comparison for you. Over here we have our 2001 Ford Focus rear shock. We just removed it. Over here we have our brand new quality 1A Auto part. As you can tell, they're both approximately the same length. They do compress and expand, so if you notice that one seems like it's longer or shorter than the other, well it's just because maybe this one's compressed a little more than that one.
This shock right here is the dead shock. It literally has no more gas inside of it. This one right here is nice and gassed up. I'll show you that in one second. We've got our mounting hole down here. We've got our upper stud right here, but the same as this one, okay? Upper stud, upper stud. This is where it goes through the body of the vehicle. This is where it connects to that lower arm, okay?
This right here... You shouldn't be able to do this necessarily by hand. Theoretically when you push it down it should want to come back up on its own. It's not really doing too much at this point. It's a good thing we're replacing this with a quality 1A Auto part.
With that said, I don't see any reason why I wouldn't want to install this into the vehicle, so I'm going to go ahead and do it. If you need this or any other part you can always check us out at 1AAuto.com. Thanks.
So here we are friends. We've got our brand new quality 1A Auto part. I just want to talk to you about something real quick. When you go to install these what you want to do is you want to be able to push this down and activate it. You want to push it up and down if you can three to five times. Sometimes it's going to be a little bit hard to do, okay? Just do the best you can.
This is super important, because you need to activate the gasses inside, get everything worked up. You don't want to hold it sideways like this and try to crush it in, give yourself a chest exercise. It might feel good, but that's not what this is about. That's for the gym. This is for today.
All we want to do, we're going to try to press down on this a little bit. We're going to cut off this little white thing. This is going to want to come up, okay? When it comes up, you're going to want to obviously be careful. We're going to wear some safety glasses. I want to see my kids and my grandkids someday.
I'm just going to press down a little bit. I'm going to cut this white thing, okay? This is going to want to come up a little bit, nice and slow. It's coming up, up, up. We're going to let it do its full thing. Still going. Still going. Okay, here we go. Thank you.
I'm going to grasp the bottom firmly so it can't slip around. I don't want it to punch me in the gut. I'm going to try to pull this down, condense it as far as I can. I'm going to let it come back up. I'm going to do that three to five times. Here we are. Bring it up. This part is going to take a little while.
So right up here is the body of the vehicle. This is where the strut is going to go up and through, and then we're going to put our upper bushing up on top and then the nut. So what you want to pay attention to is just to make sure that there's nothing there. You want to be able to see bare metal. If you have plastic or any other sheathing that was supposed to be part of the old shock you want to make sure you remove that. Now that we know that's removed let's get to putting in the new shock.
So we got a nice little bag of goodies with our shock. The way you're going to do this, you're going to take one of your washers, you're going to take one of your bushings... You want to put the thicker end facing towards your washer. Then you're going to have the body of your vehicle. This is going to go up into the body. You're going to be inside the trunk at this point. You're going to put the skinny end down up against the body of the vehicle, then your washer, then your brand new locking neoprene nut. It's essentially going to look like this.
So here we go. I'm going to put the shock in the hole up in the body up there that I told you about. We've got our bolt. I cleaned up the threads. Just going to bring it through. If you want to you can use a little bit of thread locker. It's your prerogative. You do you, boo-boo. Let me get that started.
We're going to tighten this up. I'll get you the torque spec. First we're going to bottom it out. So we're going to bottom this out using our 15 millimeter. Now we're going to torque it down to 85 foot pounds. Getting close. Here we are. Do it one more time. Torqued.
Now we'll bring the vehicle back down. We're going to put the weight of the vehicle back on the wheel here. We'll get everything set up, our bushing and our washer and then our nut, and then we're going to torque that down as well.
Okay, so we've got the wheel on the ground, right? We're creating force, forcing this in the upward position. It's pressed up against the body nice and firm. We're going to take our bushing, skinny end down. Then we're going to take our washer. We'll put them right on this stud just like this. We're going to take our locking nut. We've got the plastic neoprene there. That's going to face up.
We'll start this on here, then we're going to bottom it out, and then we're going to torque it down. I'm going to bottom this out with my 17 millimeter. I'm going to start it on there. There we are.
Okay. So to torque this down you want to torque it to 13 foot pounds. You might notice that it's hard to torque down, because when you try to tighten up that nut the shaft is going to spin. Well, the best thing that I would say to do is if you have access to an airgun you're just going to kind of blast it on, okay?
The size of the new nut is a 17 millimeter. When you have your bushings inside the vehicle you've got your washer on top and the body right here. As you tighten down your nut this going to start to squish down. You want it so that it's touching, it gives it a little squeeze, but it doesn't flatten right out like a pancake.
Like you don't want to see just that much of the bushing and just a big old squished out pancake. That's no good. You put too much pressure on your rubber bushing, it's going to wear out really quick. Just make it so it gets a little squeeze, it's completely touching. You should be good to go. The torque spec for it is 13 foot pounds.
So it's time to get this back together. We've got our insulation back up on here. We'll lift this up and slide this in. It should sit pretty flush up against there. Bring this over. The seatbelt goes up and over this lip right here. This piece has a little push clip under here. If it pops up on you like this one is you just unscrew the center area, pull out the center, that outer edge should come out. Set that aside. Okay. We'll put this back on in a second, but we'll continue with what we're doing first just so we don't have to do it again.
This goes behind here. That looks pretty good. Okay, just going to come up along here. You should have some bolt holes. Let me see if I can find them. There. Get the last one started here. I'm just going to go ahead and start tightening them up now that they're all started. Snug. Pushing that back up real quick. Let's try to get it right.
Yeah. How I'm going to snug them up again. There we go, one... There should be four. There's one up here. This one. This one right here. Okay. Cool. If your bulb became disconnected from your lens assembly you're just going to put that in. This goes right along the backside corner there. Let me see if I can get it. Might have to pop this lens out. That'll make it a little easier. Here's our lens. This is just going to go in, twist, there we are. Get it back in. Take my glove with it. That's fine.
Okay. We've got this cover. Your seatbelt is going to come through this area. The whole thing is going to have to slide from the forward back. It's got a hooky-do, hooky-do, hooky-do. It goes like this, okay? So get it lined up, grab your seatbelt, put it up and in. That's ready to go.
Get everything lined up. Give it a little bonk. Bonk, bonk. That's my thing. My little push pin. This goes underneath. There we are. Feels good. All right. Let's get our tools out of here. Easy-peasy.
And now that we've completed this side, we're going to do the same to the other side. You always want to do stuff like this in pairs. It's just a good habit, right? Easy-peasy. We know how to do one side, we can do the other.
Thanks for watching. Visit 1AAuto.com for quality auto parts shipped to your door, the place for DIY auto repair, and if you enjoyed this video please click the subscribe button.


