Complete Repair in One Purchase - Stop searching for parts individually and complete your repair with a customized kit or set from DIY Solutions.
High-Quality Parts from Trusted Brands - DIY Solutions' kits and sets are selected from the best automotive brands and include hard-to-find and even obsolete parts you may need for your vehicle.
Guaranteed Fit - DIY Solutions ensures its selected parts are quality-tested to guarantee fit and function.
Install Tip: You may be required to reset the vehicle computer after installation of this part.
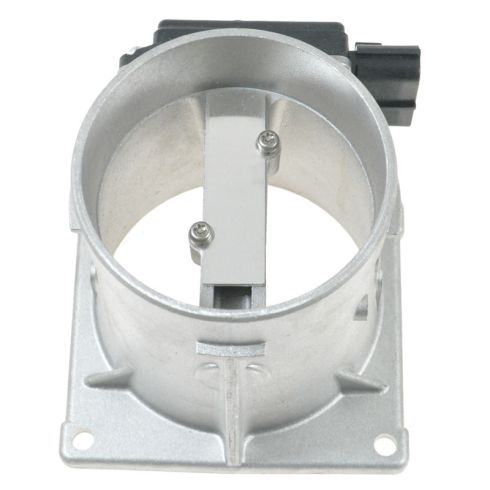
Quality Tested - built to a strict level of product standards. Air Flow Sensor Housing OptionIncludes Housing
Item Condition:New
Attention California Customers:
WARNING: Cancer and Reproductive Harm - www.P65Warnings.ca.gov.
Lifetime Warranty
This item is backed by our limited lifetime warranty. In the event that this item should fail due to manufacturing defects during intended use, we will replace the part free of charge. This warranty covers the cost of the part only.
Returns: Parts with electrical components cannot be returned once installed.
FREE Shipping is standard on Orders shipped to the lower 48 States (Contiguous United States). Standard shipping charges apply to Hawaii, Alaska and US Territories. Shipping is not available to Canada.
Expedited is available on checkout to the United States, excluding Alaska, Hawaii and US Territories as well as P.O. Boxes and APO/FPO/DPO addresses. Final shipping costs are available at checkout.
How to Replace Mass Air Flow Sensor Meter 1997-98 Ford F-150
Created on:
Tools used
Flat Blade Screwdriver
10mm Socket
Ratchet
1. Removing the Air Filter
Lift the air box straight up out of the rubber grommets
Lift up the handle on the band
Slide the cover housing off
Remove the air filter
2. Removing the Air Flow Meter
Pop a flat tip screwdriver into the slot
Pull the grommet out
Pull out the sensor
Disconnect the wiring harness
Remove the meter assembly
Remove the 10mm nuts from the sensor
3. Installing the Air Flow Meter
Place the air flow sensor into place
Tighten the 10mm nuts to the sensor
Connect the wiring harness
Fish the grommet through the hole
Press the assembly into place
4. Installing the Air Filter
Insert the air filter into the housing
Place the housing into its tab
Snap the band onto the housing
Press the filter onto the rubber grommets
Hi, I'm Mike from 1AAuto. We've been selling auto parts for over 30 years! We're dedicated to delivering quality auto parts, expert customer service, and fast and free shipping, all backed by our 100% satisfaction guarantee. We've created thousands of videos to help you install our parts with confidence. That saves you time and money, so visit us at 1AAuto.com, your trusted source for quality auto parts.
Our air filter box is a little bit hacked up, but removing it should be the same process—you just have to lift straight up, and there's two posts on the bottom of the air filter box that slide into rubber grommets; it's easy enough to just pull them straight up. Around the outside edge you have a handle that you just lift up, and at that point you can remove the plastic air filter housing and the air filter itself.
On this end, to remove this, there's a couple of slots that you can pop a flat tip screwdriver in and the center comes right out. The troubling part is that there's a wire on the bottom that's holding it in place right here. A trick to doing this is pull this grommet out, turn it sideways, and feed it back in the hole a little bit. That will allow you to gain access to this clip, which you squeeze and release. Now you have your mass airflow sensor out of the vehicle.
With the airflow meter off of the vehicle, you can see there's a 10 millimeter nut on this side and one on this side. We'll use a 10 millimeter socket and a ratchet to remove these. Once you crack them loose, they're very easy to remove just by hand, and then you should be able to just slide the mass airflow sensor off of the two studs.
You can see, comparing the old part with the new part, they look identical in every way. Same connectors on the ends, the insides look the same, the sensors also look the same inside these holes. This is where the actual magic happens: the air flows through here and it measures temperature, and the air mass that's going through the sensor.
The housings themselves are obviously extremely similar, and replacing it will get your truck fixed up right. This hole is actually in the center, but the studs are off-center, so you'll see that the mass airflow sensor only fits on one way and that is not correct. It needs to sit on this direction for it to line up with the hole in the center. Once you have it over the studs, you can reinstall the two 10 millimeter nuts. Start them off by hand as always, and then you can tighten them down with your 10 millimeter socket and extension.
All right, back at the car. What we want to do is plug in the sensor first right here. Just snaps right in place. Then your rubber grommet right here needs to go back on the outside so we need to feed this rubber grommet back through the hole. Make sure you don't tug on the wires too hard 'cause you don't want to damage the wire in any way. Rubber grommet is snapped back in this place, and then we should be able to snap this part back in place as well. You can see it has a little tab that it lines up with.
Our air filter is obviously very dirty, so we'll be replacing that. But in the interest of showing you how it's installed, you put the air filter on first, and then you get your plastic air filter housing. Now there is a tab on it that needs to line up, so you going to make sure your tab is lined up before you put this band around the center. If the tab is lined up and the band is around the center all the way around, you can snap that back into place. You want to go find your two studs on the bottom and push 'em right down into the rubber grommets.
Thanks for watching. Visit us at 1AAuto.com for quality auto parts, fast and free shipping, and the best customer service in the industry.
EMS00630
In Stock
Product Reviews
Loading reviews
5.00/ 5.07
7 reviews
5 Stars
4 Stars
3 Stars
2 Stars
1 Star
7
0
0
0
0
Great Part Fast!
J
February 6, 2019
The MAF sensor came quickly and fits perfectly as an OEM replacement for my 1997 F150. Will definitely use 1A auto again! Also, the videos are very helpful for amateurs like myself.
Air Flow meter
Michael
April 29, 2019
Mas Sensor arrived in good packaging, fast and quick order. Installed it, got rid of the code works great!!
Mass Air Flow Sensor
N
August 10, 2019
Part work excellent fixed my problem I had with my truck
Great product
Dylan
August 5, 2020
Easy to install
morris
September 1, 2021
Perfect fit.
Worked as it should
William
February 26, 2024
No issues with this part in my 96 gt. Smoothed out my idle, been on the car for a few thousand miles
mass air sensor~problem solved
Dennis
August 18, 2024
After doing a lot of research and being told by several mechanics that they couldn't find the problem I was dealing with. After a bit of trial and error, I discovered on my own that the problem was the mass air sensor. Once I installed the sensor the idle dropped the engine that was burning rich. Now starts easily regardless of temperature or humidity. Thanks to A1 and the helpful installation video the process was simple. I highly recommend A1 to anyone, for quick service quality products, and competitive prices. A1 made my day, will use them again.
Customer Q&A
how to reset the vehicle computer?August 28, 2020
Jose- G
10
2 ways: One to disconnect battery for about a minute, or with a OBD meter. I some times take it to to advance auto or auto zone if ya don't have the meter. If you are still getting a code for air flow, check all intake hose, fitting and wire grommets in the intake. also make sure your air filter box is connected together and the air flow where it comes into the air filter box that goes through header panel(radiator support) is properly connected. Or the grommet that is in the air flow tubes that the wire connector goes through is properly seated, Just make sure no air leaks in intake air flow system. also check for any holes or crackes in the rubber in air flow. Clamps are in place!! Even PCV tubes are flexible and no cracks or weathered badly!!
August 29, 2020
Michael W
10
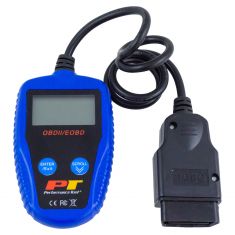
Thank you for the inquiry. You can reset the computer by either disconnecting the battery for a few minutes, allowing it to reset the 'old school' way or you can have your tool reset it for you. Depending on what you are resetting it for or any codes, they may need to be removed with the tool. If this is a newer vehicle it may be best to have someone at a local part store or mechanic reset this to prevent the lights/codes from coming back after replacing a part.
August 29, 2020
Curtis L
Customer service
877-844-3393
Monday - Friday 8:00am - 9:30pm ET Saturday - Sunday 8:00am - 4:30pm ET
Ford is a registered trademark of Ford Motor Company. 1A Auto is not affiliated with or sponsored by Ford or Ford Motor Company.See all trademarks.
Enter Vehicle Year Make Model
Specify your vehicle's year, make and model to guarantee fit.
Year
Make
Model
Options
Drivetrain
This part doesn’t fit a . Select from parts that fit.