Brought to you by 1AAuto.com, your source for quality replacement parts and the best service on the Internet.
Hi, I'm Mike Green. I'm one of the owners of 1A Auto. I want to help you save time and money repairing or maintaining your vehicle. I'm going to use my 20-plus years experience restoring and repairing cars and trucks like this to show you the correct way to install parts from 1AAuto.com. The right parts installed correctly: that's going to save you time and money. Thank you and enjoy the video.
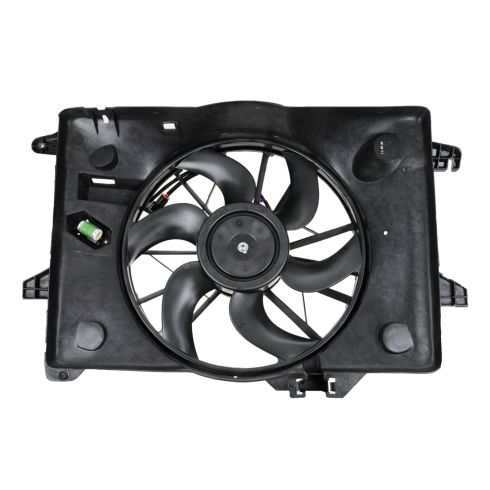
In this video, we're going to show you how to replace the radiator fan in this 2000 Lincoln Town Car. This vehicle has the electric fan, same as any 2000 to 2002. The only tools you'll need are an 8 millimeter socket with a ratchet and extension, and a flat blade screwdriver.
You want to disconnect your lead, for which you can take a screwdriver, pry on this white tab here, actually, and then the lead comes off. It just makes it a little easier. There are two locking tabs on each side. Pry one up. Pull it out some. Pry the other one down. The lead comes apart. To remove your radiator fan you're going to want to remove two bolts: one right down in here and then one over here, underneath the radiator hose, right there. You'll also want to remove this bolt here for your radiator tank. These are all 8 millimeter bolts. You'll want a socket with a ratchet and an extension to get in there. The bolts are a little bit rusty, so I'm just kind of working my wrench onto them. I'm going to fast forward through here. This is a Northern car with lots of miles on it, and these bolts did come apart. It took a little bit of force, but they came apart pretty easy. None of them broke. You should be able to get yours apart, as well. Now what you're going to do is you can lift up on your radiator bottle and just turn it off to the side like that. The more room you can give yourself, the better. Maybe even have a person hold it. That's okay.
Then, what you're going to do is, on this side, you're going to start lifting, push your fan over to the passenger side, and lift it up. You'll see that you just kind of need to pull it over to get this past your radiator hose on this side. Pull the fan towards the engine and let it dip down. When you're pulling the shroud up and out, just be mindful, there might be this hook down here that supports your lower radiator hose. You just want to make sure that you take the radiator hose off of that and then just make sure it doesn't get hooked on anything while you're pulling the shroud up and out. When you're pulling it out, kind of flip that radiator hose around that hook. There you go.
Just a quick comparison: here's the original one, and the new one from 1A Auto. You can see everything's the same. All the mounting points are the same. The shape is all the same. Most importantly, I don't know if I can get this off, but the connector is exactly the same. The 1A part is going to bolt in and work, function, just like the original. On this vehicle, my original one is working fine, so I am going to just reinstall it. That's why you'll see me reinstalling the original one. Also, one additional note: our fan from 1A Auto does come with this, basically, a little . you snap it in and it supports the lower radiator hose. Before installing, here's just two notes. Your lower tabs, here, and then over here, when those go down in, you want to put your fan down in and then you're going to lift it back up. Those tabs go into, basically, these little hooks. They slide right down in there, and on this side, it's the same thing. They slide right down into that hook.
We'll take our fan assembly, put the lower radiator hose hook on there, feed it down in sideways. Move that hose out of the way so we can hook down in. Then push it down, bring it up. You can see down in. Get those lower tabs hooked in. You'll need to pull your radiator bottle up and out of the way. Get that lower tab. That lower tab is in. Reach down, put our lower radiator hose into place. Take the bottle, put it into its spot. Start my first bolt in. Just speed up starting those three mounting bolts. Now you can tighten those up. Now I did kind of realize after the fact, this one here on this side, you just need to loosen it up a bunch of turns. You actually don't need to take it out. But taking it out might just make it a little bit easier to get things apart and back together. Now I'll speed it up as I just tighten up those three bolts. They don't have to be incredibly tight. They should be nice and firm, but again, they don't have to be extra tight or anything like that. Last but certainly not least, just reconnect that lead. If you're putting in the new 1A Auto part it'll all already be clipped on to the shroud, but I just clip it on there, and make sure it stays up and out of the way. You should be all set
We hope this video helps you out. Brought to you by www.1AAuto.com, your source for quality replacement parts and the best service on the Internet. Please feel free to call us toll-free, 888-844-3393. We're the company that's here for you on the Internet and in person.