Brought to you by 1AAuto.Com-- your source for quality replacement parts and the best service on the internet.
Hi, I'm Mike Green. I'm one of the owners of 1A Auto. I want to help you save time and money repairing and maintaining your vehicle. I'm going to use my 20-plus years of experience restoring and repairing cars and trucks like this, to show you the correct way to install parts from 1AAuto.Com. The right parts installed correctly; that's going to save you time and money. Thank you and enjoy the video.
In this video we're going to show you how to remove and replace the serpentine belt tensioner on this '98 Explorer with a 4.0 Liter. This procedure is the same for a lot of this era Explorers with the V6's. Tools you'll need are an eight-millimeter wrench, flat blade screwdriver, a three-eighths drive ratchet handle and a 13-millimeter socket.
Disconnect your negative battery cable with an eight-millimeter or five-sixteenths wrench. You're going to want to pull your intake hose back, which is very easy. You'll loosen up this clamp here, and then you want to unclamp your air filter box. Then pull that off of your throttle body. Pull this up, and then you can just flip this up and stow it away.
To remove the belt, right here is your belt tensioner. You want to take a three-eighths drive ratchet handle and then there's a square hole right in the tensioner. I'll put my wrench down in there, push down, see the belt loosen up, and then slide it right off of the eyelet pulley. You want your wrench back up, and then you can just take the belt of, all the components. Reach down and flip it off of the crank shaft. It comes up and off.
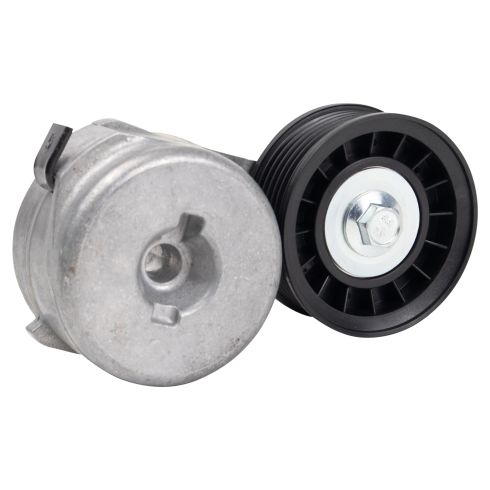
Once you have the belt off, get a 13-millimeter socket. You can actually see that my tensioner is separating now, but that's not a good sign. So a bolt comes out, and then the tensioner comes right off. Here's our old tensioner, the new tensioner from 1A Auto. You're actually going to put it on with that right there. One thing you want to test is, you can see there's- or you can hear- some of play in this. That means that those are gone. It is pretty loud when they're rotating. This one's nice and quiet. No play. To reinstall the tensioner, put it down and in and on. In the little slots. Put it on. Tighten that bolt up. You do want to pull it pretty tight.
Now, put the belt back on. It is very important to use your belt diagram. Shows how the belt is routed. What we want to do is make a little loop and work it around the crank shaft here first, and then we'll work around everything else. So make that loop, and make it tight. Pass the belt under the shaft for the fan, a little bit. Just get it into your other hand and get it up and under the crank shaft, or around the whole crank shaft. Get it on top. Take the belt up and over the water pump, and around the power steering pump and A/C compressor, over the alternator and into the tensioner. Then you're going to press on it here, make sure you everything's lined up good or well, then push your tensioner down and in with a wrench. Slide the belt underneath the idler, and you're all set.
Put your intake hose back over, push it into here, push it back in here. There are three tabs over here; Make sure they go into the right slots. Put it back on. Make sure it's pushed in there well, tighten your clamp back up. Make sure all these connections are still good. You're all set.
We hope this helps you out. Brought to you by www.1AAuto.com-- your source for quality replacement parts and the best service on the internet. Please feel free to call us toll free, 888-844-3393. We're the company that's here for you on the internet and in person.