Replaces
This part doesn’t fit a . Select from parts that fit.
Frequently bought together
Part Details
Item Condition:
New
1 Year Warranty
This item is backed by our 1-year warranty. In the event this item should fail during intended use, we will replace the part free of charge. This warranty covers the cost of the part only.
FREE Shipping is standard on Orders shipped to the lower 48 States (Contiguous United States). Standard shipping charges apply to Hawaii, Alaska and US Territories. Shipping is not available to Canada.
Expedited is available on checkout to the United States, excluding Alaska, Hawaii and US Territories as well as P.O. Boxes and APO/FPO/DPO addresses. Final shipping costs are available at checkout.


Created on:
Tools used
Tools used
Hi, I'm Mike from 1AAuto. We've been selling auto parts for over 30 years! We're dedicated to delivering quality auto parts, expert customer service, and fast and free shipping, all backed by our 100% satisfaction guarantee. We've created thousands of videos to help you install our parts with confidence. That saves you time and money, so visit us at 1AAuto.com, your trusted source for quality auto parts.
In this video, we're going to be working with our 2001 Ford Ranger 4.0-liter V6. We're going to show you how to remove and replace your power steering pump.
If you like this video, please click subscribe. We have a ton more information on this truck, as well as many other makes and models. If you ever need parts for your vehicle, you can follow the link down in the description over to 1AAuto.com.
Here are the items you'll need for this repair: Phillips screwdriver, 7-10mm sockets, 3/8 drive ratchet, socket extensions, flat blade screwdriver, hammer, penetrating oil, 18mm wrench, pliers, jack and jack stands, funnel, transmission
We're going to remove this cover over the throttle body. Use a small Phillips head screwdriver to remove these two screws and a 7mm socket and ratchet for the bolt in the back. Remove the cover from the intake.
We use a flat blade screwdriver to loosen these two screw type clamps on our intake tube. We'll then wiggle the tube off of the math sensor on the throttle body and remove it from the vehicle. You also have to remove this breather line from the back, so we remove the intake tube from the throttle body and the math, and pull it straight from the breather and remove it from the vehicle.
Your serpentine belt tensioner is located on the passenger side of the engine, just below the alternator. At the bottom there is a 3/8 square drive, which we'll use the end of a 3/8 drive ratchet for. Install it into the drive the same way you would install a socket onto a ratchet. We're going to pull that clockwise to put some tension onto the belt and keep our pulley from rotating. We use a 10mm socket and ratchet to crack the bolts on the pulley loose.
There's three of the 10mm bolts on here. You don't want to remove them fully, you just want to break that initial torque off of them. So when we remove our ratchet and take the tension off of the belt, we can finish removing them. Once you've got them correct and loose, go ahead and switch your ratchet around so you can rotate counterclockwise and take the tension off of the belt and remove it from the pulleys.
Make sure your vehicle has either a belt path diagram somewhere in the engine bay and if it doesn't, you can draw one up yourself. Remove your ratchet from the tensioner and you don't have to fully remove the belt here so I'm just going to let it hang. Remove those bolts from the pulley.
Once the bolts are out, there is a little bit of a tension fit here on the pulley, so you may have to tap it off. If you rotate it back and forth a little. It will actually walk the pulley off nice and easy. You can remove it from the vehicle.
At this point, if you haven't removed the belt fully, go ahead and do that because we're going to be using some penetrating oil. When we remove the lines for the power steering pump, we're going to let some fluid out. You don't want to get that onto your belt because they could damage the rubber. Once that's out of the way, we'll spray some penetrating oil on this fitting here. Let that soak in for a minute. This flare nut here is an 18 millimeter.
Now the best way to try to remove one of these flare nuts is with a 5.0 flare nut wrench. If you don't have one, you can use an open end. You just want to give it a good feel when you're trying to loosen it to make sure it doesn't feel like it's going to round off. Ours moves nice and freely. Now this can be a little tough to get up. If you have stubby 18 millimeter wrench, we recommend you use that once you've cracked it loose. Otherwise, you'll just have to go there about an 8th of a turn at a time to get it out.
If you have one of the ratcheting wrenches or a small adjustable wrench, those tend to be a little bit smaller too and once the majority of the torque is off of this, they're pretty easy to remove. Before fully removing this nut, make sure that you have a drain bucket under the vehicle to catch all the power steering fluid that's going to come out of here. Once it's cracked loose there, finish it by hand. Pop the line out. Let that power steering fluid drain out into your catch pan. Now sometimes you can remove the rubber hose here at the bottom that feeds the power steering fluid into the pump from the reservoir, but ours isn't a pretty tough spot to get that clamp off, so we'll remove the pump first and then the hose once we can move it around and get it where we want it.
To do this, we'll use a 10 millimeter socket and ratchet to remove these three bolts from the pump. Once the bolts are out, the pump can be moved down and out of the bracket. Make sure you still have your drain bucket under there because some fluid may come out from you moving it around. It will definitely come out when we remove the line from the reservoir. Now we can get a good grip on that clamp to remove the hose from the bottom of our pump. Using a pair of pliers, compress the clamp. Slide it down. If the hose is stuck on there, you can gently grab it with the pliers and twist the pump and the hose back and forth until it comes free.
Now there's nothing wrong with our old power steering pump, so we're going to go ahead and reinstall it. Place the inlet line back on. Using your pliers, compress that clamp and slide it back up on top of the rubber hose. We'll work it back down past the fan here. Remember the blades on that fan are only plastic, so be very careful not to put too much pressure against them and risk breaking them. Remove the pressure line out of the way if you have to.
Line the pump up and start your three 10 millimeter bolts by hand. Then tighten your bolts down with the 10 millimeter socket and ratchet. Reinstall your power steering pressure line into the bottom of the pump. Start the flare nut by hand. Once you've got the flare nut started, go ahead and tighten it back down with your 18 millimeter wrench. Remember while a stubby is suggested, this is doable with a full size wrench. You're just not going to be able to get as long of a swing on it.
Reinstall your power steering pulley onto the pump. You want to try to line this up as best you can, because it's a little difficult to move once you get it worked on there. Then reinstall your three 10mm bolts by hand. Make sure you get them down as tight as you can. We're going to loop our belt here, feed it down, and hook it around the crank shaft to start. We're coming in from the passenger side here because that's how it's going to be easiest to route our belt.
Once we're hooked around the crank, we'll run the smooth part of our belt over the water pump to the driver side. We'll go under our A/C compressor at the far end. Be sure that that's seated in fully. We'll go over our power steering pump at the top here. We'll run the other side of the belt coming off of our crank around the tensioner. That's from underneath, so the ribbed part will also be touching the tensioner the same way it comes out from under the crank, and the ribbed portion will go again over the top of our alternator. Now when we release tension, we can push down in the middle and go underneath our smooth idler pulley.
Reinstall our ratchet into the tensioner. Turn it counterclockwise again. Try to get as much swing here so we can pull it over pretty far. Go underneath the smooth pulley, inspect one more time for proper belt path and that you are not hooked on the edge of any pulleys. With your ratchet still on the tensioner, turn it clockwise as hard as you can to put some extra tension on the belt, and then tighten down your 10mm power steering pulley bolts. Remove your ratchet from the tensioner.
Reinstall your intake components so you can run the vehicle. Reinstall the breather line in both ends of the intake tube to the throttle body and the air box. Tighten down the clamps with a flat blade screwdriver. Reinstall the engine cover. We'll tighten down the front two screws with a Phillips head screwdriver and the rear with a 7mm socket.
Thanks for watching. Visit us at 1AAuto.com for quality auto parts, fast and free shipping, and the best customer service in the industry.
Tools used
Brought to you by 1AAuto.com, your source for quality replacement parts and the best service on the Internet.
Hi, I'm Mike from 1A Auto. I hope this how-to video helps you out, and next time you need parts for your vehicle, think of 1AAuto.com. Thanks!
In this video, we're going to be working with out 2001 Ford Ranger. We're going to show you how to remove and replace the water pump. This information is the same on all Ford Ranger 4.0 liters from 2001 to 2011 and is very similar to several models.
If you like this information, please click subscribe. We have a ton more videos on this truck, as well as many other makes and models. If you want this part for your vehicle, you can follow the link down the description over to 1AAuto.com.
Here are the items you'll need for this repair: 7-10mm sockets, 3/8 ratchet, socket extensions, drain bucket, 10-19mm wrench, Phillips screwdriver, flat blade screwdriver, adjustable wrench, needle nose pliers, torque wrench, pliers, razor blade, coolant, and funnel.
Remove the radiator cap at the top of the radiator on the driver's side. Simply push down and turn counterclockwise. Remove the four 10mm bolts securing this plastic cover underneath the radiator. We're going to use a socket, ratchet and a long extension for this. We put our vehicle on the lift to make it easier to show you, but you should be able to do this job with the vehicle on the ground.
You may need a flat blade screwdriver to remove the plastic push-pins securing it in, but usually you can just grab both sides and pull down. Set up a drain bucket underneath your drain plug, which is located on the passenger side of the radiator at the bottom. We'll open up the petcock with a 19mm wrench. Don't open the drain plug all the way, as coolant will come out the end where the plug sits in. We'll crack it loose until it starts draining and wait for the radiator to be completely empty.
Reinstall the petcock by hand. Just wipe that little bit of drip off the bottom there. Remove our drain bucket. If you're doing this on the ground or on jack stands, you may want to leave the drain bucket under there to catch any excess coolant that comes out of the system. We're going to place our low level drain bucket underneath the truck while we finish the repairs.
We're going to remove this cover over the throttle body. Use a small Phillip's head screwdriver to remove these two screws, and a seven millimeter socket and ratchet for the bolt in the back. Remove the cover from the intake.
We're going to use a flat blade screwdriver to loosen these two screw type clamps on our intake tube. We'll then wiggle the tube off of the MAF sensor on the throttle body and remove it from the vehicle. You'll also have to remove this breather line from the back, so we'll remove the intake tube from the throttle body and the MAF, pull it straight off the breather and remove it from the vehicle.
Ideally, you'll want to use a thirty-six millimeter wrench or clutch fan removal tool, to remove the fan clutch nut from the front of the water pump, but we're going to show you how to remove the fan clutch nut if you don't have the special tools.
Your serpentine belt tensioner is located on the passenger side of the engine, just below the alternator. At the bottom, there's a 3/8 square drive, which we'll use the end of a 3/8 drive ratchet for. We're going to pull it clockwise to put more tension on the belt, as opposed to going counterclockwise, like we would to remove the belt. Then we'll use a long, 10 millimeter wrench to remove two of the bolts on the water pump pulley, and get us some room to get a wrench on there, and remove the clutch fan.
We'll break the two bolts loose with the tension on, and remove it the rest of the way by hand. Once the bolts are loose, you should be able to take them right out by hand. With the bolts out of the way, you can put the thirty-six millimeter wrench, or an adjustable if you don't have one, loosen the nut, and remove it the rest of the way by hand. Remove the two ten-millimeter bolts at the top of the fan shroud with a socket and ratchet. Grab the fan and the shroud together, pull up, and remove them from the vehicle.
Using a 3/8 drive ratchet, put tension onto the belt again and break the remaining two water pump pulley bolts loose. Don't remove them fully until the belt is off the truck. We'll turn counterclockwise now to release the belt tension and remove the belt. Finish removing the 10 mm bolts. Now remove the pulley from the pump.
Using a pair of slip-jaw pliers, clamp down on the hose clamp, and move it down with just a little bit of pressure. If you grab this too tight, you're going to tear the hose. Wiggle it to break all the corrosion free. We'll pull down and remove the hose from the water pump. We'll use those same pliers to compress this clamp on the driver's side at the bottom and remove that hose the same way. We'll repeat this process on the third hose at the top. We may not be able to wiggle this hose off of the water pump just yet, so we'll just twist it to break it loose, and if it doesn't come off, we'll slide the water pump off of the hose on the way out as opposed to trying to remove the hose, then the pump.
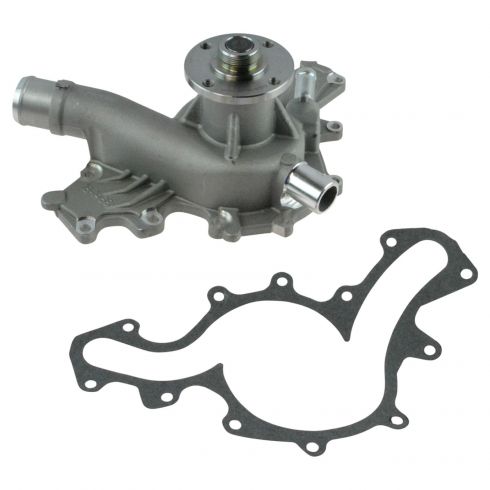
Since it's difficult to see the water pump inside of the vehicle, we figured we'd show you our new part from 1AAuto.com. You can see where the twelve 8mm bolts are located on the pump. Use that as a guide for where to locate them inside the vehicle. We'll remove these bolts using an 8mm socket ratchet and extension. You may have to wiggle the water pump a little bit to break the old gasket free from the block. Once it's free from the block, we'll twist and pull down to remove it from the upper hose.
Here we have our old water pump that we removed from our vehicle and our new part from 1AAuto.com. As you can see, we have the exact same backing here. We have the same pump in the center. Also comes with a new gasket with the same hose connections in all three locations as well as the same four bolt flange and threads for our pulley and our fan clutch.
This new part from 1A Auto is going to go in direct fit, just like your original equipment, and fix you up right. Scrape down the gasket surface with a razor blade to remove any buildup or residue left by the old part. We're going to spray some Brakleen onto a clean paper towel and wipe down the surface. We'll lay our gasket onto the back of the water pump. Put two bolts through to try to keep it in place. Try to pick two bolts that are easy to access.
Now we'll line up our water pump. Push the top of the water pump back onto the hose. Reinstall all twelve 8mm bolts into the water pump and bring them down tight with an 8mm socket, ratchet, and socket extension. Torque these bolts to 89 inch-pounds. Compress the clamp with a pair of slip-jaw pliers, and slide it back into place and release. When letting go of these, always make sure you place them somewhere where you can easily remove it later should you ever have to work here again. Reconnect the lower two hoses using the same technique.
Reinstall your water pump pulley onto the pump. Remember, we're only going to put two bolts in for now because they'll be in the way when we go to reinstall our clutch fan. Reinstall your water pump pulley. Remember, we're only going to install two bolts for now because they'll be in the way when we reinstall our fan and clutch.
Turn your belt inside-out and inspect the rib side for any cracking, dry rot, any kinds of tears or burn looking rubber. If you have anything that looks like that you should be replacing your belt. Ours looks okay so we can re-install it and get some more mileage out of it. Reinstall the serpentine belt. We'll go around the crankshaft pulley, under the water pump pulley, over the top, under the A/C compressor, around over the power steering pump pulley.
On the opposite side we'll go over the tensioner, up over the alternator. Just put a little thumb pressure under the smooth idler pulley. Put our 3/8 drive ratchet into the tensioner and turn it counterclockwise until we can slide the top of the belt under that smooth pulley. Once you get it set on, just do a quick check that the belt is fully seated into the grooves on all the groove pulleys and that it's centered pretty good on the water pump pulley.
There is a channel on the back there. You just want to make sure you don't go over that. Take a second with a 10mm socket and ratchet just to snug up the two water pump pulley bolts we have it.
We'll reinstall our fan shroud. A little tricky to sneak past the transmission lines. We'll lay our fan shroud back. Sneak our fan in. Reinstall it onto the threads on our water pump. You may have to physically turn the nut for the first couple of threads. You may have to turn the nut a few time by hand to get it started on the threads.
Once it's going, we can spin the entire fan assembly to get it on the rest of the way. We'll set our fan shroud into the tabs at the bottom, and reinstall the two ten millimeter bolts at the top. Tighten the bolts down with a ten millimeter socket and ratchet. We've got our 3/8 drive ratchet and our tensioner again. We're going to turn that clockwise to put a little extra tension on the belt.
Put our adjustable wrench onto the fan clutch nut, and tighten that down as best we can. Now, we'll take that same wrench and rotate this around a hundred and eighty degrees or so, whatever you need to do to get to the other two water pump bolts and reinstall them.
We'll start our two ten millimeter bolts in by hand. We'll put the tension back on the belt, and snug up our ten millimeter water pump pulley bolts. Reinstall the breather line and both ends of the intake tube to the throttle body and the air box. Tighten down the clamps with a flat blade screwdriver. Reinstall the engine cover. We'll tighten down the front two screws with a Phillips head screwdriver, and the rear with a seven millimeter socket.
Reinstall the bottom cover. Remember it has the plastic clips to help you line it up. Then install the four 10 millimeter bolts with the socket, ratchet, and extension. There are two on each side.
Any time this coolant level has been dropped, you'll have to bleed the system the way you see here. We're going to refill it with a 50/50 mix of the coolant designated for our truck, as well as distilled water to get the proper mixture. We'll then fill the radiator through this funnel back up to the top level, run our vehicle up to temperature with the fan on the lowest setting and the highest heat we have to make sure that that air, if built up in the heater core, circulates through fully and removes any air pockets from our system before we test drive it and confirm our repair.
Make sure the petcock on your radiator is closed if you opened it to drain the system and always use a funnel and a drain bucket to prevent any spills when filling the system. After filling the radiator completely, start the vehicle with the radiator cap off and a drain bucket underneath. Set your fan for the heat to the lowest speed and the heat to the highest setting blowing out of the vents so we can monitor the temperature coming out of the heater core. While the vehicle is running, you'll notice air bubbles coming out of that filler neck. Be sure to keep an eye on that and keep the level up top throughout this process. You can see here that our vehicle needs more coolant.
This means that our vehicle has probably gotten up to temp and that thermostat is open allowing the air inside of the block to be pushed out by the coolant in the rest of the cooling system. With a quick check inside the vehicle we can see that our coolant temp gauge on our dash has gotten up to the normal operating temperature, so we know our thermostat is open and allowed the coolant to circulate into the block, pushing that air out. Now we just need to wait for the level to stop dropping so we know our coolant is full and check that we have proper operation of the heat to be sure that the heater core has had all those air bubbles pushed out as well.
Now that we have heat coming out of our vents, the bubbling has stopped and our radiator has maintained its level for a little while now. We’ll shut the vehicle off, and remove our funnel. Level stayed right up top. We'll reinstall our cap. The level in our radiator overflow tank, which is located here, hasn't changed so there's no need to touch that, but you can top it off if necessary. Now we'll wash down any spilled coolant off of our engine and test drive our vehicle. Always be sure to monitor your cooling temperatures any time you have to bleed the system on the initial test drive to be sure the vehicle doesn't overheat.
Thanks for tuning in. We hope this video helped you out. Next time you need parts for your car, please visit 1AAuto.com. Also check out our other helpful how-to and diagnosis videos.