Replaces
This part doesn’t fit a . Select from parts that fit.
Frequently bought together
Part Details
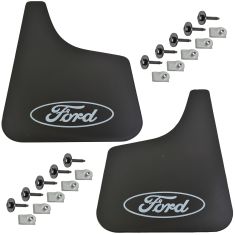
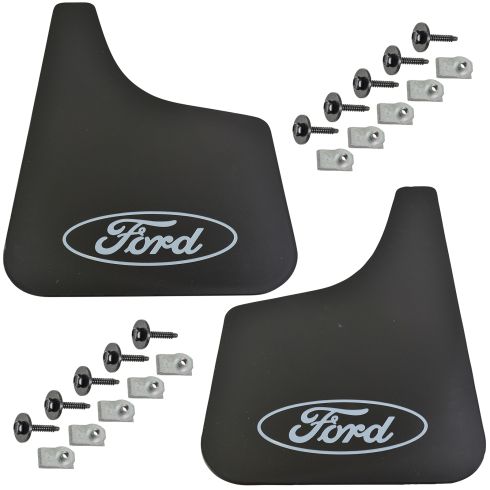
Genuine original equipment part (OEM) that was factory installed on your vehicle by the manufacturer.
Install Tip: Keep & reuse your original hardware, new hardware is not included with this item.
Item Condition:
New
1 Year Warranty
This item is backed by our 1-year warranty. In the event this item should fail during intended use, we will replace the part free of charge. This warranty covers the cost of the part only.
FREE Shipping is standard on Orders shipped to the lower 48 States (Contiguous United States). Standard shipping charges apply to Hawaii, Alaska and US Territories. Shipping is not available to Canada.
Expedited is available on checkout to the United States, excluding Alaska, Hawaii and US Territories as well as P.O. Boxes and APO/FPO/DPO addresses. Final shipping costs are available at checkout.


Created on:
Tools used
How you doing? Mike from 1A Auto. 2011 Ford F-150, going to show you how to install these Ford mud flaps, available at 1AAuto.com.
Okay, so the first thing you want to do is, with the wheel still on the vehicle and on the ground, place the mud flap. You don't want them sticking out too far, you don't want in far, and you want them pretty much with the ground here, so figure out where you want the flap. And then I'm going to use a blue marker here and make a couple of marks just so I can line it up again. A little bit of a mark on the truck so I can line everything up.
And then we'll jack the truck up and take the wheel off. Before you jack your vehicle up, 22mm socket and loosen the lug nuts. Nice big breaker bar. We sell these at 1A Auto. Just loosening them up for right now.
I'm going to jack it up by putting the jack right under the middle of the rear differential. Jack it, then support it with jack stands under the rear end. After you let it down a jack, but then just keep the jack there in place for safety. And then remove the lug nuts and the wheel and tire.
Somebody's put some accessory wheel fairings on here, which is fine, but it's always good to, whenever you can, use factory mounting points, and you can see that there's a clip right here, so we're going to pop that one out, and we're going to pop this one out, and we're going to use the mud flap hardware in place of those. The best tool for this job, a little clip tool available at 1A Auto. You can also try to use pliers or screwdrivers, but first kind of get in under the clip. They're tight. Get one tooth first, and then try to slide them both in there. Once you're locked in, pull that clip out.
Now I want to mark on the mud flap the hole that I want to go into. I have a nice, sharp awl right here. I'm going to put it in from the back so I can make a mark on the back of the mud flap. All right, so put the awl right there. I'm going to line up the mud flap. Line up the mud flap where I had it based on the marks. I'm going to take my awl and that should just put a nice little pin hole in the mud flap right where I want the hole to be.
So, I have this hole marked on the mud flap. There's another hole that's behind this little accessory flair, so I'm just going to push my awl through this and make sure that it's going right through. I can feel my awl on the back side, so I need to put a hole in this accessory flair as well, right here, so that I can have access to this hole back here.
All right, so the bolts it comes with has a nice, large washer, so don't make the mistake of drilling a hole that's only big enough for the bolt. You can drill a hole that's much bigger, and that way you have a little bit of room to move and adjust the mud flaps into the right position. I'm going to choose a nice 5/16-size drill bit. All right, so I'm going to turn the little pin mark from my awl into more of a guide hole. Just use a small bit first, and then swap over to a large bit.
Great. Now I'm going to install two of these J nuts that come with the mud flaps, and I'm just going to pull this plastic part out just a little bit. Go in between the plastic and the metal and push it down. The hole's right there. Again, use my awl to line it up. Okay. And the same thing for this one up here.
Okay, so I do only have one hole in there now, and I'm just going to roughly install the mud flap with the one bolt. All right, so I'm just kind of getting it tight. Line it up. Again, I can move it around a little bit if I need to. Just looking at where my marks are, then I'll tighten this up. All right, and I'll want to put a couple more in.
You want to feel in behind here. I can feel there's a screw right here, so I don't want to quite go that high. I don't want to be over here, because that won't go into anything. I need to be in line with my fender here, so we'll follow that right down. Might help to go smaller at first into the metal.
Once you have a hole, then put one of the nuts in and put a bolt through. All right. I've got that one located, but I just want to locate this hole here that already exists so I can use an existing hole and only have to drill one. This goes through. Just going to use a little flat blade screwdriver. Put it between that molding and the metal fender so then I can push my little J clip in. Make sure everything lines up. Got a clip in there. Just use my awl, put everything in lined up nicely. Get that one started in, put this one back in. And before I get them too tight, just come back here. Check my alignment marks to make sure they're still in the right spot.
You've got this side on and you're happy with how it's mounted, easiest thing for the other side, take it back off, put the same holes in your other mud flap, and especially these two holes are holes that already existed so should be able to line it up easily. Okay, so here's the mud flap for the other side. Put this right on top of it. Now we know exactly where to put our three holes.
Okay, somebody put a little accessory plug in here, which is fine. There's a little Phillips screw in the middle. Pull that out, and that comes out a little easier. Screwdriver to pull that out and install my two J nuts. All right, here's my flap with the two lower holes already pre-drilled, and then the mark for the upper one. Just make sure the mark's on this side so you can drill through it. Put that one in place, and put that one in place.
Okay, and I know from the other side that this part was just inside the top here, so I'm just going to kind of snug it up. And if you want, you can throw the wheel back on and line everything up.
Okay, I've got my hole marked here, and I know from my other side I was drilling a little close to the edge, so I'm just moving it in a quarter of an inch. Now drill my big hole. And, you can see, even I make mistakes a little bit. The hole I drilled was a little too far inside, so I had to make another one, but again, the heads on these bolts are nice and big. Goes in and grabs plenty.
Put your wheel back on, and then I suggest just put a couple lug nuts on nice and snug. Put both of them back on and check where your mud flaps are at. Make sure you're happy with them. All right, after putting them on, stepping back a little bit, relatively happy. They are a little bit further outside than I wanted them so just going to loosen them up, and if you're really unhappy and you need to, you could always make the holes just a little bit bigger so you can adjust them more.
Okay, so after getting them on there, I wasn't entirely happy with the alignment. I need them to move in just a little bit, so I'm just going to elongate these holes just slightly so I can move them in. Okay, so now you can see with those holes elongated it offers me a little bit of flexibility to move it back and forth and line it up like I want it.
Now reinstall all your lug nuts and just tighten them up preliminarily before you put the car on the ground. Jack the vehicle back up off the jack stands. Let it down slowly. Then, with the vehicle on the ground, torque the lug nuts to 150 foot-pounds using a crossing pattern. The process is the exact same for the front. You have the same factory mounting locations that you can tap into.
Thanks for watching. Visit 1AAuto.com for quality auto parts shipped to your door. The place for DIY auto repair. And if you enjoyed this video, please click the subscribe button.
Tools used
Hey, friends. It's Len, here at 1A Auto.
Today, I'm working on a 2011 F-150. We're going to be doing some mud flaps. It's going to be a fun job. I want to be the guy that shows you how to do it.
If you need these parts or any other quality part, you can always check us out at 1aauto.com.
So, here we go. We're going to get ready to start mounting these things up. It's kind of a preferential thing of how high you want to mount them. So, what you're going to have to do is you're going to have to think about the ride hight of your particular vehicle. If you're riding this thing with nothing more than a full tank of gas, and that's pretty much it, maybe a person or two in it, the rear is going to be sitting up pretty high. But if you load it down, and you're using something like a Giant camper, or you like to haul a trailer, I don't know, or a ton of bricks, it's going to be sitting lower.
So, the vehicle sits at an angle, we'll say like this. Of course, this is an exaggeration, but we'll say it's sitting at an angle like this. So, if we take our measuring tape, and we measure to our rears, I'm looking at about 10 and three-quarters inches from the ground. But if I go ahead and I do that up front, and I want to do 10 and three-quarters inches from the ground up there, I'm going to have probably about this much of the mud flap showing. So, it's really not going to be much of a mud flap at that point. And then, of course, if I did put some more weight in here for some reason, I was running a trailer, landscaping, whatever it is I do, it's going to be sitting even lower, and then this mud flap's going to look like it's high off the ground, and this one's going to be low.
So, this is all preference to you. Basically, all I want to do is show you the general way of mounting this in. You know, drilling, screwing, and all that stuff. The height you want it, preference.
So, let's keep moving.
So, we've got our mud flap. Now you need to decide how high you want to put it. Maybe you like to have it low, maybe you like to have it high. Like I said, if I went to the height of the rear, we'd probably be riding up about this high. Is that where you want it? It's up to you. If it is, do it that way.
So, just kind of gauge how high you want it, but don't put it any lower than seven inches from the ground no matter what. You don't want this thing riding near the ground. It's not meant to do that. It's just meant to catch stuff that's going to come flying up, get caught under here, scratch your door, or whatever might come flying up.
So, figure out how high you want it. We'll say I want to go here.
What I'm going to do is I'm just going to take a little marker, I'm going to find the bottom of the fender, and I'm just going to put a little mark there. And that will give me a good guesstimate to where I want to start lining it up at that point. So, I'm using my felt tip marker. I've got that like that.
We want to make sure that we're seven inches from the ground, or at least. It looks like I'm higher than that, so I'm doing well. Perfect. And you also want to make sure that it's level to the ground. So, you need to think about that too when you start getting ready to mount this in. All we're going to do is we're going to put in one screw where it belongs, and we're going to leave the other ones out. And then we can go ahead and do this: we can set it up so however many inches it is from here to here, it's going to be the same here to here. You want to write that number down. You want to keep track of it because we're going to do the same thing on the other side. You don't want to have one at right here, and then one up here because you didn't measure it, and you kind of just started screwing things in.
So, it's all pretty basic. And like I said, the level is preferential. It depends on where you want it. You want to have your Ford hanging down so everybody can see it, great. You want to have it up so it's level with the rear one, great. Whatever you want to do. You do you, boo boo.
So, let's get started.
So, I've got my flap. I set it to about eight inches from the ground. It's a nice easy number to remember. I like easy numbers to remember. There's a bolt inside the fender well here. Right there. We're going to be using that bolt hole to put through here. So, I just want to try to line up my mud flap with it. I'm going to try to put a little dot approximately where I believe it is. Here we go. Trying to make sure that this right here is lined up with the fender. You can have it so it's a little bit in, if you want. But you definitely don't want it sitting ... I mean, I wouldn't want it sitting all the way out here. Maybe you do. I don't know. Preference, once again.
So, let's see. I've got my little mark right there. So, now what I'm going to do is I'm just going to drill out that hole right there. And when I take out this screw, I'm going to put it through and through, and then that's going to give us a leveling point where we can start grabbing our measuring tape again. We'll get this so it's level, eight inches, eight inches, and we'll go ahead and start our next holes.
So, we've got our handy bag of stuff here. It comes with a whole bunch of bolts, a whole bunch of little nutserts. Those are great. It looks like probably about 10 of each. That's wonderful. Thank you.
Next what I'm going to do is I'm going to find a drill bit that's going to work. It doesn't need to be the exact same size as the bolt itself. If you can get it close, that would be great. But there is a fairly large washer on there. So, theoretically, if your drill bit's smaller than that, you're doing all right.
So, I think we're pretty good. I've found my hole. This is just going to be a pilot hole. Okay. Get that out of the way. Make sure this goes through. It feels pretty great.
All right. Now we can bring it back over to the vehicle. We'll take out the original bolt that's in there, we're going to stick that one through, and then we'll start figuring out where the rest of our bolt holes are going to go.
So, now, while the mud flap is still off, right here is where there's supposed to be a screw. Ours was missing one, which is fine because my bag of stuff came with a whole bunch of extra screws. So, thank you again.
I just used a pick, I came through the back side, and there's basically one of these. And this goes into a piece of plastic, or around a piece of plastic, and then there's a hole, and that's where my bolt would go through, we'll say. Well, I came through from the back side with a pick, stuck it through there, and it's coming out this way now.
So, now it's going to leave a mark. Here it is, by the way. Right there. So, now when it comes through here, and I get this on here, and I put it on my bolt hole, I get everything all measured up ... Eight inches, great. Eight inches, great. Cool. All I'm going to do is I'm going to stick it up against there, nice and firm, and I'm going to take my pick, and I'm going to try to wiggle it and make a mark where I'm going to make my next drill hole. Easy-peasy? Let's do it.
I'm going to use my five and a half millimeter to remove this bolt right here. I've got my quality mud flap, a little dirty already. Looks like somebody took it off-roading. Maybe me, maybe not. Just playing. Don't fire me.
Just going to try to get that bolt started in. I don't need to tighten it, but I do want to make sure that it's at least started in. I want to be able to turn this and wiggle it a little bit.
Here comes the fun part. We're going to do a little measuring. We did eight inches. We did approximately eight inches on this side. So, I'm going to come over here. I'm going to try to make that eight inches as well, whether I have to go down or up. It might be different for you, as it is for me.
So, that looks like it's pretty darn close. I did eight and eight. All right. Cool.
Now, I'm just going to push on the mud flap, up against there. I'm going to take my pick. I'm just going to start wiggling it. I'm not going to try to poke it through because my hand's going to be on the other side. So, safety first. Use your best judgment. Just going to see if I can get it moving.
All I want to do is mark up that mud flap a little bit.
There we are. I'm going to go with the assumption that it should be marked up pretty well.
Now I'm going to take this back out. I know it kind of seems contradictory: put it in, take it out, put it in, take it out. But we need to.
We've got our little hole right here. That tells us where we're going to make our next drill hole. So, I've got my little pick hole there. Just going to bring it to a place where it's semi-stable.
There we are. Those look pretty great.
We're going to try to put another hole up here, coming soon. But we'll figure out where that's going to be in one second.
So, here we go: hole number one, hole number two. Two brand new bolts. Just going to go ahead and get them lined up. You can stick it through if you want. Whatever you want to do. Just line it up with our hole there.
I'm just going to start it in. I don't want to go very far because the second one's going to be a little harder to line up, because I'm going to have to pull it away from the fender. Try to take a peek, see where it is. Just wiggle it.
We can snug these up, and then we're just going to take a re-measurement and make sure that we're close. If it's not close enough for you, and you're like, "Oh, no! I already drilled my holes!", well, you've got a plenty big washer here. So, if you needed to, you could just expand your hole a little bit, and that way there it will give you some room where you can start walking it around.
So, let's make sure I've got the right size. I do. These new bolts are seven millimeter.
I'm just turning it to the right. There we are. We don't have to "tighten them" tighten them too much right this second. We'll just get them so they're snug, because we've still got a little bit more work to do here.
We're going to come up, we're going to find where this needs to go up here, and we're going to drill another hole.
So, we've got our holes drilled out. Those came out great. When I mounted it in, it was eight inches from the ground, eight inches from the ground. So, that was great.
One thing that I did notice though was, up near the top, it didn't really come close enough to the fender outskirt that I wanted it to. So, what I'm going to do is I'm just going to try to expand these holes a little bit in the inward direction, and that will give me a little bit of throw to bring it this way.
So, that's what I'm going to try to do. I'm just going to try to make it so I can bring the fender a little bit out this way.
So, I expanded the holes that I had drilled on the mud flap itself to give me some room to be able to move this around, because essentially, I want this to be pretty close to the edge. I don't really prefer to have it sticking out past there. It's all preference, like I keep saying. You do you, boo boo. So, I'm going to put it pretty much the way that we have it now.
I'm going to go ahead and I'm going to drill in one last bolt right here. This one, I'm going to have to make sure that there's metal behind there, and I'm going to go ahead and use my drill bit, and I'm going to go right through right here. And there's no wiring or anything back here. I already took a peek. But if you have stereo wiring or, I don't know, if for some reason you put wiring back there, you're going to need to think about that. You don't want to drill into any wiring. So, I'm going to take my drill, my drill bit, drill a hole right here.
So, now, before we drill, we need to think about something. You see the length between the end here and the hole? You need to make sure that when you're drilling your hole, you don't come all the way out here, because this thing will never reach from the plastic part there all the way over to here. So, you can have your plastic ... Grab something here. You can have your plastic even so it lines up here, if you want it to. When you push this all the way in, it will only go there. That's okay. But if you have your plastic so it comes out to here, this is never going to make it that far to be able to line up your hole.
So, just think about that before you go ahead and drill a hole in here. If you needed to, you could try to turn it over, and just kind of give yourself a little eyeball. And take your little pick, and then shove your pick through wherever you decide you want to put your bolt. You don't need to put it up that high. Put it down here if you want, you know what I mean?
And keep in mind that this flare right here does actually kind of curl a little bit. So, wherever you're putting the hole, you need to make sure that you measure your depth. So, let's go ahead and do that. We'll drill a hole, and go from there.
Okay, so I'm imagining this is inside there. Of course, it will be in this direction, I know. But whatever. I'm imagining it's wrapped around this plastic right here. I've got my mud flap pushed over as far as I want to have it. I don't have it in too far, where I know that it's not going to line up with the plastic. I came down enough so I know that the mud flap's not going to rip. I'm just going to take this, make sure that I didn't move it too much right there, and we'll go right about there. That gives me plenty of slack. I'll probably even be able to stick my pick in between there and the plastic.
I'm going to make my mark. I'm just going to give it a little push. Okay. That's going to tell me where I want to drill. So, I'll get my drill ready.
I've got my bit. It's just a little bit bigger than the bolts I'm going to be using. I'll take it out. Put my mud flap where I want it. Now I'm going to drill my hole.
So, we're going to go ahead and put this right in with our hole. Let me see if I can get it down there. It should line up fairly easy at this point. Nice. Okay.
Grab my bolt. Hopefully, we should line up here.
I'm just going to snug it up. Sometimes they are too loose to get with the ratchet.
All right. Let's take a look at it from the other side.
Very nice.
Thanks for watching.
Visit 1aauto.com for quality auto parts shipped to your door, the place for DIY auto repair. And if you enjoyed this video, please click the subscribe button.