Brought to you by 1AAuto.com, your source for quality replacement parts and the best service on the Internet.
Hi, I'm Don from 1A Auto. I hope this how-to video helps you out, and next time you need parts for your vehicle, think of 1AAuto.com. Thanks.
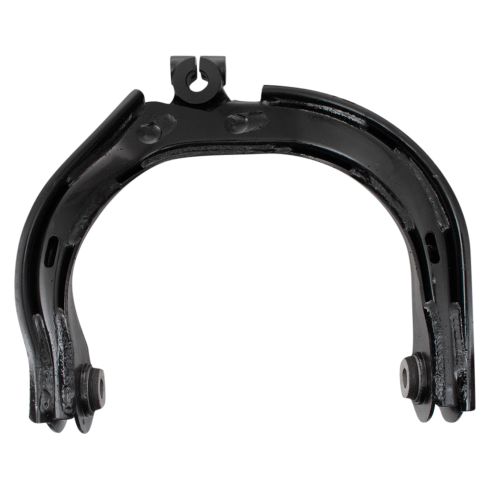
In this video, we're going to show you how to replace an upper control arm on this 2003 GMC Envoy XL. We show you on the passenger side, but the driver's side is the same procedure. The items you'll need for this are a new upper control arm from 1AAuto.com, flat blade screwdriver, 15mm and 19mm socket and ratchet, 15mm and 21mm wrenches, a hammer, torque wrench, pliers, and jack and jack stands.
Start out by removing your wheel and tire. Pry off the cap first. If you don't have the benefit of air tools, you'll want to loosen the lug nuts then raise and secure the vehicle on jack stands and remove the lug nuts the rest of the way. We have air tools, so we put the vehicle up on jack and jack stands, removed the lug nuts, and removed the wheel and tire.
Next, spray some penetrating oil on this 15mm bolt and then remove it using a 15mm socket and ratchet and a 15mm wrench. Now, remove this clip here. Ours is broken, so we're just going to use some wire cutters to remove the wire tie, but normally you would just pry the clip open with a flat blade screwdriver. Then, just pry this clip open and pull the harness free. You just use a flat blade screwdriver. Push in on the tab and it'll open up. Hit the upper control arm with a hammer to break it free. Hit it up and off the ball joint. Now, you want to secure your wheel knuckle. We're just going to use some wire ties to secure it. You could also use string or wire. You just want to make sure it's not going to move around too much.
Next, you want to remove these two 21mm bolts at the top of the control arm. Start off using a 21mm wrench and another wrench for some extra leverage. Just break both bolts free. Now we'll fast forward as Mike removes those bolts.You won't be able to remove them entirely, but you only need to remove them so that the bolt is not sticking out past the bushing. Sometimes, the bolts may get jammed and not move as far as you need them to. Just use a flat blade screwdriver and a hammer. You want to hit just underneath the upper control arm. The,n you can slide down the front and then remove that bolt the rest of the way by hand. Then angle it and remove the other bolt by hand. If it's jammed in there, you only really need one out. You can angle it and pull it out. Then just use a hammer to remove that other bolt.
As you can see, this upper control arm is in bad shape. You shouldn't have that much play. Now, just pry this clip out using a small flat blade screwdriver. On the right is the old upper control arm.
On the left is the new one from 1AAuto. You can see they are identical and they'll fit exactly the same. Push the back bolt in first and angle it into place. Tip the front of the upper control arm down and put the other bolt in. Then, angle it up into place. Then, just start both of those bolts in by hand until it secures the upper control arm into place. To start off, this bolt at the front, you won't be able to actually get the wrench onto it so just use a pair of pliers to tighten it in a little bit until you can get the wrench on it. We'll just fast forward as Mike tightens both of those 21mm bolts up. You're only really tightening these preliminarily.
Remove whatever you used to secure your wheel knuckle. Using a hammer, knock the upper control arm back down onto the ball joint and replace that 15mm bolt and the nut. Then just tighten it up and torque it to 15 foot-pounds. Push your clip into your new upper control arm. Re-clip the harness into it. Re-clip the harness into the clip on the wheel knuckle. Again, since ours is broken, we're just going to use a wire tie.
Replace your wheel. Replace the lug nuts and tighten them up preliminarily. Lower the vehicle. Tighten them the rest of the way and torque each of them to a hundred foot pounds in a crossing pattern. Have your vehicle back down on the ground with all the weight back on the suspension. Now you tighten up the two bolts that hold the control arm in and you want to tighten them to about roughly a hundred foot-
pounds. I'm pulling them as tight as I can with that wrench. Then, the last thing you want to do is you do want to have your alignment checked and fixed after you perform this repair.
We hope this video helps you out. Brought to you by www.1AAuto.com, your source for quality replacement parts and the best service on the Internet. Please feel free to call us toll-free, 888-844-3393. We're the company that's here for you on the Internet and in person.