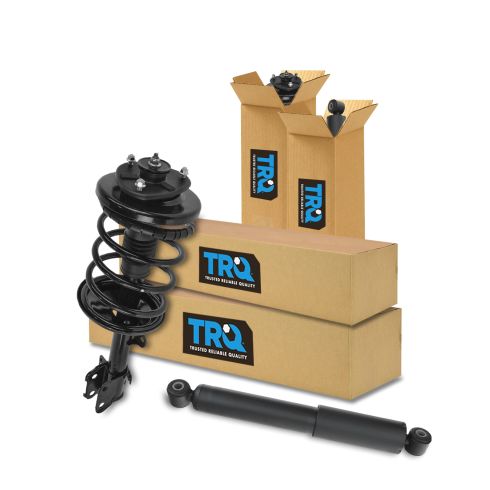
1ASSP01114-Honda Pilot Acura MDX Front & Rear 4 Piece Complete Strut Assembly & Shock Absorber Kit TRQ SKA60983


Replaces
Honda Pilot Acura MDX Front & Rear 4 Piece Complete Strut Assembly & Shock Absorber Kit TRQ SKA60983


Frequently bought together
Product Reviews
Loading reviews
4.93/ 5.0
41
41 reviews
Great videos!
March 7, 2017
The products are great and perform better. I received everything I needed for the project and I still can't believe the free shipping. The how to videos were spot on and made the job easy as I felt confident in what to do and how to do it. Thanks again for the great products and invaluable insights. Will definitely come back when I need more parts
March 7, 2017
Great product...would buy again....price is great also
2003 Honda Pilot Strut and Shock Replacement
December 28, 2017
Ordered the struts and shocks and received them in about 4 days. Watched install video. Took me and my son 3.5 hours to replace the front struts and rear shocks. saved about $1750.00 not having the dealer do it. I am Extremely HAPPY !!!!
March 17, 2018
ease of installation works great great price of quality product
Fits well.Quick delivery.
May 8, 2018
This product fits really well. I bought the part as recommended my my mechanic. He installed it for me and said it fits in the vehicle very well. Free delivery was quick as well. It was at my door step a few days later with updated status of the delivery.
I was so impressed that I just ordered the Lower control arm. As first it says it will be delivered next week. After UPS updated the status, it will be at my house by Friday.
Keep up the good work in providing quality parts!
The Solo owner
June 4, 2018
Easy to replace and so far so good. After installment took to tire shop to check alignment and very thing was with alignment specs. Drove vehicle off road for about 10 mile and it was a great ride.
Big improvement
July 14, 2018
I got these for my brothers 06 Pilot and getting the old struts off was quite a challenge given that I live in the northeast but now that the new ones are on the car I must say that this was a very good purchase. I would definitely recommend this kit to anybody in need
Happy with Order
November 28, 2018
My order was delivered in less than 24 hours. I changed the front strut assembly and stabilizer links on my 2004 honda pilot, and the rear shocks as well. Everything fit perfectly, the parts seem to be good quality, and the car now rides significantly better after 150,xxx on the original setup.
Excellent Service
December 5, 2018
They have very good service from ordering to shipping the product. Item was pretty heavy but was in good condition. I will order again from them. I really wish I knew about them a long time ago. Thank you for great service 1AAUTO.
Extremely thankful
December 17, 2018
Fast delivery and easy to order on line. Since putting on the complete strut assembly & shock absorber kit my Honda is running like new. Very happy with the product
Great value
December 24, 2018
I needed to replace shocks and struts on my wife's Honda Pilot, and I found these. Free shipping was great, and they were delivered quickly. The best part was that I didn't need to don body armor and use a spring compressor! Installation was quick and easy.
April 20, 2019
affordable price and good quality
will buy again for my future repair
Great company
May 6, 2019
I shopped around and found these at the best price. They were delivered very quickly, and I am excited to see how well they do on the terrible roads where I live.
Amazing Value
July 11, 2019
1A Auto is as advertised. Great parts, perfect price, and shipped fast! Thanks 1A Auto for my recent purchase!
Fred
great parts!
July 31, 2019
Everything was as described and assembly was a breeze
Shocks
October 8, 2019
My mechanic says great parts. Will always order from AA1Auto
Price and quality on Par
November 18, 2019
Operational ease,Ride quality after installation very surprising. All parts and materials fit and finish very satisfactory. Thank you
Great price and Fast Shipping
November 26, 2019
Bought these for my 06 Pilot and they were super quick in sending the order. The front struts felt heavier than the original. I installed these, sway bars, and tie rods at the same time. The front strut was a pain to install by yourself. Holding the struts up while starting the top bolts was a pain in the rear. The rear shocks were done in under an hour.
So why the 4 stars? Since replacing the struts, tie rods, and sway bars, my front end is noisy. The same goes for my right rear shock. Other than that, it is good.
Best for you money.
January 26, 2020
Awesome OEM quality parts that are a perfect fit, and machined with great quality and precision. Couldnt be happier with my purchase l!
service
March 31, 2020
great service received product on time. quality material.
Easy to install and fast shipping
June 25, 2020
I purchased this shock set in March of 2020, They fit perfect, easy to install and fast shipping.
I just had one of my rear shocks go bad so I contacted customer Service it was painless. I am very happy with the service at 1aAuto I thought it was going to be a hassle but it was so easy. I would have given 5 stars if it were not for the shock going bad
Shocks and Struts
July 1, 2020
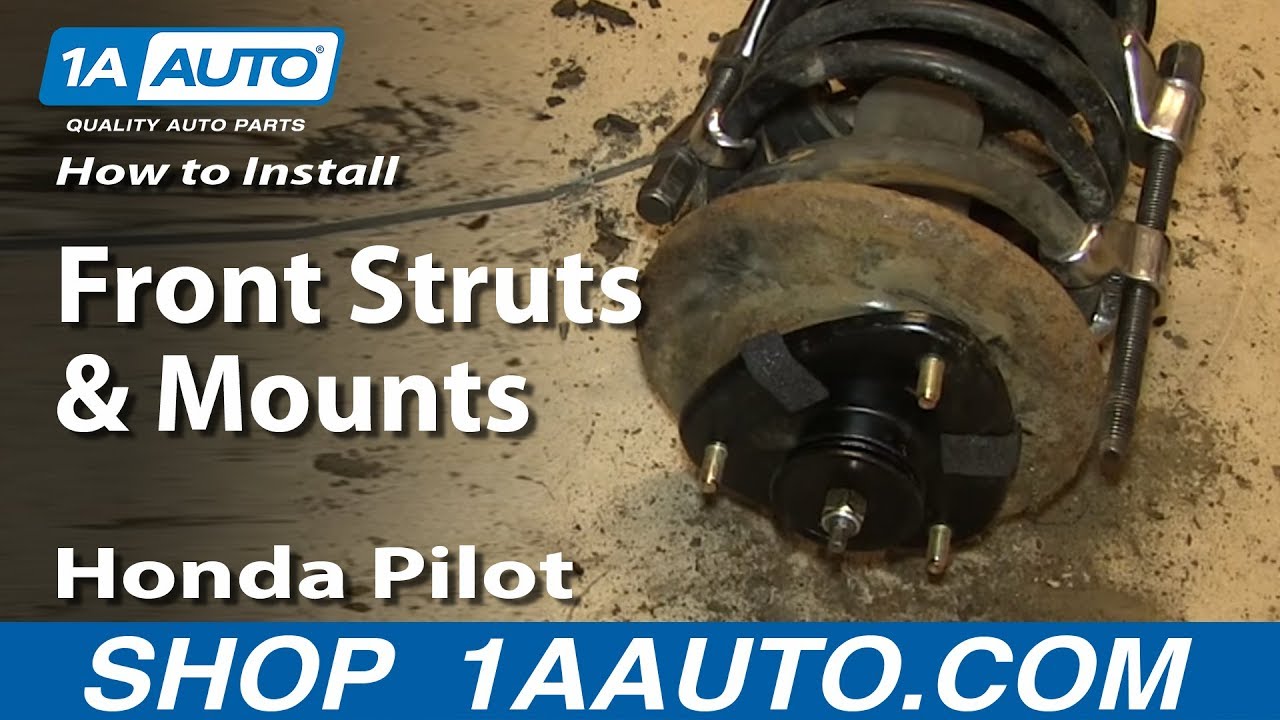
Worked great and the installation video helped tremendously.
Struts and shocks
August 8, 2020
I needed struts and shocks for my MDX. Funds were low but with 1A auto I was able to find good quality struts and shocks. the delivery time was so quick just 3 or 4 days.I truly appreciate that and the quality is awesome thank you 1A auto
Shocks/Struts for 2004 Pilot
September 22, 2020
Good parts, fit well, easy to install
Struts and shocks
November 27, 2020
Parts easy to install and no problem parts where perfect fit
Bolts right on
June 3, 2021
Perfect and fast shipping
Strut and Shock Assembly Kit
July 5, 2021
I have been buying parts from 1A Auto for a little while now and this is my first review. I have always had a good experience, but this time I felt compelled to write a review because of my consistently positive experience. I recently purchased a 4 piece strut and shock kit for my 2004 Honda Pilot. These were full strut assemblies. The price and quality was excellent. The how-to videos are also extremely well done, easy to follow and always offer some tips for the more challenging jobs. The installation went exactly as planned and I will continue to purchase parts from 1A Auto.
August 12, 2021
Fit perfectly
Quality with value
October 17, 2021
The right parts at the right price.
December 14, 2021
None
Quick and easy
April 24, 2022
Great aftermarket replacement for my Pilot. Pieces went on great and easy to do in an afternoon.
May 12, 2022
Fits perfectly
May 30, 2022
Product was just as described. Very easy to install. The ride after the install was great. Will be ordering from 1A again!
December 29, 2022
Quality parts with very quick delivery I will shop from them again and again
May 3, 2023
Fit well and good price
May 22, 2023
Item exactly as described, fast delivery, very happy overall. Will be ordering from you guys if / when I need anything else.
Great option
September 15, 2023
Great replacement parts, car rides better and install wasn't bad. Perfect fit.
Best so far
October 13, 2023
It came on time and did its job. My car works like new. Planing to order again.
Highly recommend.
November 20, 2023
Works very well just like factory! Great price and fitment.
Great quality for the price!
March 19, 2024
My pilot rides like new with 250k miles on it thanks to these shocks! Thank you!
Worked as intended
July 10, 2024
Purchased this 4 piece set along with the 12 piece steering kit and knuckles for both sides.
Everything bolted together and I had no issues with brake rotor clearance.
The top three bolts of the front struts may not line up, you just have to rotate the top mounting assembly by hand
Customer Q&A
Who is the manufacturer of the struts and shocks?
April 17, 2017
10
Sorry, I can't answer that. I put them on some months ago and am happy with the results, if that helps any.
April 17, 2017
Timothy R
10
These are our 1A Auto brand parts.
April 17, 2017
Alex P
Do these fit the 4WD drivetrain vehicle?
May 31, 2019
10
This part is specific to vehicles with a particular set of options. We will need more information about your vehicle to confirm the fit. If you'd like to contact our Customer Service team via phone or email we will be happy to assist.
May 31, 2019
Peter L
Will these shocks fit a 2004 Honda pilot 4wd?
June 18, 2019
10
Yes, according to the information you provided, this part will fit your vehicle.
June 18, 2019
Christa R
Do the front struts come with the coil spring installed?
July 12, 2019
10
Yes they do
July 12, 2019
B D
10
Yes they do. Super convenient and relatively easy to install. Saved a lot on labor by doing it myself. I put these on my wife's 2004 Honda Pilot. If you're putting it on a Pilot, as I did, be careful to keep the hub/brake assembly from dropping down when everything is unbolted because it will pop out the axle shaft.
July 12, 2019
Spencer S
10
Yes they come assembled. Was very easy to replace.
July 12, 2019
B R
10
Mine came fully assembled and ready to install with springs attached.
July 12, 2019
I R
10
The front struts in this kit will come as a complete assembly with the strut cartridge, coil spring, boot and bumper, and upper mount. It is designed to be a quick strut for easy replacement and no compressing of springs necessary. Please contact us if you have any further questions.
July 13, 2019
A C
10
They can come complete w springs installed as I did...or you can order and assemble yourself which I have done in the past!!
July 13, 2019
Keith B
Do you need an alignment after installing these?
January 18, 2020
10
No you don't, as long as you don't touch the inner and outer tie rods.
January 18, 2020
Carlos H
10
I changed them on an 03 and 05 pilot
The 03 was good 05 needed an alignment not sure why would say yes hope it helps
January 18, 2020
Kerry S
10
Yes you do!
January 18, 2020
Michael S
10
No of you dont
January 18, 2020
Benedicto F
10
Yes, unless you are replacing tires soon after then you can wait and do it then if not alignment is recommended after strut replacement.
January 18, 2020
I R
10
Most likely, I horse traded with a shop owner for the install and didnt even ask what was done....... this goes back a couple years, look at the bolts on the knuckle are the eccentric?? If they are youd need an alignment for sure, if not Im sure itd be smart to do one anyhow after replacement
January 18, 2020
T R
10
Hey Michael,
It is suggested to have it checked to see if it needs an alignment.
January 18, 2020
Corey M
10
I did get alignment but didn't know if i needed one so i played it safe
January 20, 2020
John D
10
You shouldnt have to the shocks and struts wont change you camber or caster of you vehicle
January 24, 2020
Charly B
Do this come with front and rear shocks and struts?
June 30, 2020
10
It came with everything necessary for my Honda Pilot
June 30, 2020
S T
10
Thank you for the inquiry. This kit comes with front struts and rear shocks.
June 30, 2020
Christa R
Is this a lowering spring?
March 16, 2021
10
This is not a lowering spring and should restore your vehicle back to its original ride height.
March 16, 2021
Emma F
How long is the warranty on this assembly kit? (2yr/3yr/4yr)?
September 28, 2021
10
This is backed by our limited lifetime warranty. In the event anything should fail due to manufacturing defects during intended use, we will replace the part(s) free of charge. This warranty covers the cost of the part only.
September 28, 2021
Adam G
10
Lifetime limited warranty
October 17, 2021
Jason W
What is the total weight and dimensions of packages?
January 29, 2022
10
Actual Measurements are not listed or available. This kit weighs 32lbs
January 29, 2022
Ricale A
Do this come with rear springs?
March 22, 2022
10
Rear springs are not included.
March 23, 2022
Jessica D
Are these for AWD or 2WD?
November 20, 2022
10
Mine was 2 wheel but I had 4wheel drive as well.
November 20, 2022
Joseph B
10
These directly replace the suspension on the awd
December 3, 2022
Nicholas R
Is this shock for all wheel drive?
November 29, 2022
10
Yes this will work for AWD models.
November 30, 2022
T I
10
Yes this is for the all wheel drive models.
December 3, 2022
Nicholas R
10
Yes this is for the all wheel drive models.
December 3, 2022
JUDY J
10
Yes this is for the all wheel drive models.
December 3, 2022
JUDY J
Do it come with ball joints or do I even have to replace them ?
November 20, 2023
10
You do not have to replace any ball joints to replace the struts. The lower ball joint is part of rhe lower control arm. Then you have the tie rod end for your steering. If you do replace the front strut assemblies, an alignment AFTER replacement is very recommended. I do enjoy this kit as it has worked very well for us so far!
November 21, 2023
Josiah A
10
Thank you for your inquiry! The Ball Joints are not included.
November 23, 2023
Jean O


