WARNING: This product can expose you to chemicals including Lead and Lead Compounds, which are known to the State of California to cause cancer, and birth defects or other reproductive harm. For more information, go to www.P65Warnings.ca.gov.
Lifetime Warranty
This item is backed by our limited lifetime warranty. In the event that this item should fail due to manufacturing defects during intended use, we will replace the part free of charge. This warranty covers the cost of the part only.
Returns: Parts with electrical components cannot be returned once installed.
FREE Shipping is standard on Orders shipped to the lower 48 States (Contiguous United States). Standard shipping charges apply to Hawaii, Alaska and US Territories. Shipping is not available to Canada.
Expedited is available on checkout to the United States, excluding Alaska, Hawaii and US Territories as well as P.O. Boxes and APO/FPO/DPO addresses. Final shipping costs are available at checkout.
How to Replace Crankshaft Position Sensor 2001-06 Chrysler Sebring 2-7L
How to Replace Camshaft Position Sensor 2005-06 Chrysler 300
Created on:
Tools used
Flat Blade Screwdriver
10mm Socket
Ratchet
1. Remove the air box
Loosen the clamp and the bolt securing the air box.
Disconnect the hose and wiring harness.
2. Remove the crankshaft position sensor
Disconnect the wiring harness clip to the sensor.
Remove the 10 mm bolt securing the sensor with your socket and ratchet.
Pull out the sensor.
3. Install the new crankshaft position sensor
Bolt the sensor with your 10 mm socket and ratchet.
Clip the wiring harness back in.
4. Reinstall the air box.
Tighten the clamp that connects the intake to the throttle body
Reconnect the hose and double check all of your sensors are connected.
Brought to you by 1AAuto.com, your source for quality replacement parts, and the best service on the Internet. Hi, I'm Don from 1AAuto. I hope this how-to video helps you out, and the next time you need a part for your vehicle, think of 1AAuto.com. Thanks.
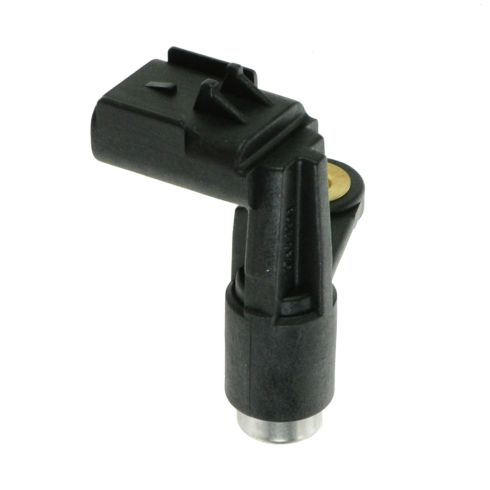
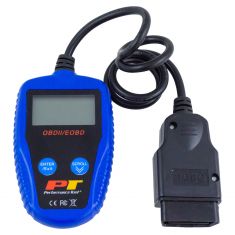
In this video, we are going to show you how to replace a crank shaft position sensor on this 2004 Chrysler Sebring. It has the 2.7 Liter V6. The procedure is basically the same for most of the cars and trucks or vans with this 2.7 Liter V6. You'll need a new sensor from 1AAuto.com, a flat blade screwdriver, and a 10mm socket with a ratchet. When position sensors start going bad, you'll get a check engine light, and usually the code is a P0335 or P0336.
You're going to remove your air box. Loosen that clamp. There's also usually another bolt down where his forearm is that holds the air box to the frame. You can see, remove the sensor, the hose, and then pull the air box up and out. Your sensor is back in the back of the engine, and you can see it right there with the little red clip. You want to push that clip down, from our angle right here. Push it down, and then disconnect it. It requires two hands to get in there, so the shot gets a little ugly here, but basically you push that right clip through and then pull off the connector.
Here you can see the clip pushed out. Here you can see there's a 10 mm bolt that holds the sensor in place, so we get our 10mm socket and ratchet down in there and remove it. We'll just fast forward through taking that bolt out. Once the bolt is out, you can grab on to the sensor and try and move it and pull it. You should be able to basically wiggle it back and forth, pull it. You can see we're struggling with it a little bit. We do get it to move a little, so then we go in with a flat blade screwdriver down in there and try and pry it. Actually, it just ends up breaking the ear off where the bolt goes. It doesn't really move it at all, but you can't say we didn't try. Then we just go back in and pull it really firm, and it comes up and out.
Here is the new one from 1AAuto on the left. It's an exact match. It's going to bolt right in place and connect just the same as the original. No big mystery to installing it. Put the sensor side in and push it in to place. Then start your 10mm bolt back on there. We'll fast forward as we tighten that up. You want to tighten it up from maybe 5 or 6 foot-pounds, not very tight, but enough to hold it in there securely.
Once you have it installed and tight, make sure you go back in and reconnect it, because quite honestly, the engine won't even start up if it's not connected. Make sure you press the red tab to lock it. There it is, all reinstalled. Then we'll reinstall our air box, and tighten up the clamp that holds the intake hose to the throttle body. Reconnect the hose, and reconnect any of the sensors you might have disconnected. We hope this helps you out.
Brought to you by: www.1AAuto.com, your source for quality replacement parts and the best service on the Internet. Please feel free to call us toll free, 888-844-3393. We're the company that's here for you on the Internet and in person.
Tools used
Socket Extensions
10mm Socket
Ratchet
1. Removing the Cam Position Sensor
Release the red safety tab with a flat blade screwdriver
Disconnect the connector
Disconnect the tuning valve connector
Remove the 10mm bolt from the cam position sensor
2. Installing the Cam Position Sensor
Insert the cam position sensor into place
Tighten the 10mm bolt to the sensor
Connect the connectors
Hi, I'm Mike from 1AAuto. We've been selling auto parts for over 30 years! We're dedicated to delivering quality auto parts, expert customer service, and fast and free shipping, all backed by our 100% satisfaction guarantee. So visit us at 1AAuto.com, your trusted source for quality auto parts.
In this video, we're going to be working with our 2006 Chrysler 300. We're going to show you how to remove and replace the vehicle's cam position sensor.
If you like this video, please click subscribe. We have a ton more information on this and many other vehicles. If you need parts for your car, you can follow the link down in the description over to 1AAuto.com.
Here are the items you'll need for this repair: deep 10mm socket, ratchet, socket extension
Your cam position sensor is located on the driver's side of the engine, at the front here, up by the valve cover. You can see it's right near your fill neck for the oil. You'll need a small, flat blade screwdriver to release the red safety tab. You don't have to remove this completely, you just have to pop it up out of the way. You'll feel a little click there when it releases. Push down on the connector and remove it from the sensor.
Now just to get a little bit of extra room here to make sure you don't break anything, you can disconnect the tuning valve connector here on the intake, and you get a little more slack to work with. It's not a completely necessary step but it does help. We're going to use a deep 10 millimeter socket and a quarter inch drive ratchet to get down onto this bolt at the bottom of the cam position sensor and remove it. There's not a lot of torque on that, so once you get it off a couple of threads, you may be able to remove the rest by hand. Remove the cam position sensor from the motor.
To reinstall the cam position sensor, being sure to line up the bolt hole, and start your 10 millimeter bolt by hand, tighten it back down with your 10 millimeter socket and ratchet. Reconnect the connectors for both the tuning valves and the cam position sensor, snap the lock tab back into place.
Thanks for watching. Visit us at 1AAuto.com for quality auto parts, fast and free shipping, and the best customer service in the industry.
ESA94862
In Stock
Product Reviews
Loading reviews
1.00/ 5.01
1review
5 Stars
4 Stars
3 Stars
2 Stars
1 Star
0
0
0
0
1
STANDARD VS OEM VERSION
RONALD
November 16, 2021
It was the OEM brand and did not clear the code. I located a shop that ordered me aOEM version and it works great. The Jeep starts without problems now.
Customer Q&A
How do i know if its a OEM replacement sensor and where do i order it from?April 12, 2023
RONALD G
10
These are manufactured by TRQ. TRQ is a high quality, high-end name brand that we offer and back with our 1A Auto Limited Lifetime Warranty.
April 12, 2023
Andra M
Customer service
877-844-3393
Monday - Friday 8:00am - 9:30pm ET Saturday - Sunday 8:00am - 4:30pm ET
Plymouth is a registered trademark of FCA US LLC. 1A Auto is not affiliated with or sponsored by Plymouth or FCA US LLC.See all trademarks.
Enter Vehicle Year Make Model
Specify your vehicle's year, make and model to guarantee fit.
Year
Make
Model
Options
Drivetrain
This part doesn’t fit a . Select from parts that fit.