WARNING: This product can expose you to chemicals including Lead and Lead Compounds, which are known to the State of California to cause cancer, and birth defects or other reproductive harm. For more information, go to www.P65Warnings.ca.gov.
Lifetime Warranty
This item is backed by our limited lifetime warranty. In the event that this item should fail due to manufacturing defects during intended use, we will replace the part free of charge. This warranty covers the cost of the part only.
How to Replace Rear Liftgate Latch 2004-16 Cadillac SRX
Created on:
Tools used
Socket Extensions
T30 Driver
Ratchet
Trim Tool Set
Pick
1. Removing the Liftgate Panel
Remove the trim door from the hatch pull with a pick
Remove the T30 screw from the hatch pull
Pry out the liftgate panel with trim tools
Pull the panel straight down and once loose, toward the rear
Disconnect the electrical connectors
2. Removing the Liftgate Latch
Remove the T30 screws from the liftgate latch
Slide the latch through the door
Disconnect the wiring harness
Remove the latch
3. Installing the Liftgate Latch
Connect the electrical connector
Press the liftgate latch into place
Tighten the T30 Torx screws to the latch
4. Installing the Liftgate Panel
Manually close the liftgate to test the latch
Open the liftgate
Connect the wiring harnesses to the liftgate panel
Clip in the liftgate panel trim closest to the latch first
Line up the rest of the panel and clip it in
Tighten the T30 Torx to the hatch pull
Press the trim button to the hatch pull into place
Hi, I'm Mike from 1A Auto. We've been selling auto parts for over 30 years.
What's up, guys? I'm Andy from 1A Auto. In this video, I'm going to be removing and replacing the liftgate latch in this 2013 Cadillac SRX. If you need this part or other parts for your vehicle, click the link in the description and head over to 1aauto.com.
Open the liftgate. Next, we're going to take this cover off. You can try to take this off with a trim tool, right here—right here—and get underneath. It's a little bit tight, so I'm just going to use a pick. Just be careful not to scratch the plastic. Get underneath here and pop it off there. Slide it out. Then we're going to take this screw out. It's a T30, so use a T30 socket extension and ratchet.
So, there're multiple clips that hold this in, underneath here; then a couple of retainers that go that way on the back. So, we're just going to take some trim tools—we actually sell these trim tools at 1aauto.com. Just go underneath here; try to pry it out a little bit.
Just grab it with your hands and pull it straight down—just going to force it—and then the back is going to come this way—just like that. See—these are those clips that are in the back. Be careful not to break those. And then you have all these other retainers, all around. Then we have to disconnect this electrical connector. Push down on this lock; slide it off. I'm going to take a T30; I'm going to take these three screws out. Take a T30 and a ratchet; pull that screw out. Pull that bolt out. All three of those are out, and we can grab the latch and slide it through here, and the connector, right here. We need to slide this gray piece up. That's just a lock. And push down on the lock, and slide the connector out.
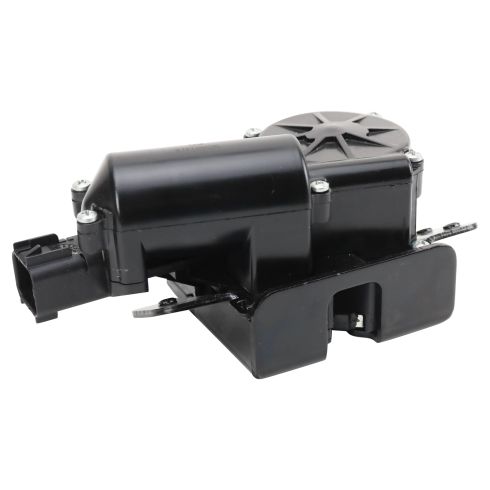
This is the old part. This is the new latch from 1aauto.com. As you can see, the shape is the same. Flip it over. The latch part is the same. Connectors are the same. Get yours at 1aauto.com and you'll be ready to rock 'n' roll.
Now we're going to take the new latch. We're going to plug in the connector, right here. Now we'll push down on that lock tab. I'm going to feed that wiring harness back in. Put that latch in position, like that. Next, we're going to take these screws—you can put a little bit of Threadlocker on them if you need to. Get these started here. Get this one. I'm going to get them all started first, before I tighten them down. I'll take the T30 and the ratchet and I'll tighten this down. I'll snug these down.
Before I put this panel on, I'm just going to make sure everything's working properly. Just manually close the liftgate. Latch is good. I'm going to open the liftgate, and it's working properly.
I'll take this cover. Connect the connector, right here; lock it on, and you want to slide these two pins in from the back first. Lock those on and then line up the other guides. There's a guide pin right here—you line that up and then line the other one up as well. Just push; give it a tap. Install this bolt with a T30 socket extension, and once I get it down, I'll snug it up with the ratchet. Just snug—not too tight. It is plastic. Get this little cover; line it up, lock it in. We can close this.
Thanks for watching. Visit us at 1aauto.com for quality auto parts, fast and free shipping and the best customer service in the industry.
BDA81478
In Stock
Product Reviews
Loading reviews
5.00/ 5.02
2 reviews
5 Stars
4 Stars
3 Stars
2 Stars
1 Star
2
0
0
0
0
Lift gate motor
frederick
June 18, 2024
It's currently working great
Direct replacement
Jeff
July 7, 2024
Bolted in place as a direct replacement. Fixed the liftgate issue.
Customer Q&A
Does the lift gate motor have to be in the vehicle for the actuator to work properly?July 7, 2024
John D
10
don't know as the problem was with computer relay in the lower part of trunk it got wet and modules burned up
July 8, 2024
Richard C
Do you need to program after putting in actuator?August 24, 2024
John D
10
No you dont
August 24, 2024
David M
Customer service
877-844-3393
Monday - Friday 8:00am - 9:30pm ET Saturday - Sunday 8:00am - 4:30pm ET
Enter Vehicle Year Make Model
Specify your vehicle's year, make and model to guarantee fit.
Year
Make
Model
Options
Drivetrain
This part doesn’t fit a . Select from parts that fit.