Install Tip: When replacing steering components, have a professional alignment performed afterwards. This ensures proper tracking and even tire wear.
Our steering and suspension components are pre-greased and sealed for long life and do not require the extra maintenance typically required by greaseable versions.
Item Condition:New
Attention California Customers:
WARNING: This product can expose you to chemicals including Lead and Lead Compounds, which are known to the State of California to cause cancer, and birth defects or other reproductive harm. For more information, go to www.P65Warnings.ca.gov.
Lifetime Warranty
This item is backed by our limited lifetime warranty. In the event that this item should fail due to manufacturing defects during intended use, we will replace the part free of charge. This warranty covers the cost of the part only.
FREE Shipping is standard on Orders shipped to the lower 48 States (Contiguous United States). Standard shipping charges apply to Hawaii, Alaska and US Territories. Shipping is not available to Canada.
Expedited is available on checkout to the United States, excluding Alaska, Hawaii and US Territories as well as P.O. Boxes and APO/FPO/DPO addresses. Final shipping costs are available at checkout.
How to Replace Outer Tie Rods 2004-14 Mazda 3
Created on:
Tools used
Socket Extensions
Torque Wrench
14mm Socket
Hammer
Rust Penetrant
16mm Socket
Jack Stands
Liquid Thread Locker
21mm Socket
24mm Wrench
Ratchet
Floor Jack
1/2 Inch Breaker Bar
Wire Cutters
1. Removing the Wheel
Loosen the 21mm lug nuts with the vehicle on the ground
Raise the vehicle with a floor jack
Secure the vehicle on jack stands
Remove the lug nuts
Pull off the wheel
2. Removing the Outer Tie Rod
Loosen the 24mm jamb nut with a 24mm wrench
Remove the cotter pin
Remove the 14mm nut from the tie rod
Tap the end of the knuckle with a hammer to pop the stud out
Turn the tie rod counterclockwise to remove
3. Installing the Outer Tie Rod
Apply anti-seize to the threads
Thread the outer tie rod on to the jamb nut
Install the castle nut by hand
Tighten the 16mm castle nut with a socket and ratchet
Insert the cotter pin and fold the ends to secure it
Tighten the jamb nut with a 24mm wrench
4. Reattaching the Wheel
Slide the wheel into place
Start the 21mm lug nuts by hand
Tighten the lug nuts preliminarily
Lower the vehicle to the ground
Tighten the lug nuts to 87 foot-pounds in a crossing or star pattern
Hi, I’m Mike from 1A Auto. We’ve been selling auto parts for over 30 years!
Hey everyone, Sue here at 1A Auto. And today we're installing outer tie rod ends on our '07 Mazda 3 sedan. These came from 1A Auto, so if you need this part or any other part for your car, click on the link below and head on over to 1A Auto.
Keep in mind before this repair, set up an appointment with your local alignment shop and you're going to need an alignment afterwards.
We're going to loosen the lug nuts with the weight of the car on the tire and it's a 21 millimeter. Now you're going to raise the vehicle with a jack and jack stands or a two post lift if you have that. Now I can take the lug nuts off. It's up in the air.
This is the inner tie rod end. It has a bellow boot that covers the end that screws into the power steering rack, and this is your outer tie rod end. This is a jam nut. This is where adjustments are made for a tow on a car. I'm going to start by spraying the jam nut and the upper part of the outer tire rod end. Let that soak. I'm going to break the jam nut free first. It's a 24 millimeter on this Mazda 3. Now that's broken free and spinning I have to undo the top nut to the outer tie rod end, take this cotter pin out. We discard it because we're going to use a new one. The nut is a 14 millimeter socket. It's kind of rusted so just wiggle it on down there. I'm going to break it free. Now I'm going to take a hammer and hit the end of the knuckle where the tie rod end goes in to pop the stud out.
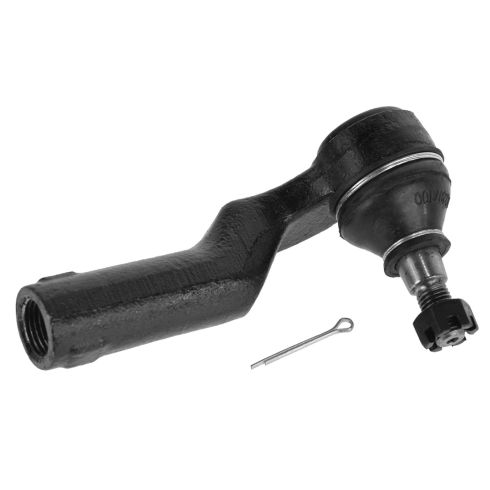
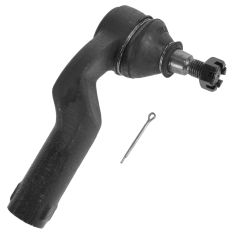
Here we have outer tie rod ends on our '07 Mazda 3 sedan. This one is from 1aauto.com, and this is the one we took out. The one from 1aauto.com is stamped clearly, R for right side, the passenger side, comes with its own new castle nut and a cotter pin. If you need this part or any other part for your car, click on the link below and head on over to 1aauto.com.
Now I'm just going to put some anti-seize on the threads. Now install the outer tie rod end. Thread it on up to the jam nut. I'm going to bring it up, put it in the knuckle, install my castle nut. The new one is a 16 millimeter socket. There is no torque for this. I just really want it down tight. There we go.
Now I can install my cotter pin. Just fold that over. That just stops the nut from possibly on back threading out. I like to squeeze all sharp edges down, only fair to somebody. Now we're going to take our wrench and tighten up the jam nut. You want that snug right down because you do have to drive it to the alignment shop. That's a 24 millimeter wrench, same as the old one. There we go. Once I lower this to the ground always tighten wheels in a star pattern. And our wheel torque on our '07 Mazda 3 is 87 foot-pounds. Always go around twice.
Thanks for watching. Visit us at 1AAuto.com for quality auto parts, fast and free shipping, and the best customer service in the industry.
PSA68455
In Stock
Product Reviews
Loading reviews
There are no reviews for this item.
Customer Q&A
No questions have been asked about this item.
Customer service
877-844-3393
Monday - Friday 8:00am - 9:30pm ET Saturday - Sunday 8:00am - 4:30pm ET
Enter Vehicle Year Make Model
Specify your vehicle's year, make and model to guarantee fit.
Year
Make
Model
Options
Drivetrain
This part doesn’t fit a . Select from parts that fit.