Replaces
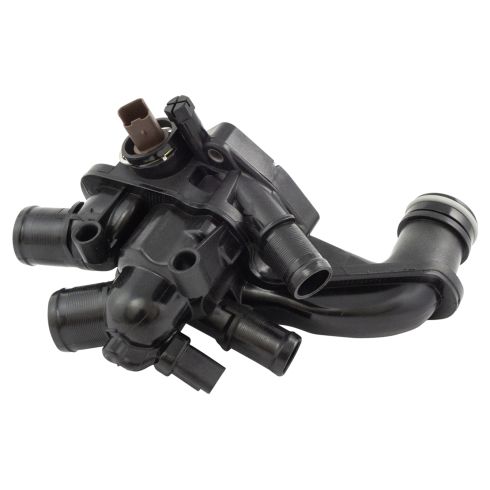
2011 Mini Cooper Countryman with Installed Sensor Adapter Harness Thermostat with Housing Assembly TRQ ECA92781


ECA92781
This part doesn’t fit a . Select from parts that fit.
Specify your vehicle's year, make and model to guarantee fit.
This part does not fit a .
Buy in the next and
Get it by: Saturday, Dec 13 with expedited shipping
Frequently bought together
Specify your vehicle's year, make and model to guarantee fit.
This part does not fit a .
Part Details
- Yes
- 221 Deg. F
- 105 Deg. C
- Plastic
Specifications
- Vehicles built between 6/2010 - 3/2012 require updated sensor adapter harness OE# 12517646145.
- with Installed Sensor Adapter Harness
About TRQ:
TRQ is a trusted brand dedicated to making every repair a success story by combining premium parts with easy installation. Each TRQ part is engineered by a team of automotive experts to meet or exceed OEM standards, delivering enhanced performance and maximum longevity. With rigorous in-house testing, the brand ensures superior fit and function across every product line. TRQ also provides customers with best-in-class, step-by-step installation videos—so you can complete repairs with confidence, whether you're a first-time DIYer or an industry professional.
Attention California Customers:
![]() WARNING: This product can expose you to chemicals including Lead and Lead Compounds, which are known to the State of California to cause cancer, and birth defects or other reproductive harm. For more information, go to www.P65Warnings.ca.gov.
WARNING: This product can expose you to chemicals including Lead and Lead Compounds, which are known to the State of California to cause cancer, and birth defects or other reproductive harm. For more information, go to www.P65Warnings.ca.gov.
Lifetime Warranty
This item is backed by our limited lifetime warranty. In the event that this item should fail due to manufacturing defects during intended use, we will replace the part free of charge. This warranty covers the cost of the part only.
FREE Shipping is standard on Orders shipped to the lower 48 States (Contiguous United States). Standard shipping charges apply to Hawaii, Alaska and US Territories. Shipping is not available to Canada.
Expedited is available on checkout to the United States, excluding Alaska, Hawaii and US Territories as well as P.O. Boxes and APO/FPO/DPO addresses. Final shipping costs are available at checkout.


Created on:
Tools used
- Remove the retainer from the valve cover hose Remove the hose from the valve cover Loosen the hose clamps from the air intake tube with a flat blade screwdriver Disconnect the wiring harness from the air intake tube Disconnect the PCV hose Remove the air intake tube
- Remove the T25 Torx bolts from the air box cover Disconnect the MAF sensor from the air box cover Lift the air box cover up and out Disconnect the lower intake hose with a flat blade screwdriver Repeat this process for the front side of the hose near the headlight Remove the lower air intake hose
- Remove the small vacuum lines that were beneath the lower intake tube from the engine with a pick Disconnect the wiring harness attached to the valve cover Pry up the clip from the wiring harness attached to the valve cover Disconnect the electrical connectors attached to the bracket with a pick Unclip the harnesses from the valve cover Move the wiring harness bracket out of the way
- Loosen the hose clamp from the radiator hose underneath the front of the vehicle Have a drain pan ready Disconnect the hose and drain the coolant Connect the radiator hose Tighten the hose clamp
- Loosen the hose clamp from the coolant reservoir hose Remove the hose from the coolant reservoir with a pick Remove the 8mm bolt from the coolant reservoir Lift the reservoir up and over to the side
- Have a drain pan ready Disconnect the radiator hose clamp from one of the four hoses on the housing Disconnect the radiator hoses from one of the four hoses on the housing Repeat this process for the remaining hoses Release the hose from the air intake elbow hose on the air box Release the air intake elbow hose from the air box
- Pry off the metal clip with a flat blade screwdriver Remove the three 10mm bolts from the thermostat housing Lift the housing out Loosen the hose clamp and remove the hose
- Apply white grease to the o-ring Connect the water pipe to the thermostat housing Clean the mating surface with sand paper and parts cleaner Insert the thermostat and housing into place Tighten the 10mm bolts to the housing Torque the bolts to 8 Newton-meters Clip on the metal clip
- Connect each hose to the thermostat housing and tighten the hose clamps with pliers Connect the air intake elbow hose to the air box Connect the hose to the intake elbow hose
- Insert the coolant reservoir into position Connect the hose to the reservoir Connect the hose clamp to the coolant hose Tighten the 8mm bolt to the reservoir
- Insert the wiring harness bracket into place Connect the wiring harnesses Clip the harnesses to the valve cover Connect the small vacuum lines beneath the lower intake tube to the engine
- Insert the lower air intake tube into place Attach the air box cover Tighten the T25 Torx screws Connect the MAF sensor
- Insert the upper air intake tube into place Tighten the hose clamps to the upper air intake tube Connect the wiring harness from the air intake tube Connect the PCV hose Connect the hose from the valve cover Connect the retainer from the valve cover hose
- Locate the bleeder screw between the valve cover and the air intake tube Loosen the bleeder screw a couple turns with a flat blade screwdriver Add the appropriate 50/50 coolant to the reservoir until it seeps from the bleeder screw Close the bleeder screw with a Phillips screwdriver With the cap off the coolant reservoir, start the engine and let it warm up Monitor that the engine is not overheating Turn the heat to max setting After about 10 minutes the thermostat should open With the thermostat open, turn the vehicle off Let the engine cool Adjust the coolant accordingly Take the vehicle for a road test Adjust the coolant accordingly
Hi. I'm Mike from 1A Auto, we've been selling auto parts for over 30 years.
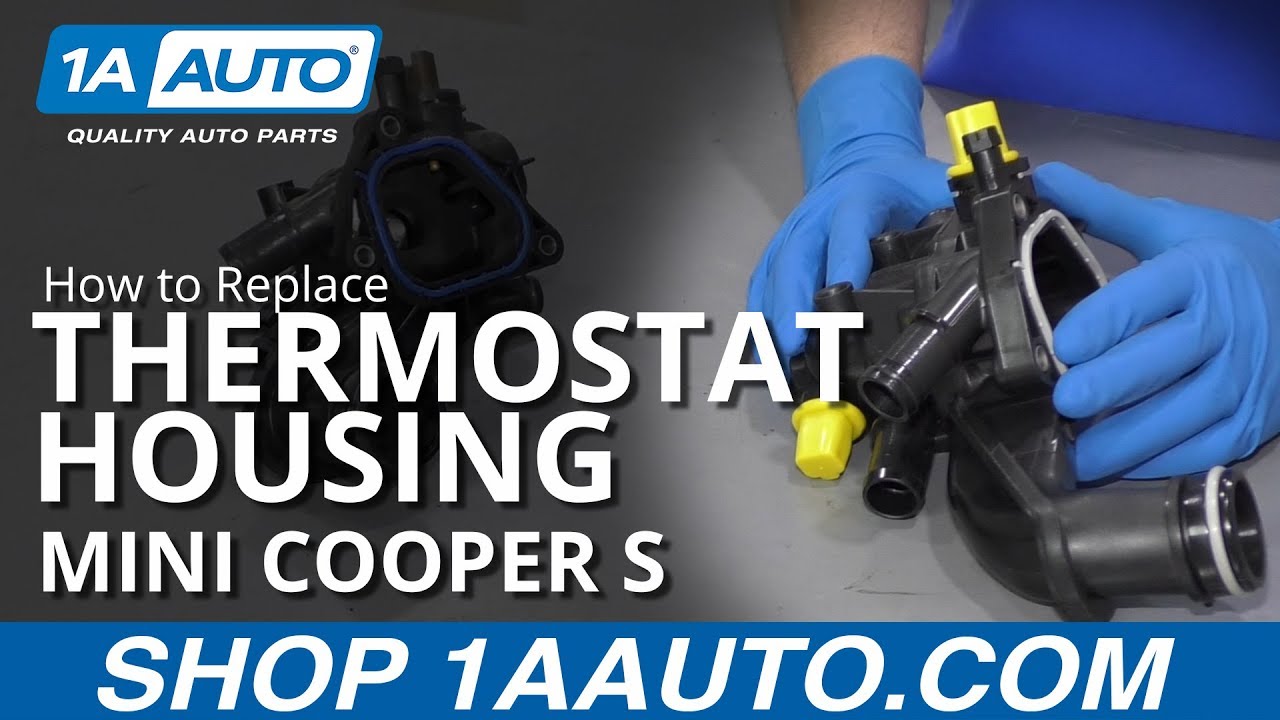
What's up guys? I'm Andy from 1A Auto. In this video, I'm going to be replacing this thermostat and housing in this 2007 Mini Cooper S. If you need this part or other parts for your vehicle, click the link in the description and head over to 1AAuto.com.
All right. We're going to remove this hose right here. There's a little section right here that pulls up. Pull that retainer off and just slide that out. Disconnect this right here. Use a straight blade screwdriver. Loosen up this worm clamp, and we'll loosen up this one down below here. This goes to the turbo charger. Disconnect this connector right here.
There's a little lock here. Just pull up on that lock and slide it out. We're going to disconnect this hose right here. There's a little lock right here. Push down on that, remove that, so that's out of our way. We can slide this hose off here and slide it out of the way.
I'm just going to remove these four screws on the air box. Use a T-25 extension and a ratchet. Get those loosened up. They don't have to come out all the way. Then I'll disconnect this connector right here. Just push down on that lock. It's for the mass airflow sensor. We can grab the air box, rotate it, and slide it out of our way.
All right. I'm going to disconnect this intake tube right here. There is some little locks on it, so if you take a straight blade screwdriver, get underneath here, you can release it. Just rotate it a little bit and pull it out. We'll slide this up, and there's some locks on the front side. I can get in there from right here. Just slide underneath here and release these. We can pull this out. Just twist it and rotate it, and it'll come right out.
We're going to want to move these vacuum lines out of our way, so over here I'm going to get a small 90 degree pick and get under here. Try to loosen this up and then work it off just like that. Then over here, I'm going to take this vacuum line off as well, just use a different pick, and pull that off. We'll take these and set them aside.
I'm going to disconnect this connector right here just so I have more room to move the wiring harness around. Then also this little retainer right here that holds the wiring harness attached to the valve cover. Slide that up. You could use a pick tool under there or a screwdriver to help you move that around. Then I have a little more room to wiggle this harness around.
Now, I want to disconnect these two electrical connectors in here. You want to keep in mind which one goes where, because I believe that the connectors are the exact same. This one has one wire going in right here and this one has two wires. Just take a little pick, slide it underneath here, disconnect that connector and then also this one. Pull that connector out.
All right, so I'm going to take this connector out. There is a lock on the backside. That's why it's kind of hard to get out. I'm trying to push both locks at the same time. There we go. Slide it out. See, there's a lock on the other side as well. Pull that off and then there's a connector right here. Disconnect that as well. Just use another pick to release the lock on the connector and slide it off. Just get underneath there with the pick, and that just gives me a little more room with the wiring harness. You don't necessarily have to take these off to do this job, but it just makes it a lot easier. All right. I'm just going to attach a bungee to this wiring harness to move it out of the way, mostly for filming purposes. You could just slide it out of your way.
From underneath the vehicle, I'm going to drain the coolant. I'm going to drain it at this hose right here. There's no easy access port to a drain on the radiator. I don't believe there's an actual drain on the radiator, so we'll just loosen up this hose clamp. Just use hose clamp pliers, move it to the side. Make sure you have a drain bucket to catch the coolant. I'm just going to loosen this up and slowly drain some coolant out.
Now our coolant's drained out, I'm just going to hook this back up so I don't have to do it later. Take my hose clamp pliers. Now, if this hose clamp is weak, you're going to want to replace it with a worm style hose clamp, but this one's nice a strong so we'll just reuse that. That's good.
I'm just going to remove this coolant reservoir to get it out of my way. You don't necessarily have to do this, but then I'll have more room to work under here. I'll just take a hose clamp and remove this hose. I'll just take a pick, get underneath here and loosen this up. Take that hose off there.
I'm just going to take a 8 millimeter socket, extension, and a ratchet and remove this bolt right here. You can grab the reservoir. Sometimes this is a little tricky to get out. Just take a pick, get underneath here, and slide it forward. Slide that out like that. Pull it up. Actually I can just leave it out of my way like that.
Now I have more room right here to access this hose. I'm just going to use some hose clamp pliers. Take this hose clamp off right here. This is the upper radiator hose. It goes to the top part of the radiator. Now, once you release the hose clamp, it stays unlocked, just like that, so I'll just move that aside. You can just twist the hose back and forth and slide it off. You might have to have a drain pan underneath, because some of the coolant may still drain out.
Next I'm going to use this tool. We actually sell this tool at 1AAuto.com. It's a hose clamp pliers with a cable. When you tighten the cable, this tightens down this section. We're going to clip this onto the hose clamp over here and squeeze the cable. That's going to release the hose clamp. With it locked, I can actually twist the hose back and forth and release it. Once it's off, then I can release the tension on the pliers and move that out of our way.
There's a hose clamp underneath here that I'm going to have to get to. I can release this right here. Slide that back. I'll take these pliers again and take this hose clamp off over here. Just try to wiggle the hose and slide it off. I'm going to use this pick to try to slide the hose off. All right, take that off. A lot more coolant's coming out.
All right. This hose clamp is a little bit too close to this area right here. I'm just going to take a straight blade screwdriver, and just pry out on it a little bit just to try to rotate it just so we can access it easier. Then I'll use some hose clamp pliers and loosen it up. Squeeze that, move it aside, and slide this hose off. Just grab the hose and rotate it. Just to give me some room, I'm just going to take this piece off. I'm going to use some needle nose pliers, release this hose retainer right here, squeeze that. Then I'm going to take this and rotate it and slide it out.
Now I'm going to take this clip off on the back side. It's kind of hard to see. I'm just going to use a straight blade screwdriver. Get in there, and get underneath the clip. Slide this out. Just like that. You can pull it all the way out. Just going to use the 10 millimeter socket extension in a ratchet; take this bolt out right here. Loosen it up. Pull that bolt out and there's gonna be another one right here in the front. Loosen this bolt up. There's another bolt underneath here. If you need to, you can always references the new thermostat housing that you have and see where the bolts are. Oops, dropped it. Pull that bolt out.
Now, we're going to grab this housing and just rotate it back and forth a little bit. Try to slide it off. We still have the hose connected over here. I pulled the hose clamp off, but the hose is still connected. I'm going to take this pick and try to get that hose off. All right. That's disconnected. I can just slide this out. We're still connected in the back here. That crossover--I'm just trying to work it back and forth. I'm going to try rotating this a little bit. The O-ring is stuck and it's probably because it's been on there since the car was brand new. Just work this back and forth. Try taking the screwdriver and getting in between the housing and the crossover pipe. The housing is real brittle on this car, so I'm going to have to replace the crossover pipe as well. Disconnect that and pull it out.
Here's our old thermostat and thermostat housing. Here's our new thermostat and thermostat housing from 1aauto.com. As you can see, the shape is the same. Comes with the same O Rings and seal on the inside. Flip it over. All the ports are the same. The connectors, there's gonna be these little covers to cover up the connectors. The connectors for the electrical terminals are gonna be the same. Same with here. Same bleed procedure, right here. You're going to loosen that up to bleed the coolant out. Get yours at 1aauto.com and you'll be ready to rock and roll.
Before I take the thermostat housing, I'm actually going to clean up the area right here where the gasket's going to meet. Just take a little sandpaper or some emery cloth and just clean up this area. Just take a little parts cleaner and a rag and just wipe this down.
I'll just take a little bit of grease and put it on this O-ring so that it goes in smooth. I'm going to take this, position this into the pipe like that. We're going to make sure that we get this pipe installed as well. We'll slide that on there first, because we never took that pipe off. It's just easier to not have to take that pipe off. Then get the O-ring lined up with the pipe, the water pipe. Get that lined up, and just wiggle it on. Okay, that slipped in, and that pipe's on down below here.
We're going to take these 10 millimeter bolts. Get them started. Just take a socket and extension. That's going to help me get the bolts lined up. I'll just take my socket, and extension, and ratchet, and I'll just snug these down. I'm going to use a torque wrench and a 10 millimeter socket. I'm going to tighten these down to 8 Newton-meters.
Now we're going to install this retainer clip. It's going to go over here. Just slide that in position there and lock it down in place. Okay, now we're going to resecure this hose clamp down here before we forget. Just take our hose clamp pliers, move that clip right there. Next we'll do this back hose right here, get this in position. Take this hose clamp pliers, squeeze that pretty tight. Just watch your fingers when you're working around the hose clamps, because sometimes they let go. That's in position, and release it.
All right. Next we're going to install this hose. This goes to the lower radiator. I'm just going to squeeze the clamp first and line it up. That looks good. I'll release. I can take this one. Now, this one was already locked, so this is that lock that I was talking about that sometimes if you tighten it too tight then it'll go into like an unlock mode. We can actually slide this one right on, and then we can release that. Sometimes you can take a pick. Sometimes you take a screwdriver, and then just try to rotate this.
I got it to release. I'm just going to move it into the right position. Just take the hose clamp pliers and just move it. We could use some needle nose pliers. That looks good right there.
Now we're going to take this bungee cord off and we'll move the reservoir. Get the reservoir in the right position, just like that. Take this hose, install the hose, and move the hose clamp. Take this bolt and tighten this down with an 8 millimeter socket, and extension, and a ratchet. Just snug.
All right, now we're going to move this bungee cord. This is going to go in this position. There's a couple little tabs on the bottom of this wiring harness bracket that slide into those little holes like that. Then on the backside there, there's a connector. We'll connect this connector down here and slide that in position there. Then there's this connector right here. Line that up, lock it in place. There's these two connectors that were the same connectors. The one with two wires goes over here. Lock it in place. Then the other one, the single wire, goes right here. I can connect the wiring harness right here.
Next, we're going to install this intake part of the air box. Just line this in position, push it in, and twist it. All right, now we're going to take this tube. Going to slide this down here. You're just going to have to twist it. Just keep twisting it. Get that in position, and we'll lock that in right here. That's good right there. Then lock it in over here. That's good right there.
One thing we forgot, to add these little hoses. They go underneath this air tube. Before we put everything back together, we can slide these underneath right here, just like that. Then this one's going to connect right here, just like that, and then this one's going to connect over here.
I'll take the air box. Line these three tabs up with the slots in the top of the air box, just like that. We'll take these screws. Get those started, and tighten these screws down. Snug those down. Before I put this on, I'll just connect the mass airflow censor right there. Then we can take this hose. This is going to go on this side, this intake tube. This actually goes down to the turbo down here. Slide that on there. When that's slid on, then we can take a straight blade screwdriver. Tighten this worm clamp down. We can do the same on this side.
We'll connect this connector right here. We'll connect this hose right here. Lock it in place. There's a little retainer that holds it right down here, just like that. We'll take this hose. It's going to slide onto the valve cover, just like that. Then there's this retainer that's going to hold that hose in there. Lock it in place.
Before we add the coolant, we're going to want to open up the bleeder screw. We'll just take a straight blade screwdriver, go down here, and loosen up the bleeder screw. Just a couple turns, not too much. Then we're going to take the appropriate coolant, and you're going to want a 50/50 mixture. Add the coolant. We'll just keep adding it until it starts coming out of the bleeder screw. You may hear some air coming out. Then once it starts coming out, you're going to close the bleeder screw. You just have to watch that. We'll just snug it up.
Now, we want the coolant level to be about where the level is. This is a little bit on the higher side. Then we're going to start it. I'm going to start the vehicle with the cap off, leave it running for a while, let the engine warm up, constantly monitoring to make sure that the engine is not overheating. I like the leave the heater on so that the engine. I can tell that the engine's full of coolant and the coolant's cycling, doing its thing. Then after about 10 minutes, the thermostat should have opened, and you can shut the vehicle off. Let it cool down, recheck your level, and adjust accordingly. Take it for a road test, and then adjust again when you get back, and you should be good to go.
Thanks for watching. Visit us at 1aauto.com for quality auto parts, fast and free shipping, and the best customer service in the industry.
ECA92781
877-844-3393
Monday - Friday 8:00am - 9:30pm ET
Saturday - Sunday 8:00am - 4:30pm ET
Specify your vehicle's year, make and model to guarantee fit.
This part does not fit a .


