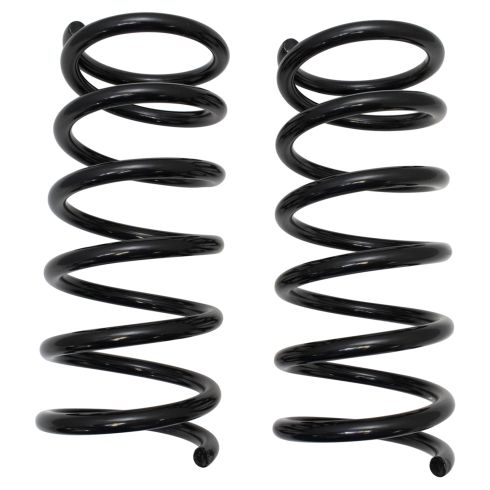
Hey, everyone. It's Len from 1A Auto. Today I'm going to be working on a 2010 Nissan Altima. We're going to be doing rear coil springs. It's a very simple job and I'm going to show you how. And as always, if you need this or any other part, you can always come down to 1aauto.com.
Now we have our vehicle partially supported off the ground. We want to make sure the wheel's still touching. We're just going to break all five of these lug nuts free. And we don't need to loosen them up very much--we just want to break them free so when we get it up off the ground, we don't have to worry about spinning the wheel trying to break them free. There's one, and we're going to be using our 21 millimeter socket. We're on our last two. That one off, all right. What I like to do is I like to leave one on there when I'm removing the last one. So I'll just put that second to last one back on a couple threads, and then we'll go ahead and remove this last one. Reason for that is so the wheel can't come loose, fall, and hurt anybody. Safety is key here at 1A Auto. Last one. Now we'll go ahead and remove this second to last one that we started on, holding the wheel. Take off that hubcap. Here we go, being careful not drop it to hard.
So now that the wheel's off, what we want to do is we want to make sure that we have plenty of slack with our ABS wire. We don't want any tugs on that. So we'll just try to pull it out of all of its brackets. There's one right here and one right here. Comes off fairly easily. This one you have to pull in an upward motion. Now we've got all the slack in the world.
So for our next step, we're going to remove the sway bar link from the upper control arm. We're just going to remove the whole bracket. You can use a long extension with a 14 millimeter socket. Get that one loose. We'll move over to the other side. Once we have them both loose, we'll go ahead and remove them completely and we'll be clear to move onto the next step. Here we go. Just remove those two bolts. As you can tell, they're both the exact same. They're in fairly good condition. There's a little bit of corrosion. We could clean that up if we want.
So now what we're going to use is an 18 millimeter wrench and an 18 millimeter socket. I'm going to put one on the backside here, which is the nut side. And then I'm going to bring my socket, and I'm just going to do it on this side since it's easier to get to. Let's see if I can break it free. All right, just keep turning this out. I'm using the ratchet wrench, which comes in handy. Okay, the nut's off. There we are. So I'll put this aside. So we're going to grab our crayon or marker or whatever you happen to be using--nail polish. We're just going to make a mark because this right here is an alignment adjustment. So you want to get it back to as close as you can get it. So I'm just going to go a little something like that. Make nice and deep, dark. We'll be able to see that from a mile away. Hello, space station.
We're going to take our 18 millimeter socket on a long handled ratchet and a 19 millimeter wrench on the backside. We'll find the backside of the bolt goes right on there. And this is basically just to hold the bolt still for when it breaks free. Just going to turn it around. We're going to turn this to the left to loosen. We don't need to go very far with this, we're just loosening it just so we can get a little bit of pivot with this arm to replace the spring. That feels pretty good--maybe one more. There we are. All right, moving on.
Next we're going to support this. Just put a little bit of pressure so we can remove this bolt, and make sure the spring doesn't come out. You can use a floor jack, jack stand, or whatever your preference is. You do you, boo-boo. That should come out okay. I'm going to use a little pry bar or you can use a chisels--whatever you might have access to. I'm just going to put it up against the head right there and try to tap it out. See if it wants to come out. For the purposes of this video, I'm sure it won't. Did it move? There we go, it's starting come out. So we want to make sure that we do have this supported, which we do. And we're just going to keep on going. Wearing our safety glasses, of course. Safety's key at 1A Auto.
At this point we can go ahead and use a ratchet wrench or a ratchet if we want, and we're just going to turn this counter-clockwise and the threads should bring it right out. Getting close now. There we go. Wrench keeps coming off because I'm trying to pull the bolt with it at the same time. There it is. Now we're clear to start lowering this down. We're lifting the vehicle. If you have this on a jack stand, you'll have to lift the vehicle up. But essentially, for me, I'm going to hold the spring. I'll come around here. I can move this right out of the way if I want. This will help drop the arm down plenty. And now we have our old spring out. We're going to go ahead and replace this with a quality 1A Auto part.
I wanted to make note, that, as you can tell, the old spring is quite worn. What generally happens is these will rot out, and they'll break off and you'll have an issue with your suspension. So what I like to do is I like to replace them with a quality 1A Auto part. If you need this, or any other quality part, you can always come down to 1aauto.com and we'll be sure to take care of you.
Now we're going to use an 18 millimeter socket; put it on this side of the bolt. The other side's a welded nut onto the backside of the shock. So I'm just going to give this a little tug. There we go. Now we're going to pull this out, being careful of any pinch points. There's that bolt. As you can tell, it doesn't have anything special to it. We could clean up these threads if we wanted to. Put that aside where we can find it. Now we can move this around quite a bit. You can see I grabbed the rubber pad off the old spring. I'm going to go ahead and put it right on the new spring. Fits in there perfectly.
Next, what I want to make sure is you can see where this has a little divot that's going to line up with our lower control arm. You can see where there's a divot right here. If you can't see it, you can always feel around. I can understand if you're on the ground it's hard to see things. I can feel it; it's right there. I'm going to line that up with this. So I'm going to come in from the bottom, or come in from the top I guess, but starting with the bottom. I'm going to line that up with where it want it down here.
I'm going to come around. I'm going to try to get it under. And now I'm going to lift this up. Get my jack or jack stand, whatever you happen to be using under there in a safe location. See if I can get it started here. Once we get some pressure, I won't have to do all this extra holding and I can actually get to... there we go.
Okay, so we're going to make sure we're still lined up here. We're going to make sure it's going in up top where it's supposed to be. That feels pretty great. There it is. We're going to go up. All the while going up, we're going to notice that the angle of this control arm's going to continue to change. It's going to start leveling out, and then it might even start going up. When it goes out, you're at a position where this could slip out. If it slips out, this could drop and your spring could come shooting out. We want to try to line up this bolt hole with this right here.
All right, I'm going to stop here. Now what I'm going to do is I'm going to lower the vehicle down a little bit more. I'm going to try to get it close, and then I'm going to use the rest with the jack right here.
So as we stated, we need to line this hole up with this hole. It's going to give you a little bit of problems. It's going to be a fighter--that's okay. For me, I'm just going to use the old trusty ratchet strap. I'm going to come around the backside of the knuckle. Wearing my safety glasses, of course. And then, for me, I'm going to go right to here. I'm just going to try to ratchet it down. Get it close. I'm going to need to hit this a little bit--that's all right. Get it pretty close.
Now I'm going to grab my bolt. Coming in from the backside, push it in. These holes lined up. I can go ahead and tap this with a hammer. Should be pretty close to the other side. Take a peek. All right, looks like I'm going to have to bring it down another click. Just try to get it lined up. Maybe one more. There we are. You can use a little bit of thread locker if you want. For the purpose of this application, I'm not going to worry about it. Just going to go ahead and put my nut on. I can remove whatever strapping or however you used to get the bolt through and then I'm going to go ahead and tighten it right up.
Now I'm going to use my two 18 millimeter wrenches. I'm just going to tighten this down. Once I get it nice and snug. Once I get this tightened down, I'll go ahead and I'll grab my long handled ratchet with an 18 millimeter socket, and I'll make sure I tighten this down and then we can move on. Just give it a little tweak. We don't want to break the bolt. I know we want to be Hercules someday. Now we're going to take our ABS cable. You happen to remove this, generally speaking, it's good measure. So we'll just go ahead and we'll put it back on. And from that point, we should be good to go with the spring.
All righty, so now we're going to line up this hole with this hole. It depends on if you're going to be jacking up or you're going to be lowering your jack--whatever your circumstance is. Essentially, line this hole up with this one. For my circumstance, I'm going to bring this up. There we go. We're going to take our long bolt. If you want to use a little thread locket, it's up to you. For this video, I'm not going to worry about it. I'm just going to put it through. Give it a couple threads by hand, and then I'll go ahead and tighten it down, and we'll get the torque spec. We'll torque it right up. Just going to get this snugged up, and we'll hit it with a torque wrench for 66 foot-pounds. We're using an 18 millimeter socket. Feels pretty good. Let's hit it one more time. There it is.
We're going to go ahead and remount our ABS sensor wire: one right here, one up this way, and then the last one up to here. It's very important to make sure you mount this so it's secure. You don't want it flopping around anywhere and getting caught. Causing damage to the ABS wire will cause issues down the line. Next we're going take our two sway bar bolts. These just hold the sway bar link to the control arm. See if we can get them started. Let's see if we can find the hole. There's one. My hand's in the way, sorry. Just wiggle it around. Once we get these started, we'll go ahead and snug them right up. This next one, that's nice and tight. All right, and then we can just make a quick scan and make sure we tightened everything up.
As you can see, our marking came unaligned, so we're just going to turn the backside of the bolt, and that'll turn the adjustment. Get it as close as we can. Let's see, right about there. Now I'm going to go ahead and tighten this up. I'm using a 19 on the back and an 18 on the nut side. Here we go. There we are. All right, and now that completes us installing this new rear coil spring. Everything's good to go. We double checked all of our bolts and everything's nice and tight. Should be all set.
So we're at the point we're going to take off our securing lug nut here. This was basically just to hold the rotor on so it didn't wobble around. We remember that. If it feels stiff, you can go ahead and use your 21 millimeter socket. I'm going to hold that in my hand. Grab my tire. It's easiest to roll it right up your knee so that way you can use your abs to lift it instead of your back. So I'm going to go like that. Use my leg. Put it right up on here just like that. I'll hold it still. I can grab my hub cap or wheel cover--whatever you want to call it. 21mm get it on here. We're going to go ahead and start all five of these. We'll snug them up and then we'll go ahead and torque it right down.
Just going to go ahead and snug these down. Our next step is to get this wheel so it's just barely touching the ground so it won't spin, and then we're going to torque these lug nuts to manufacturers specifications.
Now it's time to torque this puppy down. We're going to go to 83--that's the manufacturers specification. We're going to use our torque wrench with a 21 millimeter socket. We're going to make star pattern. It's five lugs, so a star. Here we go. Now maybe you got distracted. Maybe somebody came over and talked to you. You don't remember if you got them all. Just go around again. I mean, it's not like you got to pay for it. Let's hit them again.
Thanks for watching. Visit 1aauto.com for quality auto parts shipped to your door, the place for DIY auto repair. And if you enjoyed this video, please click the subscribe button.