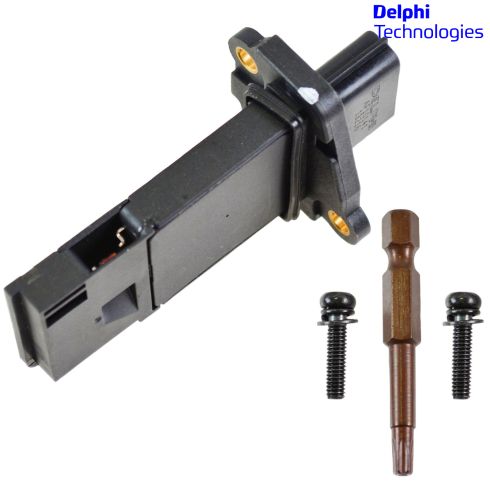
As an Original Equipment Supplier, Delphi Automotive products from 1A Auto come directly from the source. You wont have to worry about going to the dealership for Original Equipment - these parts are the exact same as the original. Delphi products come with the same quality from the dealership at a lower cost to you.
Install Tip: You may be required to reset the vehicle computer after installation of this part.
Direct Fit Replacement - Guaranteed to fit and function for your specific application Quality Tested - built to a strict level of product standards.
Item Condition:New
Lifetime Warranty
This item is backed by our limited lifetime warranty. In the event this item should fail due to manufacturing defects during intended use, we will replace the part free of charge. This warranty covers the cost of the part only.
Returns: Parts with electrical components cannot be returned once installed.
FREE Shipping is standard on Orders shipped to the lower 48 States (Contiguous United States). Standard shipping charges apply to Hawaii, Alaska and US Territories. Shipping is not available to Canada.
Expedited is available on checkout to the United States, excluding Alaska, Hawaii and US Territories as well as P.O. Boxes and APO/FPO/DPO addresses. Final shipping costs are available at checkout.
How to Clear P0102 Code Replace Mass Air Flow Sensor 2004-12 Nissan Altima L4 2-5L
How to Replace MAF Sensor 2009-14 Nissan Murano
How to Replace Mass Air Flow Sensor 2004-15 Nissan Titan
Created on:
Tools used
1/4 Inch Wrench
1/4 Inch Socket
1. Removing the MAF Sensor
Disconnect the wiring harness
Remove the 1/4" bolt from the sensor
Remove the sensor
2. Installing the MAF Sensor
Insert the sensor into place
Tighten the 1/4" bolt to the sensor
Connect the wiring harness
Hi, I’m Mike from 1A Auto. We’ve been selling auto parts for over 30 years!
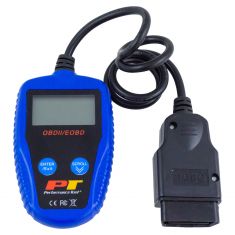
All right. So a Nissan has a check engine light on and it's running really rough. We're going to check for the diagnostic code that we're getting on this Nissan Ultima using the scan tool. We're getting a P0102, and it says MAF or VAF check low input. We're going to check the mass airflow meter. Make sure it's plugged in fully, and if it's not plugged in fully, we'll plug it in. If it's plugged in fully, we're going to replace it and see if that clears the code.
We're over here at the mass airflow sensor. It goes right in here in the intake tube after the air filter. Double checking the plug is in there and locked in place. As far as these wires go right here at the connector, where they kind of bend. They don't appear to be broken, so we're going to try and replace this mass airflow sensor.
To replace the mass airflow meter, that's this piece right here. Push the lock in, pull the connector off and set it aside. Our replacement comes with a matching security torques bit that fits right in there. It's a quarter-inch drive. To put the top on, I can use this quarter-inch drive tool. Just unscrew it. The other screw is on the opposite side here on the bottom. It's kind of tight to get the quarter-inch driver in there or a socket ratchet, so I'm just going to use a small quarter-inch wrench. Just going to put it in here. We just need to move it this way. Hold it with one finger, and like that. Once it's loose enough, I can just turn it with my hands. Grab the screw so I don't drop it. Pull the old mass air meter out.
Here's our original one from our vehicle and our brand new one from 1AAuto.com. This actually comes with two new screws, security torques, and the bit to install and remove them. Once you put in the car, it'll work great for you. On our sensor, it's got a tab here and a tab here on the intake tube that match up with these openings here and here, so you can only install it one way. Definitely doesn't fit that way, so I'll have to go in this way. Fits nice and even.
Install the screws. Take our supply torques bit, and you continue to just turn it with my fingers. Wrench till you feel it get tight. I'm just going to stop because it's just a metal screw going into a metal bushing that's inside this plastic. We don't want to strip it. Could use the let driver, top one. Reconnect it so it clicks. Mass air meter has been replaced. Now our check engine light is off.
Thanks for watching. Visit us at 1AAuto.com for quality auto parts, fast and free shipping, and the best customer service in the industry.
Tools used
Socket Extensions
6mm Socket
Ratchet
1. Removing the Mass Air Flow (MAF) Sensor
Disconnect the MAF sensor electrical connector
Remove the two 6mm bolts from the MAF sensor
Pull the MAF sensor off the air intake tube
2. Installing the MAF Sensor
Line up the MAF sensor on the intake tube using the locating pins
Install the two 6mm bolts into the MAF sensor
Connect the MAF sensor electrical connector
Hi. I'm Mike from 1AAuto. We've been selling auto parts for over 30 years!
Mass airflow meter is located here, on top of the intake tube, aft of the air filter. To change it, I'll push in on this connector to unlock it. Lift it off, push that down.
There's a screw here and a screw here. It's a six millimeter, or it's a very small Phillips head, you can put in there. I'm going to use the six millimeter ratchet and remove it. Carefully take this one out and don’t lose the screw. Now, on the opposite corner is the other screw.
This is loose. The mass airflow sensor will come right out, straight out.
This is the mass airflow meter sensor. It is keyed on both sides and there's little pins that match on the air intake tube. It only goes in one way. So, this is the correct way. It will sit down nice and even. The screw holes line up. The tabs line up. The lock for the electrical connector’s towards the top. If you tried to put it in backwards, flip it over here, it's not going to fit right. It's close, but it's not quite there. It doesn't really want to line up with the tab. The screw hole doesn't line up. So, if you tried to struggle with this and force it, you could break it. It definitely, when it fits the right way, goes in real easily. You can also tell, there's a direction of flow, so the air is coming from the air filter. It's going into the engine, so it needs to go into this opening and that's how it reads the amount of air going into the engine. It's going to sit in, just like this.
I'll reinstall those screws. These are just really small screws. They're not going to take a lot of torque. I'll get this back one set up. They’re just little machine screws, little insrets in the air tube. You don't want to over tighten them. Get them in there with my fingers. I'm going to take the ratchet and just very lightly tighten them. Right where I feel them get tight, I'm just going to stop.
With those tightened up, I can put the connector back on. It'll click when it locks in place.
Thanks for watching. Visit us at 1AAuto.com for quality auto parts, fast and free shipping, and the best customer service in the industry.
Tools used
Phillips Head Screwdriver
1. Removing the Mass Air Flow Sensor
Disconnect the mass air flow sensor wiring harness
Remove the two Phillips head screws from the mass air flow sensor
Pull off the mass air flow sensor
2. Installing the New Mass Air Flow Sensor
Slide the new mass air flow sensor into place
Insert the two Phillips screws into the mass air flow sensor
Connect the mass air flow sensor wiring harness
Brought to you by 1AAuto.com, your source for quality replacement parts and the best service on the Internet.
Hi, I'm Don from 1A Auto. I hope this how-to video helps you out, and next time you need parts for your vehicle, think of 1AAuto.com. Thanks.
In this video we're going to show you how to replace a Mass Air Flow Sensor on this 2004 Nissan Titan and it's the same part and similar process on these Titans from 2004 to 2013. The only items that you're going to need for this are a new mass airflow sensor from 1AAuto.com and a Phillips screw driver.
Your mass airflow sensor is right here. Just push the tab on the harness and pull it free and then remove these two Phillip's screws. We'll just fast-forward as Don does that. Then, your mass airflow sensor pulls right out.
Take your new mass airflow sensor and push it into place. Then replace those two Phillip's screws and we'll just fast-forward again as Don tightens those up. Now reconnect your harness and you're all set.
We hope this video helps you out. Brought to you by www.1AAuto.com, your source for quality replacement parts and the best service on the Internet. Please feel free to call us toll-free, 888-844-3393. We're the company that's here for you on the Internet and in person.
Product Reviews
Loading reviews
2.33/ 5.03
3 reviews
5 Stars
4 Stars
3 Stars
2 Stars
1 Star
1
0
0
0
2
Air Flow Sensor
P
December 29, 2018
Very easy to replace! Works perfectly. Would definitely order from again! Hopefully wont need to. Very Fast shipping!
Not working
Richard
November 28, 2021
I bought 2 MAF sensors for my 1013 Nismo 370Z to try and clear an ongoing issue with Dash Command. I carefully removed the existing, stock, sensors and set the new ones in place. First thing I noticed was that they didn't appear to sit in flush in the plenum. I rocked them around and tightened the screws. After resetting my ECU I went for a couple drives. The idle speed was higher than normal, almost like a vacuum leak and on more than one occasion it went into limp mode and I had to shut it down to reset it. After about a week, I carefully cleaned my old sensors (with the correct cleaner) and reinstalled them. The high idle and limp mode disappeared. I've yet to speak with anyone about this and it's in no way a bad review on the company.
Waste of money
William
January 4, 2022
I installed the MAF and took the car for a spin. I had to change back to the old MAF on the side of the road because the car sputtered so bad it wouldn't run. It even gave me a PO102 code which means no MAF installed and a PO117 meaning the intake air was too hot.
Customer Q&A
No questions have been asked about this item.
Customer service
877-844-3393
Monday - Friday 8:00am - 9:30pm ET Saturday - Sunday 8:00am - 4:30pm ET
Nissan is a registered trademark of Nissan Motor Co., Ltd. 1A Auto is not affiliated with or sponsored by Nissan or Nissan Motor Co., Ltd.See all trademarks.
Enter Vehicle Year Make Model
Specify your vehicle's year, make and model to guarantee fit.
Year
Make
Model
Options
Drivetrain
This part doesn’t fit a . Select from parts that fit.