This item is backed by our 1-year warranty. In the event this item should fail during intended use, we will replace the part free of charge. This warranty covers the cost of the part only.
FREE Shipping is standard on Orders shipped to the lower 48 States (Contiguous United States). Standard shipping charges apply to Hawaii, Alaska and US Territories. Shipping is not available to Canada.
Expedited is available on checkout to the United States, excluding Alaska, Hawaii and US Territories as well as P.O. Boxes and APO/FPO/DPO addresses. Final shipping costs are available at checkout.
How to Replace New Serpentine Belt 1992-98 Toyota Camry
Created on:
Tools used
12mm Socket
Socket Extensions
14mm Socket
Ratchet
1. Removing the Serpentine Belt
Loosen the 14mm bolt that mounts the alternator to the engine
Loosen the 12mm bolt underneath the adjusting screw
Turn the adjusting screw counterclockwise to drop the belt
Familiarize yourself with the route of the serpentine belt
Pull the belt off the alternator
Release the tensioner
Pull the belt off by hand
2. Installing the Serpentine Belt
Loop the belt around the crank pulley
Bring it under the A/C compressor
Pull the belt over the alternator
Loosen the adjustor if needed
Tighten the 12mm adjustor bolt clockwise
Tighten the 12mm bolt beneath the adjustor bolt
Tighten the 14mm bolt that mounts the alternator to the engine
Start the vehicle and listen for slipping or squeaking
Brought to you by 1AAuto.com, your source for quality replacement parts and the best service on the Internet.
Hi, I'm Mike from 1A Auto. I hope this how-to video helps you out, and next time you need parts for your vehicle, think of 1AAuto.com. Thanks.
In this video, we're going to show you how to replace a serpentine belt. This is a 1998 Toyota Camry. The procedure is pretty much the same for vehicles between 1992 and 1998. Items you'll need are a new serpentine belt from 1AAuto.com, 12 to 14mm socket, a ratchet, and an extension.
Open the hood and secure the hood prop. Your alternator is used to adjust the tension of the serpentine belt, either tighter or looser, and also to slack it enough to be removed. Using a 14mm socket and ratchet, loosen the bolt where the alternator mounts to the engine. This will allow the alternator to pivot when adjusting the adjuster screw. Using the 12mm socket and ratchet, loosen this bolt into the alternator, and then adjust your adjusting screw down to remove the belt. Turn the adjusting screw counterclockwise to loosen it. You may have to push down on the alternator a little to get it to move.
Once you have enough slack, remove the serpentine belt from the pulleys. You may have to twist it sideways to clear between the pulleys and the body. This belt will need to be changed. As you can see, all the lines are cracking all throughout the belt, as well as it being brown and dried out, making it very brittle and likely to snap under tension.
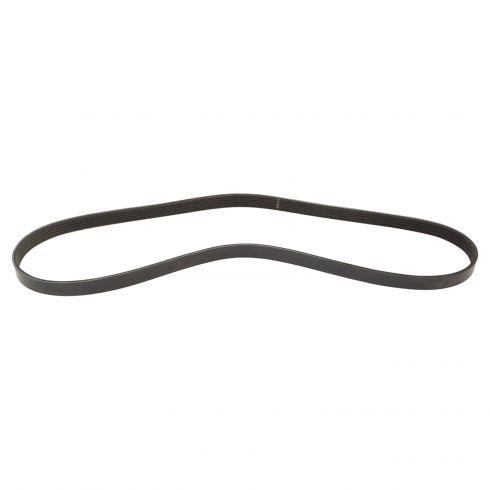
Here we have our old belt which we removed from the vehicle and our new belt from 1AAuto.com. As you can see, these belts, the same size, the same thickness. You can see the new belt has nice rubber, nice and pliable, no cracking. You can clearly see the channels on the pulley. Same number of grooves on the bottom. The serpentine belt will be installed around the crank pulley, over top of the alternator pulley, and under the A/C compressor.
With the new belt, you may have to loosen up the alternator adjuster more than you had to to remove the old one. Be sure that the belt is seated properly onto the grooves of each pulley. Using the 12mm socket and ratchet, turn the tensioning bolt clockwise to add tension to the belt. Lock down the adjusting block with the same 12mm. Using the 14 mm socket and ratchet, clamp down the pivot point bolt. Start the vehicle and check that the belt does not squeal or slip.
Thanks for tuning in. We hope this video helped you out. Next time you need parts for your car, please visit 1AAuto.com. Also check out our other helpful how-to and diagnosis videos.
5K435
In Stock
Product Reviews
Loading reviews
5.00/ 5.01
1review
5 Stars
4 Stars
3 Stars
2 Stars
1 Star
1
0
0
0
0
!A Auto Part Quality
Michael
December 10, 2020
I have ordered numerous items from 1A Auto. The parts have always been OEM quality and exact fit. I appreciate the how-to videos that make replacing the part(s) as easy as possible.
I am a repeat customer, a "real" person and a non-compensated endorsement. I would tell my best friend to shop here.
Thank you to all the staff at 1A-Auto!
Customer Q&A
No questions have been asked about this item.
Customer service
877-844-3393
Monday - Friday 8:00am - 9:30pm ET Saturday - Sunday 8:00am - 4:30pm ET
Oldsmobile is a registered trademark of General Motors Company. 1A Auto is not affiliated with or sponsored by Oldsmobile or General Motors Company.See all trademarks.
Enter Vehicle Year Make Model
Specify your vehicle's year, make and model to guarantee fit.
Year
Make
Model
Options
Drivetrain
This part doesn’t fit a . Select from parts that fit.