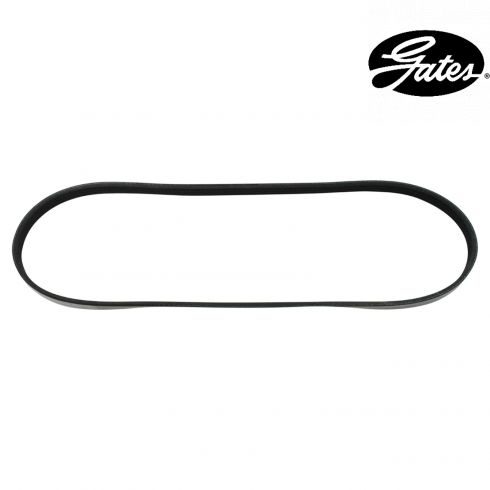
These parts are authentic Gates brand products that are supplied and packaged by Gates. Some of the components included in this kit may be sourced by Gates from other high quality suppliers such as Aisin, GMB, Koyo & other OEM suppliers. These parts are subjected to the very same testing and quality standards as all Gates products.
Item Condition:New
Attention California Customers:
WARNING: This product can expose you to chemicals including 1,3-Butadiene, which is known to the State of California to cause cancer, and birth defects or other reproductive harm. For more information, go to www.P65Warnings.ca.gov.
Lifetime Warranty
This item is backed by our limited lifetime warranty. In the event this item should fail due to manufacturing defects during intended use, we will replace the part free of charge. This warranty covers the cost of the part only.
Wear and Tear
This item is backed by a warranty against defects in materials and workmanship under its intended use. The warranty does not cover normal wear and tear. Please keep your invoice for proof of this warranty.
FREE Shipping is standard on Orders shipped to the lower 48 States (Contiguous United States). Standard shipping charges apply to Hawaii, Alaska and US Territories. Shipping is not available to Canada.
Expedited is available on checkout to the United States, excluding Alaska, Hawaii and US Territories as well as P.O. Boxes and APO/FPO/DPO addresses. Final shipping costs are available at checkout.
How to Replace Serpentine Belt 2000-07 Subaru Outback
How To Replace Alternator Fan Belt 2000-04 Subaru Outback
Created on:
Tools used
12mm Socket
Socket Extensions
10mm Socket
Ratchet
1. Removing the Engine Shield
Remove the three 10mm bolts from the top of the engine shield
Pull off the driver side of the shield
Remove the 12mm bolt from the engine shield
Pull off the engine shield
Loosen the 12mm bolt under the adjusting bolt
2. Removing the Serpentine Belt
Loosen the serpentine belt tensioner bolt with a 12mm socket and ratchet
Pull the serpentine belt off the alternator
Pull out the serpentine belt
3. Removing the A/C Compressor Belt
Loosen the pulley bolt
Turn the 12mm tensioner bolt for the A/C compressor belt counterclockwise
Pull off the A/C belt
4. Installing the New A/C Compressor Belt
Loosen the A/C belt tensioner bolt all the way
Loop the A/C belt around the crank pulley
Stretch it around the A/C compressor
Tighten the adjusting bolt
Tighten until the belt only moves between 1/8 - 1/4 inch by hand
Tighten the pulley bolt
5. Installing the New Serpentine Belt
Apply penetrating oil to the tensioner bolt
Loosen the tensioner bolt all the way
Loop the serpentine belt around the two larger pulleys
Bring the alternator around the crank pulley
Tighten the tensioner bolt
Tighten until the belt only moves 1/4 inch by hand
6. Reinstalling the Engine Shield
Put the passenger side engine shield into place
Insert the 10mm bolt into the engine shield
Insert the 12mm bolt into the engine shield
Put the driver side engine shield into place
Insert the two 10mm bolts into the engine shield
Brought to you by 1AAuto.com, your source for quality replacement parts and the best service on the Internet.
Hi, I'm Mike from 1A Auto. I hope this how-to video helps you out, and next time you need parts for your vehicle, think of 1AAuto.com. Thanks.
In this video, we're going to show you how to replace the A/C serpentine belt on this 2003 Subaru Outback, which has the 2.5 litre motor, and the only tools you'll need are a 10mm and 12mm sockets with a ratchet and a 6 inch extension.
Use a 10mm socket and ratchet or a wrench and remove two bolts: one from here and one over here. There may also be a nut here; it seems to be missing on my vehicle. Okay, now I'm using a 12mm socket with an extension and a ratchet. I'm going to loosen this bolt here. This allows this shield to come right off; then there's another 12mm bolt right under here, under this adjusting bolt. Loosen that, and then loosen this bolt.
Now, fast forward here as I just loosen that adjusting bolt, and as you loosen it you'll see the belt start to loosen. You do need to loosen it way up, in order to peel that belt off the alternator and then remove it. Pull the belt right off. Now, down in here, we're going to want to loosen this bolt here. Now my 12mm has an extension on here, which makes it a little easier, on that adjustment bolt here. Turn that counterclockwise. Again, just fast forward it here. As you turn that bolt counterclockwise, again the belt will loosen up until you can take it off of the A/C compressor and then the crank pulley as well.
Now, you probably want to loosen up your tensioner bolt all the way. Put your new belt right down in. The belt on this car is actually fine; I just need to replace the tensioner. Make sure that it's in the grooves on the crank pulley here. Pull it up; put it in the grooves of your A/C compressor, and right on, and then tighten up your tensioner bolt. Then, as you start getting it tighter, you want to take the belt, press on it, and you want it to move between an eighth and a quarter of an inch. Then tighten up the pulley bolt down here. Then we put some penetrant on here, to make it a little easier to turn things. Loosen this up further.
I'll put on my old belt; it's still in good shape. New belts from 1A Auto are the exact same length and dimensions, so they'll go right on. Put it on. Sometimes it's easier actually to get it on to the two larger pulleys first, then onto the alternator. Make sure it's on all the pulleys correctly, and now just tighten up this tensioner bolt, and once you have that tightened, there's about a quarter of an inch of play up and down. Tighten up this bolt to lock it in place.
Then I'll fast forward this here as we just finish it up. I put the metal bracket back on, slide it behind that bolt in the alternator, and then put the 10mm bolt in the top, and tighten those up and then put the plastic shield back on, and use 10mm bolt, and also there's probably another 10mm nut that was missing on my vehicle, that you would need to tighten up.
We hope this video helps you out. Brought to you by www.1AAuto.com, your source for quality replacement parts and the best service on the Internet. Please feel free to call us toll-free, 888-844-3393. We're the company that's here for you on the Internet and in person.
Tools used
12mm Socket
Socket Extensions
10mm Socket
Ratchet
1. Removing the Serpentine Belt
Remove the two 10mm bolts from the shield
Remove the 12mm bolt from the alternator
Remove the shield
Remove the 12mm bolt below the adjusting bolt
Loosen the adjusting bolt
Pull the belt off the alternator
2. Reinstalling the Serpentine Belt
Familiarize yourself with the route of the serpentine belt
Insert the belt in place by following your vehicle's diagram
Tighten the adjusting bolt to leave 1/4 inch up and down on the belt
Tighten the 12mm bolt below the adjusting bolt
Insert the shield in place
Insert the 12mm bolt from the alternator
Insert the two 10mm bolts from the shield
Brought to you by 1AAuto.com, your source for quality replacement parts and the best service on the Internet.
Hi, I'm Mike from 1A Auto. I hope this how-to video helps you out, and next time you need parts for your vehicle, think of 1AAuto.com. Thanks.
In this video, we're going to show you how to replace the belt that drives the alternator and power steering pump on this 2003 Subaru Outback. This vehicle has a 2.5-liter engine. Only tools you'll need are 10mm and 12mm sockets with a ratchet and extension.
Use a 10mm socket and ratchet or wrench and remove two bolts: one here and one under here. There may also be a nut here it seems to be missing on my vehicle. Now I'm using a 12mm socket with an extension and a ratchet. I'm going to loosen this bolt here up. This will allow the shield to come right off.
Then there's another 12mm bolt right under here, under this adjusting bolt loosen that. Then loosen this bolt. I'll fast-forward here as I just loosen that adjusting bolt, and as you loosen it you'll see the belt start to loosen. You do usually need to loosen it way up in order to peel that belt off the alternator and then remove it. Then pull the belt right off.
Put on my old belt since it's still in good shape. New belts from 1A Auto are the exact same length and dimensions so they'll go right on. Put it on, and sometimes it's easier actually to get it onto the two larger pulleys first and then onto the alternator, Make sure it's on all the pulleys correctly and now just tighten up this tensioner bolt. Once you have that tightened so there's about 1/4 inch of play up and down, tighten up this bolt and it'll lock it in place.
I'll fast-forward this here as we just finish it up, put the metal bracket back on, slide it behind that bolt in the alternator, and then put the 10mm bolt in the top and then tighten those up. Then put the plastic shield back on and use 10mm bolt and also there's probably another 10mm nut that was missing on my vehicle that you would need to tighten up.
We hope this video helps you out. Brought to you by www.1AAuto.com, your source for quality replacement parts and the best service on the Internet. Please feel free to call us toll-free, 888-844-3393. We're the company that's here for you on the Internet and in person.
K040353
In Stock
Product Reviews
Loading reviews
5.00/ 5.01
1review
5 Stars
4 Stars
3 Stars
2 Stars
1 Star
1
0
0
0
0
Great range of products and quick delivery.
Rutger
October 28, 2019
1a auto carried the right part for me in stock and shipped it right away. Online videos were helpful to provide needed guidance.
Customer Q&A
No questions have been asked about this item.
Customer service
877-844-3393
Monday - Friday 8:00am - 9:30pm ET Saturday - Sunday 8:00am - 4:30pm ET
Subaru is a registered trademark of Fuji Heavy Industries Co., Ltd. 1A Auto is not affiliated with or sponsored by Subaru or Fuji Heavy Industries Co., Ltd.See all trademarks.
Enter Vehicle Year Make Model
Specify your vehicle's year, make and model to guarantee fit.
Year
Make
Model
Options
Drivetrain
This part doesn’t fit a . Select from parts that fit.