WARNING: Cancer and Reproductive Harm - www.P65Warnings.ca.gov.
Lifetime Warranty
This item is backed by our limited lifetime warranty. In the event that this item should fail due to manufacturing defects during intended use, we will replace the part free of charge. This warranty covers the cost of the part only.
Returns: Parts with electrical components cannot be returned once installed.
FREE Shipping is standard on Orders shipped to the lower 48 States (Contiguous United States). Standard shipping charges apply to Hawaii, Alaska and US Territories. Shipping is not available to Canada.
Expedited is available on checkout to the United States, excluding Alaska, Hawaii and US Territories as well as P.O. Boxes and APO/FPO/DPO addresses. Final shipping costs are available at checkout.
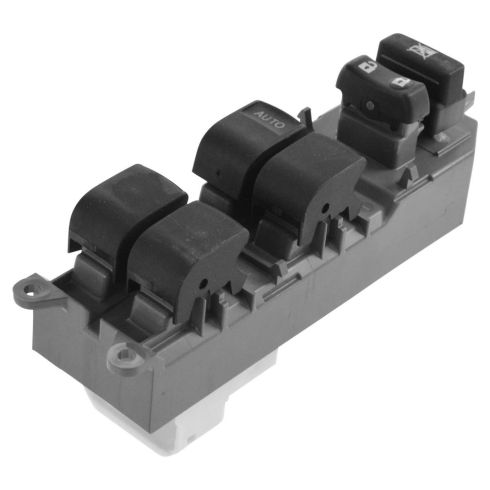
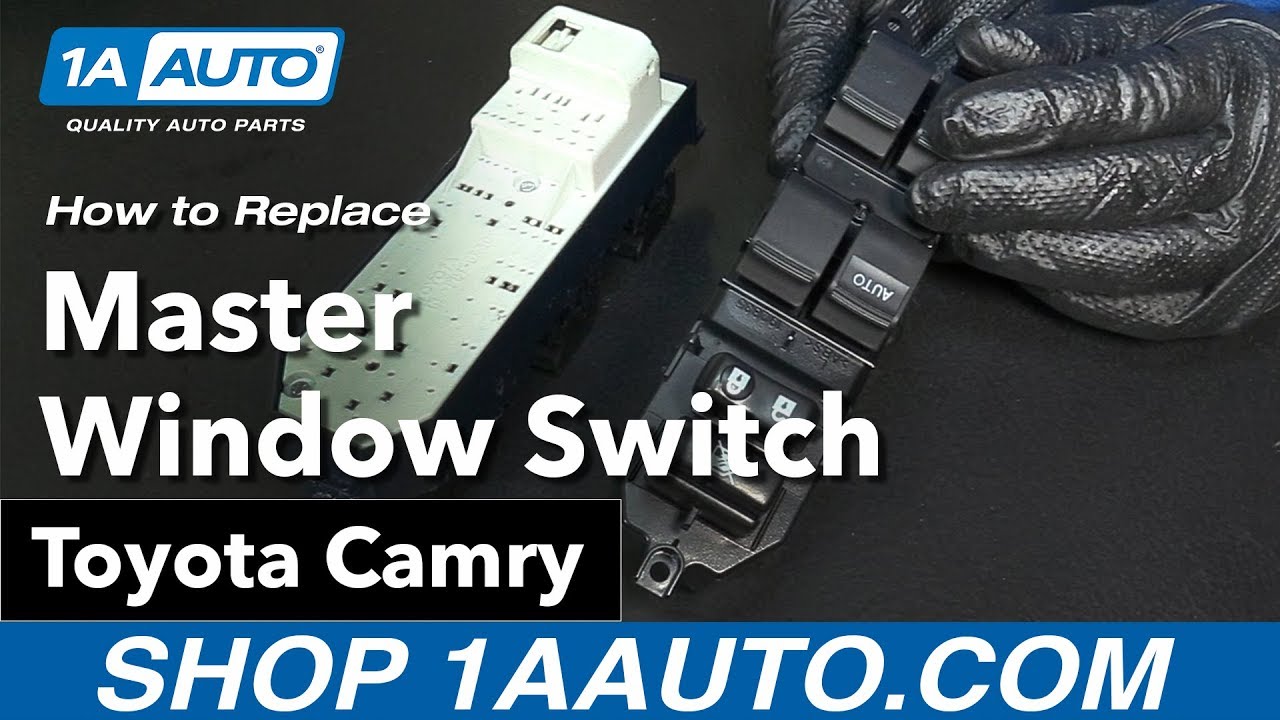
How to Replace Master Window Switch 2006-11 Toyota Camry
How to Replace Master Power Window Switch 2007-14 Toyota Camry
Created on:
Tools used
Phillips Head Screwdriver
Trim Tool Set
1. Removing the Door Panel
Pry the courtesy light out of the door panel with a trim tool
Disconnect the courtesy light electrical connector
Pry the trim piece off the mirror base with a trim tool
Pry the grab handle panel off the door handle with a trim tool
Pry the trim piece out of the door handle with a trim tool
Pry the clip out of the front of the door panel with a trim tool
Remove the Phillips screw inside the door handle
Remove the two Phillips screws from the grab handle
Pry out the door panel clips by hand
Lift the door panel off the door
Unclip the door lock cable from the door handle
Pop the door handle out of the door
Disconnect the wiring harness from the door panel
Unclip the wiring harness from the door panel
Disconnect the door latch cable from the door handle
2. Removing the Master Window Switch
Remove the three Phillips screws from the window switch
Pull the window switch out of the back of the door panel
Unlock the window switch electrical connector
Disconnect the window switch electrical connector
3. Installing the Master Window Switch
Connect the electrical connector to the window switch
Lock the electrical connector
Push the window switch into the back of the door panel
Insert the three Phillips screws into the back of the window switch
4. Installing the Door Panel
Clip the white door cable into the top of the door handle
Clip the green door cable into the bottom of the door handle
Feed the courtesy light electrical connector through the door panel
Connect the electrical connector to the door panel
Clip the door handle into the door panel
Lift the door panel onto the door
Line up the door panel, using the locating pins
Push in the door panel clips
Insert the Phillips screw inside the door handle
Clip the trim into the door handle
Insert the two Phillips screws into the grab handle
Clip the trim onto the grab handle
Clip the trim piece onto the mirror base
Push the plastic clip into the front of the door panel
Connect the courtesy light electrical connector
Push the courtesy light into the door panel
Hi. I'm Mike from 1AAuto. We've been selling auto parts for over 30 years!
To remove this, take a plastic prying tool. You can get this from 1AAuto.com. Just kind of push in on this side. It'll pop it out. There's a clip there that you're trying to pop it out of. Push in the tab.
We're going to pop off the piece behind the mirror. You're going to get your fingers in there or use a plastic trim tool. It just pops to the two clips.
To pop off this grab handle here, use a plastic trim tool. Pry it up. Pop it out. Put that aside. Pull the door handle open.
Use the plastic prying tool to get in here. Pop that out.
Use the plastic prying too to get this clip out. If you can get the middle up, that helps unlock it, but sometimes when they're flush like that, it's difficult. This one snapped, but it'll still work.
I'm going to use a Phillips head screwdriver to remove the one that’s behind the door handle. There's one in here and one deep in here.
With these screws removed, the door panel is clipped around this edge and then it's going to lift off of the door frame. So I'm going to reach under here and pull it out. Do the same on this side. It’s free. Just be careful. The screws are in there so one just fell out. Put that aside.
You disconnect the door handles. That's the door lock. Pop this out. Pull it straight up. Same thing with this one. Pop it out. This whole piece actually came with it. That's fine. I guess that can stay in there.
Disconnect the main harness from the door panel. It's clipped up here. There's a lock that's on the other side. Push it in. Pull it down.
Door panel will come off. Pop this out. Pull it right off. Put that side.
To change the master window switch, which also has the power door lock button in it, it's got a sub-harness that's mounted to the back of this door panel. There's a lock on this. You could undo it by pulling it out, but it's a lot easier to remove the switch first. Don't get in here and start prying with a screwdriver. I'm going to show you how to unlock this, but you've got to take this out of the door panel first. Just take a Phillips head screwdriver. These are just little screws that are self-tapping into the plastic. They should come out pretty easy. I'm going to put them aside here. We've got all three screws out.
This will just pull straight out of the plastic. There's our master window switch, door lock switch, window cancel switch. We want to unplug it from the harness. Just kind of move it to kind of straighten it out. Pull back on this. It unlocks it, and then lets the whole harness pull out. There is a mechanism in here as you push it in to lock it, see if I can get it to go. Actually this might be on it, but you can see there's like a little lever in there. That actually locks into a keyway that's in here in the connector.
To install our new switch, I'm going to pull this down, leave it open, and then we'll put it together.
This is our old switch from our vehicle, and our brand new one from 1AAuto.com. It’s the same design, same type of type on here, same size. The plastic is a little different. It doesn't really matter, it should operate in the same manner. It's got the same lock here, so this will fit great and work great for you in your vehicle.
Take our new switch. Got the lock on the connector unlocked. It's going to match up with this tab that's in here. Put it in place, then push this in. Now it's locked in place. Put it up into the door panel. It should slide right in. Reinstall the three self-tapping screws. You don't have to over tighten them; they're just going into plastic.
Make sure you don't get these cables mixed up because they can fit in both position. The white one goes on top. Put the little lead weight in there. Flip it over. Clip it into place. Take the green one. You'll kind of know because one is longer than the other. They kind of fit better in their perspective spots. Put the little lead weight over there, just like the top one. Snap it into place. So one pulls the door handle. One locks and unlocks the doors.
We're ready for the door trim panel. So the top of this has some metal clips. They will slide onto the thin part of the sheet metal here. There is a locating pin here. Then you've got the clips all the way around and the screws that'll hold it on together.
Before we do that, we need to feed this into here. Just going to get it started. For our courtesy light, there's an opening in the bottom of the door panel for it. Just feed that through. A little trick to install this: get that started.
Take your door harness. Don't forget to plug that in or else nothing's going to work. It'll snap into place, so get this lined up. It's got a couple pins on the top and the bottom and those are going to push into these tabs.
Now we take the door panel and kind of push it up towards the window. Push it up towards the window and then down over. Sometimes you’ve got to push in on it. Just push down just like that. I can see the screw holes are lining up. I've got that where I want it. I'm just going to push in. That’s just going to capture all the clips.
I can reinstall the screws and install this small screw here behind the door handle. Our little trim piece has got all the clips. Pull this door handle out and get this front one captured first. Push that in place.
There's two large self-tapping screws. One's going to go in the top. One's going to go in the bottom here in this door pull handle. Start with the top on. With two screws installed, we can clip this back into place.
Install our little triangle piece that goes near the mirror. These two clips are here. Push right into place. There's this little clip here. This one kind of broke, but we push it in there. If you don't have it, it's not a big deal. It doesn't do too much. The rest of the door panel is secure.
To reinstall the courtesy light and plug it back in. Push that up into place. The door panel's reinstalled.
Thanks for watching. Visit us at 1AAuto.com for quality auto parts, fast and free shipping, and the best customer service in the industry.
Tools used
Flat Blade Screwdriver
Phillips Head Screwdriver
Trim Tool Set
1. Removing the Window Switch
Pry up the window switch panel with a trim tool
Disconnect the mirror control switch connector
Release the sliding lock tab to disconnect the second connector with a flat blade screwdriver
Remove the three mounting screws from the bottom of the bezel with a Phillips head screwdriver
Remove the main switch from the bezel
2. Replacing the Window Switch
Line up the main switch with the bezel
Reinsert the three mounting screws to the main switch with a Phillips head screwdriver
Reconnect both connectors
SWA60355
In Stock
Product Reviews
Loading reviews
5.00/ 5.02
2 reviews
5 Stars
4 Stars
3 Stars
2 Stars
1 Star
2
0
0
0
0
Pretty easy install
Robert
May 14, 2019
I installed the switch myself once I had the correct trim tool. I still required a new OEM power window motor, which was installed by Pro. Now both working fine. Auto button works as expected. Looks exactly like old switch. The only one concern is that there was a recall on this part by Toyota for possible electrical issue. Hopefully, this after-market switch was manufactured after the recall and included the fix, if necessary. I think Toyota recommended inserting some silicon insulation somewhere but not sure.
My 2013 Toyota Camry from driver side power window and door lock switch was easy to swap out the old parts and replace it with a new parts.
Customer Q&A
where can I get the wire to connect to the window panel?September 3, 2020
Tanya K
10
Thank you for your inquiry! Unfortunately, that is not something we currently carry. You may be able to locate via eBay or Amazon. If you have any other questions, let us know.
September 3, 2020
Jessica D
Customer service
877-844-3393
Monday - Friday 8:00am - 9:30pm ET Saturday - Sunday 8:00am - 4:30pm ET
Enter Vehicle Year Make Model
Specify your vehicle's year, make and model to guarantee fit.
Year
Make
Model
Options
Drivetrain
This part doesn’t fit a . Select from parts that fit.