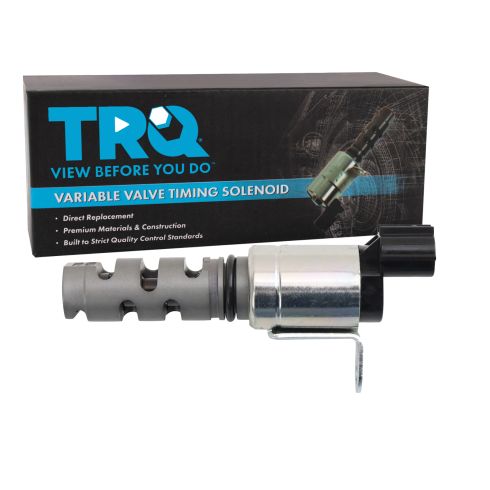
TRQ variable valve timing (VVT) solenoids are manufactured to precise specification using premium raw materials with anodized housings for maximum service life. To ensure peak performance, TRQ recommends replacing the variable valve timing solenoids in pairs (where applicable) to ensure a consistent oil flow rate and prevent premature wear of timing components. All products are fit and road-tested in our Massachusetts R&D facility to ensure we deliver on our promise of Trusted Reliable Quality.
Product Features
Anodized Housing: Prevents premature wear
Improved Oil Flow: Better fuel economy and reduced emissions
Direct Bolt-on Replacement: No modifications and pre-calibrated
Item Condition:New
Attention California Customers:
WARNING: This product can expose you to chemicals including Chromium (Hexavalent Compounds), which is known to the State of California to cause cancer, and birth defects or other reproductive harm. For more information, go to www.P65Warnings.ca.gov
Lifetime Warranty
This item is backed by our limited lifetime warranty. In the event that this item should fail due to manufacturing defects during intended use, we will replace the part free of charge. This warranty covers the cost of the part only.
Returns: Parts with electrical components cannot be returned once installed.
FREE Shipping is standard on Orders shipped to the lower 48 States (Contiguous United States). Standard shipping charges apply to Hawaii, Alaska and US Territories. Shipping is not available to Canada.
Expedited is available on checkout to the United States, excluding Alaska, Hawaii and US Territories as well as P.O. Boxes and APO/FPO/DPO addresses. Final shipping costs are available at checkout.
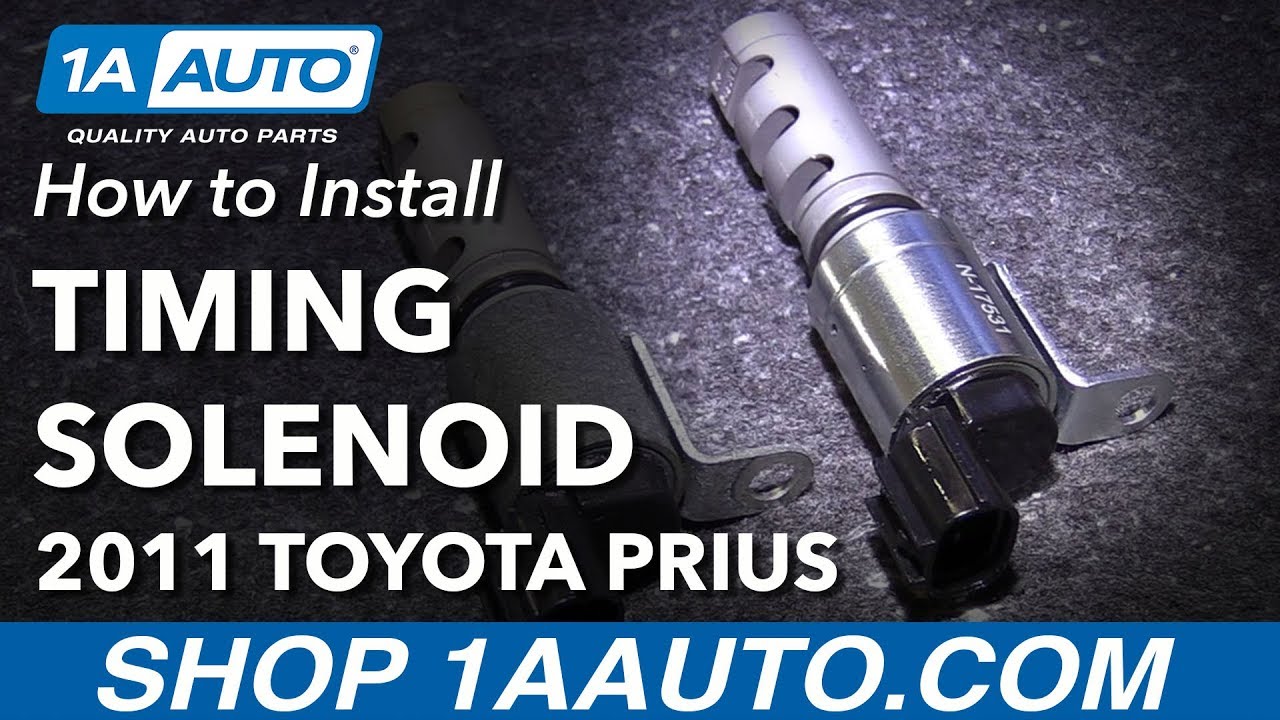
How to Replace Intake Variable Valve Timing Solenoid 2010-14 Toyota Prius
How to Replace Intake VVT Solenoid 2009-16 Toyota RAV4
Created on:
Tools used
Socket Extensions
10mm Socket
Ratchet
1. Removing the Variable Valve Timing Solenoid
Remove the plastic cover
Disconnect the wiring harness
Remove the 10mm bolt from the solenoid
Remove the solenoid
2. Installing the Variable Valve Timing Solenoid
Insert the solenoid into place
Tighten the 10mm bolt to the solenoid
Connect the wiring harness
Replace the plastic cover
Hi, I’m Mike from 1A Auto. We’ve been selling auto parts for over 30 years!
Remove the plastic cover. We have removed our cowl panel here, so you can see what we're doing better, but you can snake out this variable valve timing solenoid with the cowl piece installed, however, this gives us little better access and it's easier for you to see in a video what we're doing.
To remove this connector, we'll spray a little bit of water displacement oil in here to help free it up. It's got some dirt in it. Lock's on this side. We'll push it in. It's because you push the hole connector in this way, it'll open the lock. And then pull it off. Makes it easy to work it back and forth a couple of times. Try not to pull on the wires. If need be, use a little small flat bladed screwdriver to help you push the lock open. And there it is. Spray some rust suspension here. Use a 10 millimeter socket and ratchet to remove the 10 millimeter bold that's holding it into the head. Put the bolt and washer aside once I take it out.
With the bolt removed, you can kind of spin it this way. Then, it's sitting on an o-ring. Just have to work it out, back and forth and it should come out.
This is the original variable valve timing solenoid we pulled from our vehicle. Our brand new one from 1AAuto.com, same exact style design, same style connector, same mounting hole. This will work great and fit great for you.
Install the new one. Slide it into the same opening. The o-ring will fit pretty tightly. Slide it down. Get the bolt started by hand. It's a steel bolt going into the aluminum valve cover. You don't want to cross-thread it. I need to adjust the position of it. Tighten it up. You don't want to over tighten it. When it feels tight, just stop. Put the oil connector back in. It's keyed. It can only go in one way. It will click when it locks in place.
Put your plastic engine cover back on. These three rubber mounts, just push over these three ball sites, line it up with the oil cap hole. And that's it.
Thanks for watching. Visit us at 1AAuto.com for quality auto parts, fast and free shipping, and the best customer service in the industry.
Tools used
Socket Extensions
Flat Blade Screwdriver
10mm Socket
Ratchet
1. Removing the Intake Variable Valve Timing Solenoid
Pull the engine cover up to remove it
Locate the intake VVT solenoid on the rear passenger side of the valve cover
Disconnect the solenoid electrical connector
Remove the 10 mm bolt
Remove the VVT solenoid
2. Installing the Intake Variable Valve Timing Solenoid
Lubricate the solenoid gasket with oil or automatic transmission fluid
Insert the solenoid into position
Install the 10 mm bolt
Connect the electrical connector
Push the engine cover down onto the mounting pins
What's up, guys? I'm Andy from 1A Auto. In this video, I'm going to show you how to replace the intake VVT solenoid on this 2010 Toyota RAV4. If you need this part or other parts for your vehicle, click the link in the description and head over to 1aauto.com.
Just want to pull this cover off. Just grab underneath the cover, slide up, and up there and there is these retainers that hold it in and just push on little grommets right on those locations. Your intake VVT solenoid is on the back side here. It's similar to the exhaust solenoid. Just disconnect the connector right here. Push down on that and release that connector. Then, there's a bolt right here. We're going to take that bolt out first. I'm going to use a 10mm socket and an electric ratchet. You can use a regular ratchet if you don't have an electric one. Take that out. We can grab the solenoid, try to wiggle it back and forth a little bit. There's an O-ring that if there's any dirt or corrosion above the O-ring, it's a little bit tricky to remove the solenoid. Actually, so I can see it more, not that you have to do this, I am going to take these two nuts off right here just so I can move that wiring harness out of the way. Use the same 10mm socket and ratchet.
Slide this up. I'll just move that out of the way a little bit just so I can see, but you don't have to do this. This is just for the video. I am going to use a little water displacement oil. Just spray that down, let it soak a little bit, or some kind of lubricant. I'm going to take a straight blade screwdriver and just try to get in here a little bit. Just be careful, you don't want to mess up any of the machine surfaces. Be careful prying right here. You don't want to bend it if you're going to reuse it. Just work it back and forth. Just be careful doing this. Slide it up and there you go.
Now, take the VVT solenoid. I'm just going to take a little bit of transmission fluid, you can use engine oil or some other type of lubricant and just lubricate this before you slide it in and it'll just make easier installation. It's also a good idea if you're having problems with this and the solenoid had failed that after you do this job, you actually change the oil because the oil could be the cause of the solenoid failure. Just slide this in here. Just line it up. Don't force it. You want to get everything lined up because you don't want to mess up any of the machine surfaces. I'm going to slide that in just like that. I'll take the bolt, get the bolt lined up. Now, I'll just take a 10mm socket and ratchet and just snug this bolt down. Not too tight. Take the connector and line it up, lock it in place, and you didn't have to take this wiring harness off, but if you did, then install the wiring harness and then these two nuts, install those and tighten them down.
Slide it down. Take this cover and we want to line these little tabs up with these little pins right there. There's three of them. Just push it down and then you're good to go.
Thanks for watching. Visit 1aauto.com for quality auto parts shipped to your door. The place for DIY auto repair, and if you enjoyed this video, please click the subscribe button.
VTA93431
In Stock
Product Reviews
Loading reviews
5.00/ 5.07
7 reviews
5 Stars
4 Stars
3 Stars
2 Stars
1 Star
7
0
0
0
0
Parts services
Mitch
August 13, 2021
Excellent business to deal with great prices and customer service.
Solved my problem
Sal
April 10, 2022
Fixed code P0080 on my Prius.
Thanks for the instruction video
Karl
November 1, 2022
Nice
Mauricio
March 12, 2023
Good
Probably needed all these parts freshened up anyways.
Randy
February 17, 2024
This part seems fine and I installed it. My 2012 Prius 2 will not accelerate the engine or charge the hybrid battery, I have changed the fuel pump, fuel injectors, hybrid battery and 12 volt battery and charge controller, egr valve, MAP and MAF sensors, Intake manifold, throttle body and accelerator pedal, pcv valve, timing chain sensor and now the Valve timing solenoid. The car idles great and no check engine lights. Nothing has helped, next step is taking it to Toyota.
Vladimir
March 26, 2024
Perfect fit and works like it should
2015 RAV4 XLE
Clay
September 1, 2024
So far so good. Seems to be an exact replacement easy change out.
Customer Q&A
how do you install 2010 Toyota Prius variable timing solenoid replacement?July 21, 2017
Perry F
will this let car run over4000 rpm and correct the misfire ?December 14, 2017
C O
10
We are unable to guarantee this as a proper resolution. Are you getting any sort of check engine light code we could research? If yes, please provide the code number.
December 14, 2017
Alex P
10
Yes it will all though there are screens you wanna clean before installation of the new part
November 24, 2018
J A
10
Suggest u clean or replace screens if u have speed limit issue
November 3, 2019
Fred M
On my car there are two VVT solenoids. At least I think theyre both VVT I see here an intake vvt solenoid which one should I get?March 18, 2020
Marques P
10
Thank you for the inquiry. We would recommend having the vehicle diagnosed in order to determine which one you actually need. We are not able to give diagnoses.
March 18, 2020
Curtis L
2009 corolla getting a 0300 code. ?June 23, 2021
John D
10
There could be multiple reasons why you're having this particular problem. We suggest taking your vehicle to a nearby reputable shop to identify the cause. Once you know the cause, we'll be happy to see if we carry the parts and how-to videos needed for your repair.
June 23, 2021
Emma F
What the code for vacuum leak or maf sensor?October 23, 2021
Chris S
10
Hello, I apologize we do not have that kind of information you can try searching on google.
October 23, 2021
Ricale A
P0015 code 2009 Toyota RAV4 2.5l What part would fix this?November 1, 2021
John D
I have a dual vvti engine will this fit the exhaust side too or is it just for the intake side?September 9, 2023
Jasir P
10
No
September 10, 2023
DAVID R
10
This is unable to fit for any other side other than the intake.
September 12, 2023
Emma F
Customer service
877-844-3393
Monday - Friday 8:00am - 9:30pm ET Saturday - Sunday 8:00am - 4:30pm ET
Scion is a registered trademark of Toyota Motor Corporation. 1A Auto is not affiliated with or sponsored by Scion or Toyota Motor Corporation.See all trademarks.
Enter Vehicle Year Make Model
Specify your vehicle's year, make and model to guarantee fit.
Year
Make
Model
Options
Drivetrain
This part doesn’t fit a . Select from parts that fit.