Replaces
2009 Toyota Rav4 L4 2.5L without Integrated Transmission Oil Cooler Radiator TRQ RDA83051
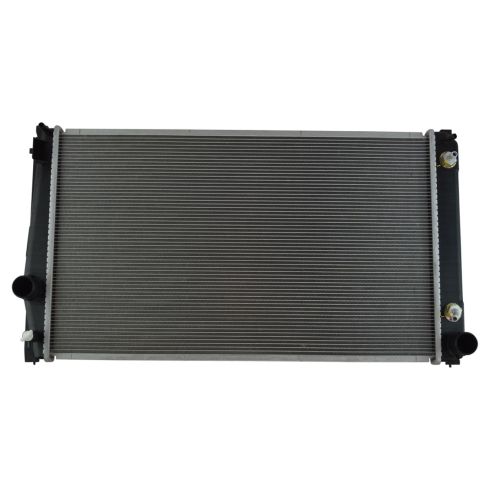
RDA83051
This part doesn’t fit a . Select from parts that fit.
Specify your vehicle's year, make and model to guarantee fit.
This part doesn't fit a . Select from parts that fit.
Buy in the next and
Get it by: Wednesday, Dec 10 with expedited shipping
Recommended for your 2009 Toyota Rav4
Frequently bought together
Specify your vehicle's year, make and model to guarantee fit.
This part doesn't fit a . Select from parts that fit.
Part Details
- No
- Yes
- 1.5 in
- Top Left
- Yes
- Left & Right
- No
- Male
- 15.88 in
- 0.75 in
- No
- Plated
- 26.38 in
- Bottom Right
- Aluminum
- 1.5 in
- Cross Flow
- 3
- Plastic
- 1
Specifications
- without Integrated Transmission Oil Cooler
- L4 2.5L
About TRQ:
TRQ is a trusted brand dedicated to making every repair a success story by combining premium parts with easy installation. Each TRQ part is engineered by a team of automotive experts to meet or exceed OEM standards, delivering enhanced performance and maximum longevity. With rigorous in-house testing, the brand ensures superior fit and function across every product line. TRQ also provides customers with best-in-class, step-by-step installation videos—so you can complete repairs with confidence, whether you're a first-time DIYer or an industry professional.
Direct Fit Replacement
- Core thickness equal to the OE part. If radiator core is slightly thinner than the OEM, this can decrease overall performance and lifespan.
Premium Aluminum Core
- Engineered for top performance.
- Provides efficient cooling and heat-transfer.
100% Leak Tested
- Built to strict quality control standards.
Attention California Customers:
![]() WARNING: This product can expose you to chemicals including Lead and Lead Compounds, which are known to the State of California to cause cancer, and birth defects or other reproductive harm. For more information, go to www.P65Warnings.ca.gov.
WARNING: This product can expose you to chemicals including Lead and Lead Compounds, which are known to the State of California to cause cancer, and birth defects or other reproductive harm. For more information, go to www.P65Warnings.ca.gov.
Lifetime Warranty
This item is backed by our limited lifetime warranty. In the event that this item should fail due to manufacturing defects during intended use, we will replace the part free of charge. This warranty covers the cost of the part only.
Packaging:
Radiators may incur bent cooling fins or small imperfections during shipping or manufacturing. A few bent fins or small dents and scratches do not affect the fit or the function of the part. Neither our 60 Day satisfaction guarantee, nor the manufacturer's warranty, cover these types of insignificant damages.
FREE Shipping is standard on orders shipped to the lower 48 States (Contiguous United States). Standard shipping charges apply to Hawaii and Alaska.
Shipping is not available to a P.O. Box, APO/FPO/DPO addresses, US Territories, or Canada for this item.
Expedited is available on checkout to the United States, excluding Alaska, Hawaii.
Final shipping costs are available at checkout.

Created on:
Tools used
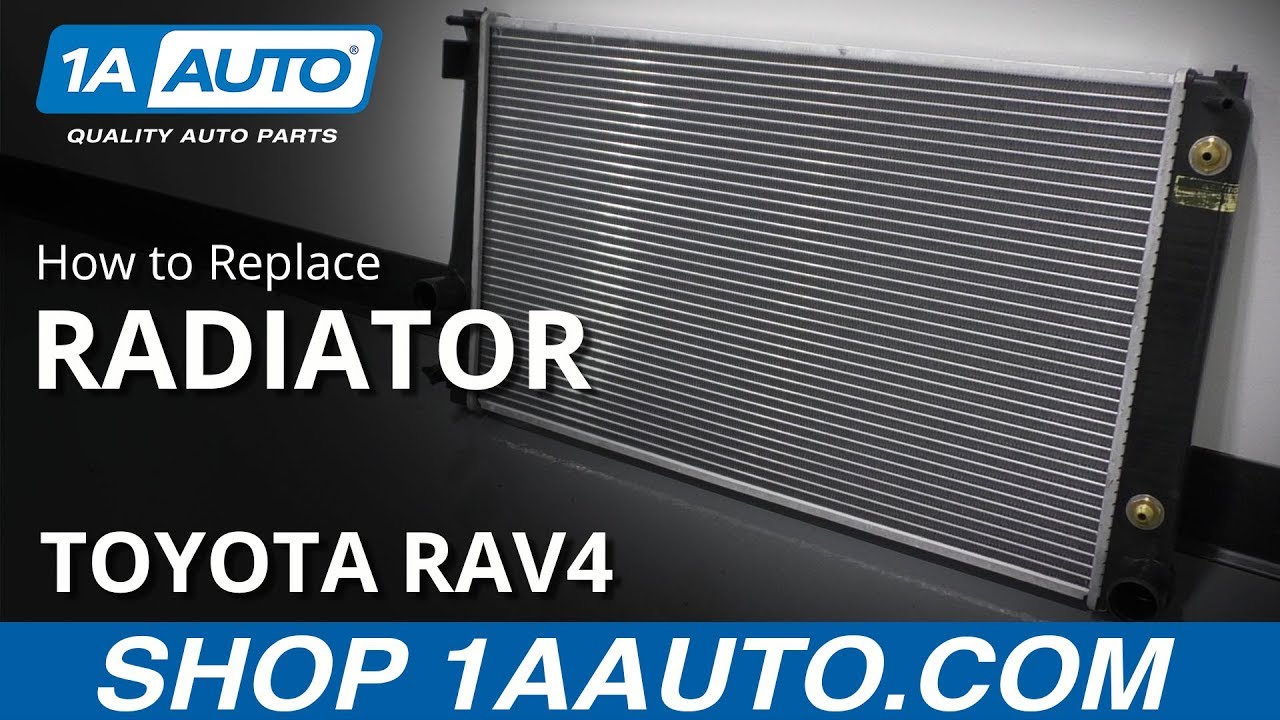
What's up, guys? I'm Andy from 1A Auto. In this video, I'm going to show you how to replace the radiator on this 2010 Toyota RAV4. If you need parts for your vehicle, click the link in the description and head over to 1AAuto.com.
From underneath the vehicle, we need to remove this panel right here. This one was pretty much falling off. So there really wasn't much holding it on. But you should have some push pins right here and right here, right here, right here, and over there. And then this one didn't have any of these fasteners, but there's some type of screws that go there. So you want to pull those off and then slide this down and slide it out. Get that out of your way. All right. I want to loosen up the drain on the bottom of the radiator right here. It's below the radiator hose, right there, so loosen that up. Make sure you have a drain bucket underneath. And actually, it's pretty tight, so I'm going to take some pliers. Now be careful with this because if it breaks then you're going to have to replace the radiator. If it doesn't move with pliers easily, then don't even bother with it. Just drain it with the hose or something else.
And there we go. I'm just going to let that drain slowly. Now I'm going to take the cap off. This is going to make it drain a little bit faster. A little bit faster. I want to pull this trim panel off. Take these little push clips out. What you do is you push down just a little bit on the clip and just slide it out. Just use a pocket screwdriver or a pick. Just grab that panel, slide it out. Before we take this radiator support bracket off, it's a good idea to mark this. Just take a felt tip pen mark around the bolt hole because we want to put it back pretty close to where it came off. And then my mark right here and right here. You can also mark that bolt. And we'll do the same for the other side.
I'm going to use a 10-millimeter wrench and disconnect the negative terminal on the battery. Just slide that off and out of the way. We're going to take this battery bracket off. I'm going to use a 10-millimeter socket and a ratchet. Now it's a good idea to have the battery disconnected when you do this. You don't necessarily have to, but it's just safe practice and you don't arc anything out by accident. Loosen that up. I'm going to loosen this one up, as well. Now this one is connected to a rod and there's a hook down there. I'm going to slide that hook out. You don't have to take that completely off. This one you do. And slide that battery bracket out of the way. If you have these retainers on the wires, you're going to have to either cut them or try to slide them out. Take that away.
Next we'll take this hood latch cable off. Just disconnect it right here, slide it out and then slide the retainer ball out. Disconnect it from these clips right here. You don't have to disconnect it from this clip, but if it helps just slide it out of the way. Now, this, I don't want to forget this, so I'm going to just put this right here in this position and have it leaning out of where the hood would be so that if I close the hood, I see that that's there. Now I'm going to take a 10-millimeter socket and a ratchet, take these two bolts out, one right here and one right here. There's a coolant crossover pipe or just a coolant pipe that goes from the reservoir to the other side of the radiator. Take that off. Take that, slide that out of the way.
I'm going to take these two radiator support brackets out. Just use a 12-millimeter socket and a ratchet. Grab my electric ratchet, pull that out. Pull that out like that. And do the same for the other side. Now I'm going to use a 12-millimeter socket and ratchet, and take these bolts out, and then same on the other side. It's four of them total. Loosen that up. Loosen that up. Just slide this up and set it aside.
Now I'm going to use a 12-millimeter socket, extension, and ratchet and take these two bolts out, one here and one on the other side. Just take a pocket screwdriver and put it behind that clip there, and then it's clipped in right here too. And you can slide that cover off. All right. We're going to take this hose off up top here and this one as well. I'm just going to use these hose pliers. You could use regular pliers if you want, but these make it a little bit easier. Just slide that there. I'm going to slide this one as well. Slide the clamp. And we're going to take a pick and just slide it under the hose. You can grab the hose and twist it and slide it off. Just slide this hose out of the way. Try not to hit the metal part on the positive terminal on the battery. And then same on this side, although we did disconnect the battery, so it's not as big of a deal, but if you didn't disconnect the battery. All right. Slide that off there just like that.
We want to disconnect this wiring harness from the coolant fans. Just take a trim tool, get underneath here. There's some clips that hold the wiring harness on. Try to get underneath those clips. Pop those off. There's three of those. There's another one right here, so there's four. Just like that. All right. We're going to release these connectors. There's a little push tab right here. Push down on that and slide the connector off right there. If you need to, you can use a pocket screwdriver and just pry a little bit. Be careful though, you don't want to break it. Same with this one. So I'll just use the pocket screwdriver on this one. Push it down a little bit and disconnect it. Set this aside.
Now keep in mind the black connector is going to go on the passenger side and the gray connector is on the driver's side. All right. And then disconnect this hose on the driver's side. Slide this clamp down the hose. Now if you need to, you can use the right-angle pick or you can try to twist this a little bit. And it's coming off pretty easy. Just make sure you have a drain bucket underneath here. Pull this off just in case any coolant comes out. Not too much. So that was good. All right.
So on the passenger side, I need to take off that lower radiator hose right there, but the clamp is underneath the hose. It's not on the top side, so what I'm going to use is these style hose clip pliers that have a cable. So when I tighten this up, this is going to tighten on the clamp. You can always try to go from underneath the vehicle but might be a little bit tricky. And just squeeze. And that's loose and now I can move the hose clamp. Take the tool off. And again, I'm going to have a bucket underneath this hose when I take it off. Just wiggle it. If you need to, use the pick to try to loosen this up. But this is moving so it should be all set. And there we go. A little bit of coolant came out. Not too bad. All right.
Lift up on the fan and radiator shroud. Just slide it up. We're just going to push it back a little bit because now we want to take the condenser off. Just slide this out on the driver's side and try to slide it out on the passenger side. Might have to maneuver it a little bit. Just angle this down a little and slide that out. Just be careful with it, you don't want to damage it. There we go. Slide it out. We can just grab this whole radiator and fan shroud and slide it up, just like that. All right.
Now I'm going to take this bolt off underneath. I'm going to use a 12-millimeter socket and a ratchet. Then we'll do the same with the other side. Just grab the fan shroud, slide it, separate it from the radiator. Here's the old part. Here's the new radiator from 1AAuto.com. It has the same tanks on the side as the original. Same fittings for the coolant pipes. Same drain on this side, same fittings, but it also has an extra cooler in it if you have a transmission cooler. If not, it's okay. Get yours at 1AAuto.com and you'll be ready to rock and roll.
All right. If any of these came off with the fan shroud, you're going to want to take these off and re-install those in the vehicle. Bring that over here because they're going to go down here. I'm just going to sit there. Just pay attention if when you're reinstalling it, just make sure those are there. It's a lot easier. All right. Just to make this easier, I'm going to actually flip these fans over and then we'll slide the radiator onto the back of the fans. So this happens to be the driver's side of the fans where the drain was, so that's going there. This is going to go like this. There is some alignment pins right here. Going to line those up right there and right there. Lind those up and then we'll put the bolts in from underneath. All right. Take those same bolts, get those started on this side. And same with the other one over here. With that 12-millimeter socket and ratchet, and snug these up. Not too tight, just snug. The same with this one. That's good.
And if your vehicle has an oil cooler, you're going to want to add these two fittings depending on where the old ones were. One's going to go here and one's going to go here, just like that. These come with the radiator. And that's another thing, if when you were removing it after you had all the coolant hoses off, if you had these lines on there, you're going to want to loosen those up. So put that like that and we'll just snug these up. That way in the future, if you wanted to add a transmission oil cooler, you could. It's already right there and just add the hoses.
All right. Just slide this assembly back in position, just like that. Okay. Now, this might just take a little bit of maneuvering to try to get this back in position. Just be careful with it, not to break anything. Basically, there's two little pins on the bottom of this that you want to line up with the two little holes right there. Get those lined up. All right. So I got those two little tabs in there. What helps a little bit is if you grab this hose right here, you're able to maneuver the condenser a little bit, but you really got to have the radiator and fan shroud far forward to get it to line up. It might take a little bit of practice to get it in. All right.
So now we're just going to grab this whole assembly, we want it to get it lined up with those other grommets on the bottom. And you might have to check from underneath just to make sure you're lined up. It looks like I'm lined up. You can try to feel down there and you can just make sure they're lined up, so that's good. Now I'm going to reinstall this lower radiator hose while I'm here. Just get that started, right there. Now I'll use this hose clamp tool with the cable, put this on the hose clamp and reposition that. If these hose clamps feel weak or if they're broken, you're going to want to replace them. Can always replace them with a worm clamp like that. And then just squeeze right here. And position that hose clamp and it's good right there. Loosen that up. We're going to install this hose. It's going to go right here. Just slide the hose into the bracket on the fan shroud and use these hose clamp pliers or some regular pliers that work. Squeeze the hose clamp and reposition it. There we go.
Now we're going to install these hoses. This one goes to the reservoir right there, and then this is that crossover pipe that goes to this side over here. Slide that in position. Make sure you don't put it on where the transmission cooler would go. And if you have a transmission cooler, you're going to want to hook those up as well. Now we'll take these hose clamp pliers, install these hose clamps in the right position, just like that, and same with this one. Get that lined up right there. I like to put it in the exact same spot where the old one was, that way it seals up better. All right.
Let's slide this cover on, this plastic trim piece or upper radiator support. And this is going to slide, it's going to slide and connection in right here. Just get that lined up. I'm not going to snap it in yet. I just want to get it lined up. Just try to slide the radiator in position and put the bolt in. Get that bolt started and we'll do the same with the other side. Once you get those bolts started, then I'm just going to lock these in place like that, just like that, and then I can tighten down the bolts. Just use a 12-millimeter socket and a ratchet and just snug them up, not too tight, just like that.
Now we'll plug the wiring harness in. Connect the gray ones to the driver's side. Lock it in place. And the black one on the passenger side, just to line up the connector, lock it in, and push all these locking tabs in. Then hold the wiring harness down. Just like that. Good. Now we'll take the upper radiator support, get this lined up. Just make sure this hose is in the right position, just like that. All right. Then, take these bolts, get this one started and this one started, and same with over here, that one and that one. So we marked this, so we want to tighten these down in the exact same location we took them out. Just take a 12-millimeter socket and ratchet, tighten them down. That looks like it's lined up perfect. And same with that one. So this other side should be good to go and same with this one.
Before I do anything else, I want to make sure I hook up this hood cable. Just line that up. Actually, we're going to put the ball into the latch first and then lock that in place. Connect that right there and right here, just like that. I'm going take this radiator support brackets, just line these in position. There's two little tabs right there and right there. Get those lined up. I'll take these bolts, get the bolts started. And tighten these down, use a 12-millimeter socket and a ratchet. Snug those up. Take these bolts, get this bolt in here and this one in here. Take a 10-millimeter socket and a ratchet, tighten these up. All right.
We're going to connect the negative terminal on the battery. Take a 10-millimeter socket, I mean 10-millimeter wrench, tighten this down. Just snug that down and then just make sure, wiggle it, make sure it's nice and tight. What you want to do is make sure that coolant drain is closed all the way. Just grab it and just give it a twist. You can try loosening it and just snug it up. You don't want to tighten it too tight, just finger tight and then maybe just a little bit more, so that's good. So if you have this panel, just line this up, right like that. Just position that there. So if you have the screws or bolts that go in there, put those back in. And any of the push pins, they go in there, there. There's a couple of other spots, there and there, right there and there. And then we just take this cover, and just slide this back in position like that, make sure everything lines up.
And now we're just going to have to reset these pushpins. Just push this tab back so the centerpiece is popping out like that. Slide it in position and then push the button down so it's flush. Do that for all of them. All right. Now we're going to take this coolant funnel, and this for this particular vehicle, I don't need any adapters. I can just put this coolant funnel here. This funnel comes with different adapters. We actually sell this at 1AAuto.com if you want one.
And we're going to take the appropriate coolant, you're going to want to check the owner's manual and make sure you use the right coolant for the vehicle. And we'll fill it up. And as you fill this up, it may take a little while, so you might find that the reservoir completely fills up with coolant, and then just let the vehicle sit for a little while. It's going to have to bleed itself into the engine. There may be some air pockets, so just be patient and fill it up and let it bleed. As you can see, it's about two minutes later and it drained back down. So just keep doing that. Fill it up, let it sit for a minute, watch it drain. So once you've noticed that the level stays at one level for a little while, what you can do is go over to the radiator hose and give it a squeeze and see if you can get any air bubbles out of it. See if we can get it to bleed a little bit more. It looks pretty good right there.
Then what you're going to want to do is start the vehicle, let it run, put the heat on low speed and monitor the coolant temperature. Make sure the coolant temperature does not get over 210 degrees or into the red zone. And as long as you feel heat, it should be good. And then you're going to shut the vehicle off for a little while. And then once it cools down, recheck your level and adjust accordingly. Take the funnel out. Take the cap, put the cap back on, lock it in place.
Thanks for watching. Visit 1AAuto.com for quality auto parts shipped to your door, the place for DIY auto repair. And if you enjoyed this video, please click the subscribe button.
RDA83051
877-844-3393
Monday - Friday 8:00am - 9:30pm ET
Saturday - Sunday 8:00am - 4:30pm ET
Specify your vehicle's year, make and model to guarantee fit.
This part doesn't fit a . Select from parts that fit.


