
★★★★★
November 17, 2024
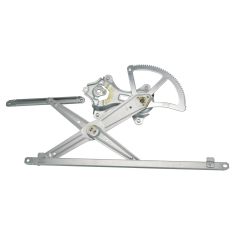
Much lower quality than oem. Spring looks like it will pop off

Replaces







About TRQ:
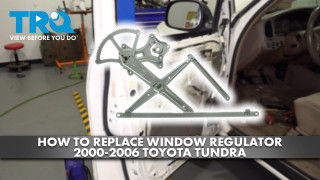
TRQ is a trusted brand dedicated to making every repair a success story by combining premium parts with easy installation. Each TRQ part is engineered by a team of automotive experts to meet or exceed OEM standards, delivering enhanced performance and maximum longevity. With rigorous in-house testing, the brand ensures superior fit and function across every product line. TRQ also provides customers with best-in-class, step-by-step installation videos—so you can complete repairs with confidence, whether you're a first-time DIYer or an industry professional.
Product Features
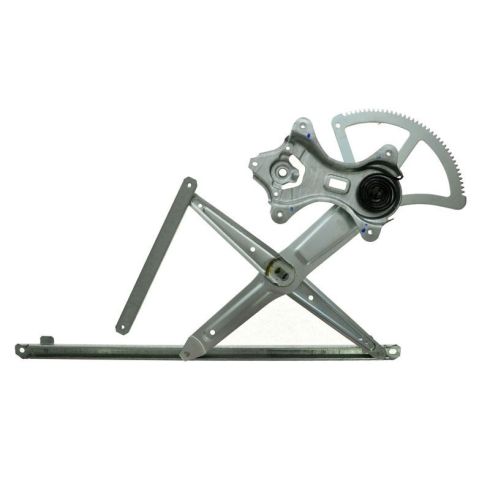
Note: This window regulator is designed to work with factory style motors only. Due to variations in aftermarket designs, replacement motors may not have the correct gear style.
Attention California Customers:
 WARNING: This product can expose you to chemicals including Lead and Lead Compounds, which are known to the State of California to cause cancer, and birth defects or other reproductive harm. For more information, go to www.P65Warnings.ca.gov.
This part fits 2 vehicles spanning 2001-2007.
| Year | Make | Model | Description |
|---|---|---|---|
| 2001-2007 | Toyota | Sequoia | Toyota Sequoia Front Driver Side Window Regulator TRQ WRA52457 |
| 2004-2006 | Toyota | Tundra | Toyota Tundra Crew Cab Front Driver Side Window Regulator TRQ WRA52457 |
| Brand Label | Part Number |
|---|---|
| Toyota | 698020C020 |
| Dorman - OE Solutions | 749-240 |
| CARDONE Reman | 8210027a |
| AISIN | RPT091 |
| ACI | 81508 |
| ACDelco | 11R359 |
| CARDONE Reman | 821103Q |
| Echlin | WLR1060 |
| Hollander | 125-58888L |
This item may be interchangeable with parts from other brands with the above part numbers. This information is provided only for reference and does not guarantee that the item you are purchasing is identical to parts with part numbers from the brands listed above. To confirm that this item fits your vehicle, use the above "Check Vehicle Fit" option.
Lifetime Warranty
This item is backed by our limited lifetime warranty. In the event that this item should fail due to manufacturing defects during intended use, we will replace the part free of charge. This warranty covers the cost of the part only.
FREE Shipping is standard on orders shipped to the lower 48 States (Contiguous United States). Standard shipping charges apply to Hawaii and Alaska.
Shipping is not available to a P.O. Box, APO/FPO/DPO addresses, US Territories, or Canada for this item.
Expedited is available on checkout to the United States, excluding Alaska, Hawaii.
Final shipping costs are available at checkout.

Created on:
Tools used
Brought to you by 1AAuto.com, your source for quality replacement parts and the best service on the Internet.
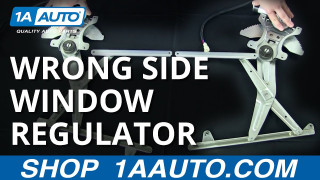
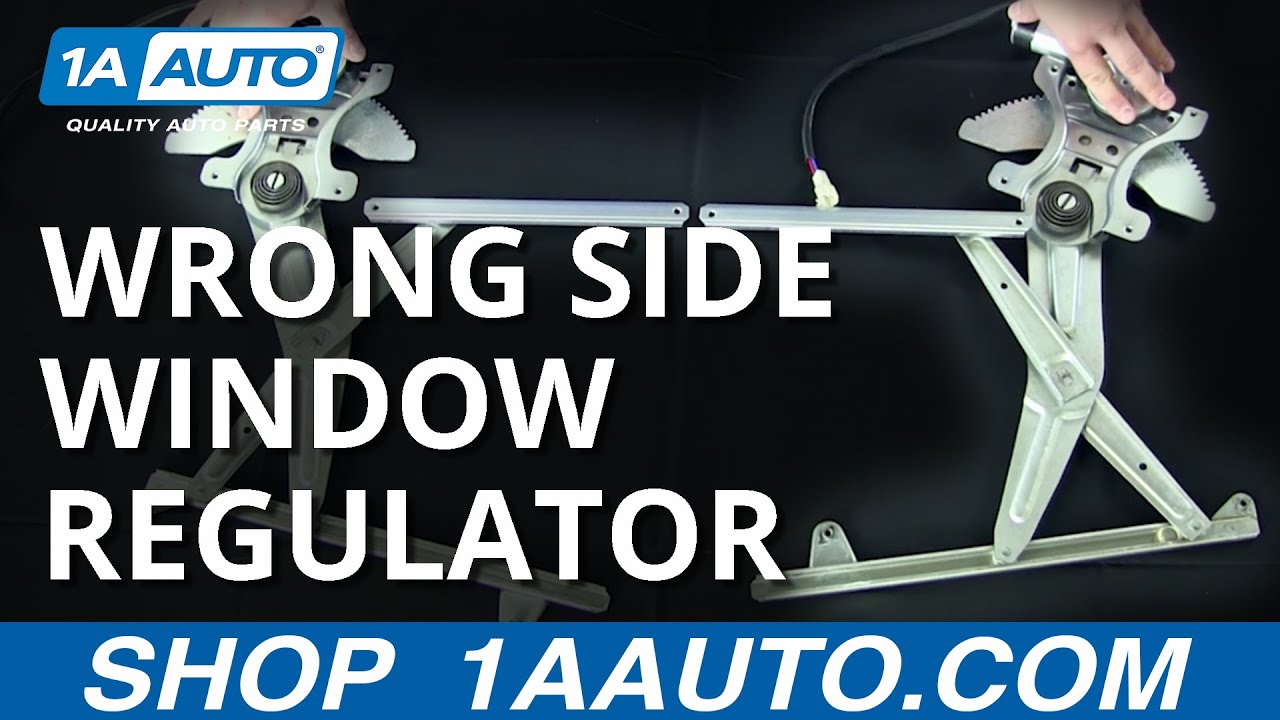
Hey, I'm Brian, I'm here to give you guys a little tutorial on some window regulators. The specific design is the scissor design. We actually get a lot of calls on these products here and the common question is: The part I received seems different than the part in my vehicle.
The scissor design actually has a flip design and we're actually going to show you how to fix this here. The most common thing that you want to do, or the first step you want to do is lay the parts out side by side. Try not to match them up in the car because this can get confusing. Take it out, lay them side by side, and what you actually see here is a same exact part for the same model vehicle in the same door. As the appearance shows here, they seem to be mirrored.
If you look down at the bottom here, we have the power window motor. This is the piece that is actually powered to lift and lower your glass. The next section down here is . you actually have your gear drive. Here's your mounting plates on both. As you can see, it's identical. You have your tension spring here. If you notice on the upper section here, it's kind of reversed. You're going to think normally, I get the wrong side door. You're going to give us a call and you want to express that to one of our customer service reps. I'm going to show you how to fix this.
Basically, pick this up by the base and you want to scissor or flip. This is how you're going to fix the issue. It's going to actually match the component as shown there. You can now see that both of these components here are the same part and you're ready for installation.
You should be good to go. Click on Subscribe or check us out at 1AAuto.com. We'd be more than happy to have you join on board and join the 1AAuto team.
Thanks for tuning in. We hope this video helps you out. Brought to you by www.1AAuto.com, your source for quality replacement parts and the best service on the Internet. Please feel free to call us toll-free, 888-844-3393. We're the company that's here for you on the Internet and in person.
Tools used
Brought to you by 1AAuto.com, your source for quality replacement parts and the best service on the Internet.
Hi, I'm Mike from 1A Auto. I hope this how-to video helps you out, and next time you need parts for your vehicle, think of 1AAuto.com. Thanks.
In this video, we're going to show you how to remove and reinstall a window regulator in this 2001 Toyota Sequoia. We do the driver's side; the passenger's side is pretty much the same procedure. Tools you'll need for the job are flat blade screwdriver both regular and small size, Phillips screwdriver, door panel clip tool or a putty knife would work, 10mm socket with ratchet and extension and some painter's tape.
Your battery's here in the driver's side. You want to disconnect your negative battery cable which should be the one closer to the fender. Loosen it, pull it up off the terminal and tuck it down on the side.
Start up here with a flat blade screwdriver. Carefully pry at the top and pull this is up and out. Then there's your switch panel here. Insert your screwdriver right in the middle of the front and it's a little unnerving. It eventually comes but you have to pry up pretty hard.
Your switch panel comes up and out and there's a little tab right here; press that down and disconnect. Next there's a little detent here. Pull this little plug out and then on your courtesy light here put your screwdriver in at the front and pry it out. There's a little metal clip. You heard it fall down in the door. It'll fall out in a second. Then you pull this right off. Then you'll need a smaller flat blade screwdriver. There's a little trapdoor in your door handle here. Just pry that out and you'll see a Phillips screw and then also here there's a little plug. Pry that off and there's a Phillips screw right there. Use your Phillips screwdriver. I'll fast forward here as we remove that screw, the one that is in the door handle, and then the one underneath the armrest as well. Take your regular screwdriver again, put it in right above the lock here and pry up and out on your bezel and then down and out, and pull that right out.
Now on the back edge of the door panel, there are two little pins. Push the center of the pins in and then these clips come out. Take a door panel clip tool and insert it into the back here, slide it up, you'll feel a clip, try to go around the clip, and pull it out. There's my little clip for my courtesy light. Go right around the door. If you don't have a door panel clip tool like this then a household putty knife works as well, as long as it has a tempered blade. Once you release the clips lift the door panel up and off.
A clip or two stayed behind. Just use a pair of needle nosed pliers and pull those out and just put them right back into your door panel. Even though I'm going through it in fast forward, you want to make sure you slowly and carefully pull your water shield down. Try not to rip it or stretch it too much.
As you are doing that, there's going to be three bolts that hold the speaker on; remove those three bolts and remove the speaker, as well. This is where your power window motor is hooked in up here first. I'm going to press this tab and pull that out. Then I'm just reaching up and releasing this clip that holds it. The regulator is held on by six bolts. There are two here that hold the track, and then there are four here that hold your motor assembly. I'm going to start by taking these two off. Right now, my window is all the way up in the up position. You'll see you can take the regulator apart and then move the window down and then unbolt it. I'm just going to fast forward here as I remove most of the bolts for the regulator and the track. You see once I loosened that up, it started moving a little bit. I'm actually going to hold onto the window while I take this one out. Now you can slowly let the window down and now you need to remove that bolt there and that bolt there to release the window from the regulator. Use a little fast forward as we remove those two bolts. With those bolts released, now the window's separate from the regulator. I'm going to pull the window back up. I raised up the window and secured it with some painter's tape while I work on the door. I'm going to take our regulator right out.
I threaded a bolt here and then we have to bring it up and get this arm here to go up like that. You need to make sure that this arm here slides in right there, and then bring this up, and put that so that bolt's right there and we can start our other bolts in. I'll fast forward here, again, as I just start in all the bolts. I start them all in first. Then I get my socket and ratchet. Tighten them up and you want to tighten them all nice and firm. You don't need to over tighten them though.
Here I'm going to reconnect my power window motor, the lead, and I've already reconnected my battery. Turn my key on. I can bring my regulator down so I can see both the holes here really well. Now here, I'm just removing the painter's tape and then slowly sliding the window down until it's contacted with the regulator. Then I'm starting our bolts. I'll speed it up here. Really important: make sure you start both bolts in first to make sure they're going and then tighten them up and again tighten them nice and firm. You don't have to over tighten them though. With the battery hooked back up, do a quick test. Everything seems to work really well.
Now I'm going to speed through. You want to put the lower part of your . actually you can put the whole water shield back on and reinstall your speaker and just make sure that you pull all your harnesses through the correct spot in the water shield. Reconnect your speaker as well as put the door handle cables through and reinstall your door handle as well.
To put the door panel on, put it up in place. Make sure you pull your window harness through and fish this harness through right down here. Just look back and make sure your pins are going in. Now, you just start from top to bottom. Make sure this goes down in correctly. Make sure that goes in. We'll fast forward here again as I put the screw in underneath the armrest and the door handle as well as the front one and put that clip on and the little cover panels. On these pins make sure you push them out, so the center is sticking out, and then you push it into place and lock it in by pushing the pin flush. Again, push it out so the pin's sticking out, put it in, and push the pin in flush to lock.
If you haven't already, reconnect and tighten up your negative battery cable.
We hope this video helps you out. Brought to you by www.1AAuto.com, your source for quality replacement parts and the best service on the Internet. Please feel free to call us toll-free, 888-844-3393. We're the company that's here for you on the Internet and in person.


Much lower quality than oem. Spring looks like it will pop off
Drivers door Window Regulator. It would have been nice to know as a first time installer of this window regulator that the section of the part that holds the window regulator motor moves around. When I took the window regulator out of the box, the section where the motor gets installed is more towards the center of the part. I didn't know you had to move it as I was watching their DIY installation video. Once I figured that out, all the bolts lined up with the regulator motor. I've submitted a short video describing that discovery.
Easy replacement fixed my issue.
Works great
This item was not an identical match for the original one that was in the car. There is a center 'hub' on the spring, and in the original part that hub is long enough to extend through a bushing in the door, providing extra support. Also, in the factory original part, the short arm is 1 piece and extends all the way back to the hug. The part that I received from 1A Auto had a shorter arm that was not connected back to the hug. This may not matter once the unit is installed because this part is held in place by screws through the door, but it is still a difference from the original. Finally, the short arm has a series of screws holes to mount the unit to the door. Some of the screw holes have a real nut pressed into the arm, but a few of the holes are just punched into the metal and could be easily stripped out if care isn't used when tightening the screws. In the end, I did install this piece and it solved the problem that I was having. The differences listed above are why I gave it
wrong part =fixed fast
Needed a regulator but there was no room at the Inn(Shop). So I ordered my regulator on Christmas day and had it installed (thanks to A1 Autos helpful videos) the day after New Years. Thank You 1A Auto!

WRA52457
