Replaces
2009 Toyota Tacoma V6 4.0L Starter TRQ STA03046
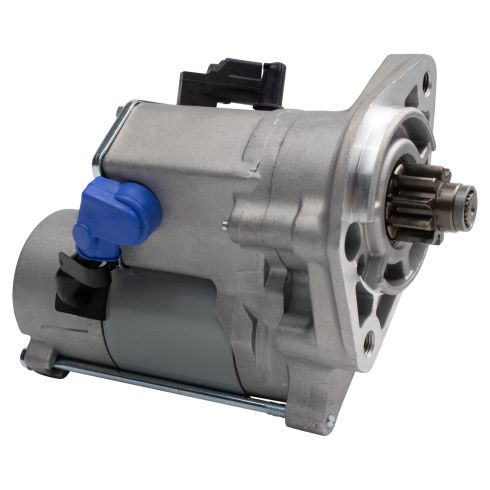


STA03046
This part doesn’t fit a . Select from parts that fit.
Specify your vehicle's year, make and model to guarantee fit.
This part does not fit a .
Buy in the next and
Get it by: Tuesday, Jan 20 with expedited shipping
Recommended for your 2009 Toyota Tacoma
Frequently bought together
Specify your vehicle's year, make and model to guarantee fit.
This part does not fit a .
Part Details
- 1.8 KW
- Offset Gear Reduction
- Aluminum
- 10
- 12 VDC
- Clockwise (Right)
- DENSO
- No
- Yes
- No
- No
- 4.91:1
Specifications
- V6 4.0L
About TRQ:
TRQ is a trusted brand dedicated to making every repair a success story by combining premium parts with easy installation. Each TRQ part is engineered by a team of automotive experts to meet or exceed OEM standards, delivering enhanced performance and maximum longevity. With rigorous in-house testing, the brand ensures superior fit and function across every product line. TRQ also provides customers with best-in-class, step-by-step installation videos—so you can complete repairs with confidence, whether you're a first-time DIYer or an industry professional.
Product Features
Returns: Parts with electrical components cannot be returned once installed.
Attention California Customers:
![]() WARNING: This product can expose you to chemicals including Lead and Lead Compounds, which are known to the State of California to cause cancer, and birth defects or other reproductive harm. For more information, go to www.P65Warnings.ca.gov.
WARNING: This product can expose you to chemicals including Lead and Lead Compounds, which are known to the State of California to cause cancer, and birth defects or other reproductive harm. For more information, go to www.P65Warnings.ca.gov.
Lifetime Warranty
This item is backed by our limited lifetime warranty. In the event that this item should fail due to manufacturing defects during intended use, we will replace the part free of charge. This warranty covers the cost of the part only.
Returns: Parts with electrical components cannot be returned once installed.
FREE Shipping is standard on orders shipped to the lower 48 States (Contiguous United States). Standard shipping charges apply to Hawaii and Alaska.
Shipping is not available to a P.O. Box, APO/FPO/DPO addresses, US Territories, or Canada for this item.
Expedited is available on checkout to the United States, excluding Alaska, Hawaii.
Final shipping costs are available at checkout.

Created on:
Tools used
- Disconnect the negative battery cable with a 10 mm wrench Raise and support the vehicle if necessary Remove the four 12 mm bolts securing the underbody shield Disconnect the starter electrical connector Remove the 12 mm nut securing the battery direct connection cable to the starter Remove the battery cable Remove the two 14 mm bolts securing the starter to the transmission housing Inside the engine compartment, remove the 10 mm bolt securing the bundle of brake line and hoses to the wheel well Inside the wheel well, remove the 10 mm nut securing the same bundle of lines and hoses Move the lines and hoses aside Remove the 10 mm bolt securing the metal bracket above the alternator for additional clearance Remove the starter through the top of the engine compartment
- Lower the starter into position from the top of the engine compartment Replace the metal bracket with the 10 mm bolt Secure the lines and hoses with the 10 mm bolt inside the engine compartment, and the 10 mm nut inside the wheel well Under the vehicle, position the starter Install then tighten the two 14 mm bolts Reconnect the direct connection battery cable with the 12 mm nut Reconnect the electrical connector Reinstall the underbody shield and secure it with the four 12 mm bolts Reconnect the negative battery cable and tighten it with a 10 mm wrench Test the starter
Hey friends, it's Len here at 1A Auto. Today I'm working on a 2007 FJ Cruiser. I'm going to show you how to do a starter. It's going to be a very easy job. I want to be the guy that shows you how to do it. If you need this or any other part, you can always check us out at 1AAuto.com. Thanks.
Okay friends, one of the first things we do when we're doing a starter is we want to make sure we pop the hood and we want to get to the negative battery terminal. The reason for that is because we want to make sure that there's no voltage going down to the starter when we take off the positive lead to the starter, and that wire might go like this and tap up against something metal under there. You don't want it to arc out. That could cause some big issues further down the line for all of your electrical things. You know, even your PCM, or ECU, or who knows. It might cause an issue essentially, blow a fuse.
What I like to do is get under the hood. I'll come to the negative terminal. I'm going to take off this 10 millimeter, or I'm going to loosen the 10 millimeter nut, just enough so I can get the terminal off. Put on my safety glasses of course. Take this, get it going. Nice and tight there. That's good. It's good to have it tight, but ... There we are. We'll set this right aside. It's's important to remember that when you take your battery terminal off, you're going to lose your radio stations, you're going to have to reset your clock, and in some vehicles you might have to reset the security for your radio. So keep that in mind. Usually your security code can be found inside your little book inside your glove compartment. Just keep that in mind.
We have this disconnected now. Now we're clear to get underneath the vehicle. If you got it on a lift, you want to raise it and support it securely. If you've got it on a jack and you're going to be on the ground, you want to make sure that you're safe, have it supported securely.
Okay. I'm going to take down this shield just so we have a better view of what's going on up here. The starter's located right up there. Can you get it without taking down the shield, I'm sure you can. For the purpose of the video, I'm just gonna show you how to take it down. Okay, just the shield. You got a 12, 12, 12, 12. Easy peasy. I like to give short bursts like that with my air gun. Gives vibration, helps break it free. If you're using something like a ratchet and a socket, you might have a little bit more of an issue where you'll get some twists and possibly break your bolts. Bolt number four.
Okay, now we'll get those other bolts out and we'll get the shield down. Hold my shield up. You always want to wear safety glasses when you're under here doing this stuff, you've got rust flying. Could be any sort of debris up on top of these, just like that, could fall down in your face. I'll dump this out in the trash can and we'll put it aside.
Right here is a little connector. I'm just gonna stick my small screwdriver right up along here. Push. Give it a little twist. We always take a look at our electrical connectors. That one looks like it's in good condition. I don't see any rust or debris or rainbow colors. I'd say it's good. The only thing is there's supposed to be a rubber around that. Looks like it's right there in the starter. We can get that out once we get the starter out. We just have to remember to grab it. Okay, don't forget that.
Anyway, we'll get this out of the way. This right here should be a little cover. We're just going to try to pop that off. Use whatever you need to to get that off. I'm just going to try to use a screwdriver or whatever I can. Hopefully I can use something to get it off. Come on Len. There it is. As you can tell, these like to hold moisture, so that's always nice. We've got a nice rusted nut up there. I'm going to hit that with some penetrant, give it a second, and then we'll remove it.
Okay, so now it's time to remove that nut. Right there. We've had penetrant on it for a little while now. We're going to use a 12 millimeter. That right there should have power going directly to it if we had the battery still connected. If you have your battery still connected, now is the time to disconnect your battery. Since I've already disconnected the battery, I'm going to go ahead and put my ratchet up here with my 12 millimeter. See if I can get it on there. There we are. I'm going to turn it counter clockwise. If it breaks the stud on the starter, it's really not a big deal because I'm replacing it. Oh yeah, nice. I think we got it.
There's our nut. I'll set this aside so we can recycle it. Take our cable off of there. Inspect the cable. Let's see if I can come around this way. You can see that there's some green. Green generally speaking is bad for electrical wires, but if you look where the wiring is, it doesn't look very green at all. If you saw green or blue running all the way up there, or even white, you'd probably have to replace this wire right here. We'll set that aside. Now we're clear to remove the bolts that hold the starter in.
We're going to use a 14. we're going to remove this bolt right here and this bolt right here, 14 millimeter socket. You do whatever you gotta do to get them out. I usually like to keep the first one that's almost all the way out, I'll leave it in a few threads and then I'll go ahead and fully remove the second one. That just makes it easier so the starter doesn't fall out and hurt me, which is always key. I prefer not to be hurt.
This one seems like it's loosening up. That's nice. It's kind of nice, right? See if I can do the same thing for this top one up here. It's close. This doesn't really give me very much swing here, not very much at all, so we might have to put together a little contraption and see what we can figure out that'll give us what we need to do this because I don't think I'm going to have enough here. I'm going to try this with my 14 millimeter wrench. See if I can break it free. Sometimes it's super tight. Holy crap. There we go. Cool. Okay, I'm gonna try with a ratchet wrench. Hopefully I get it loose enough here. They don't give you much room. Oh yeah, that's nice once you break it free. Come on. Top bolt, bolt number one. Next, second verse, same as the first. There we are. Set that aside. Okay. We can move our starter around.
Okay, so we've got the starter unbolted from the transmission there. Right here there's a whole packet of like brake lines and whatnot. Underneath there is a little 10 millimeter head bolt. I'm just going to grab that and see if I can get it out of here. Hopefully this will give me a little bit of maneuverability with the lines, so I should be able to squeeze that starter up and out without having to remove anything else. That's my plan.
All right, get that out of there. Set this aside so we don't lose it. Right here, not in there. Now we should be able to move this stuff around a little bit. Right here is where the first bolt came through from this side. This one there's a stud that comes through from this side and there's a nut right there, so I'm going to go ahead and try to remove that. I'm gonna use my 10 millimeter. Put it on. Hopefully at this point, once I get this off, I should be able to move those lines around enough to give me some space to be able to get that starter out of there without having to remove the exhaust manifold. I've got a nut here someplace. There it is. Okay.
Move stuff around a little bit for me, special treat. Hopefully it'll give me enough room. Grab this starter. Let me fix my stool. Right here there's a 10 millimeter on this big bracket. I'm just going to try to loosen that up, maybe even remove it, so I can get this little plate out of the way. Hopefully that'll give me some room and I should be able to get the starter out.
All this struggling is just basically so I don't have to remove the exhaust manifold, which is the way that you're actually supposed to do these. Whether you want to or not, that's your prerogative. My experience you are more than likely going to break a stud or two, or who knows, strip something out, and it's just going to be a nightmare. You're going to be in there with a drill. If I can avoid any of that, I am going to absolutely try my darnedest. Almost there. Come on baby.
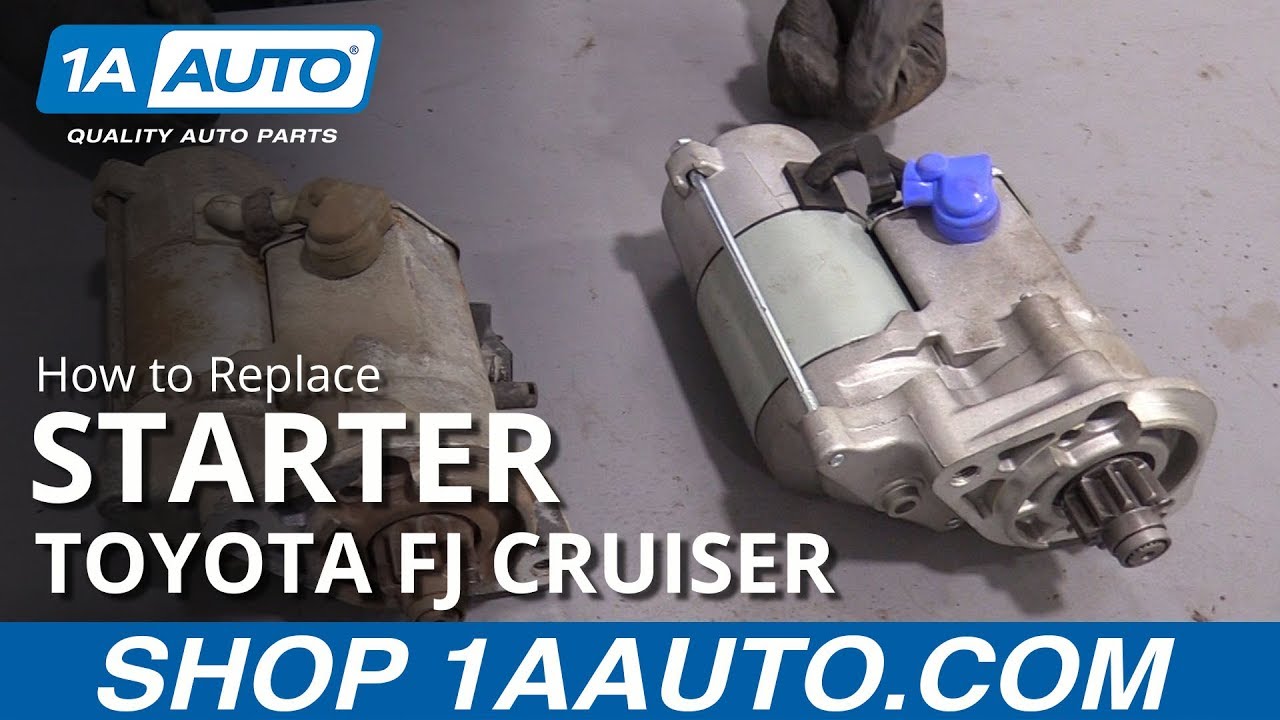
Here we are friends. A quick product comparison for you. We have our starter out of our 2007 Toyota FJ Cruiser. We just removed it. Over here we have our brand new quality 1A Auto part. As you can tell, they're both the exact same. They both have the electrical connectors here, and then the stud for the electrical connector there, or the wiring I guess you would say. That's the positive lead by the way. You've got the gears, right, that's the starter gear. We've got our mounting holes, there, there. It looks pretty easy. Turn it over. Exact same on this side. As you can tell, we have a quality part here. I don't see any reason why I wouldn't want to install it into the vehicle, so I'm going to go ahead and do it. If you need this or any other part, you can always check us out at 1AAuto.com. Thanks
All right, so we've got our new starter. We're going to go ahead and put it down in here nice and easy. Once I get it down, you know it might be harder to hold onto. You want to, of course, make sure you don't drop it. Let's see if we can get it down past all this stuff we've got here. It was a real tight fit. Like I told you, generally speaking, you're supposed to remove the manifold, but I prefer to avoid doing stuff like that if I can just because those manifold studs break sometimes. So just a little bit of extra work in here trying to get this through, but it will be worth it in the long run. Okay. Going down. I'm close.
We're getting there. Right now all we're doing is just trying to get it down there. Then once we're down, we'll button it all up from underneath. There we go. Okay, we'll leave that right there. Let's put our bracket back on that we removed. We've got our little bracket. You can see which way it came off because you've got a little circle. That's where the bolt was. Over here you've got a flat area. That's where, of course, the plate was it bolted onto. Got this right here. It's going to go through like that, right. That goes right here. We can get it screwed in. Okay. 10 millimeter, snug that right up. Okay, nice and snug.
We'll grab our little bolt. We remember that, that held these lines in place down here. I'm just going to see if I can get my hand down there, see if I can line up the lines, get the bolt through. Practically impossible. Okay. Let's see, see if I can get it with this ratchet. I might go grab my wrench again. Then we'll grab the the nut from inside the wheel well there. We've got our nut. It's going to go right on our little stud here. 10 millimeter. That feels nice and tight. Perfect. Let's get under the vehicle.
I've got my flashlight here. Let's see what we've got to do. We've got to drop down in. Looks like we're pretty close. Essentially all I want to do is line up my mounting holes, whatever you have to do to get your mounting holes lined up. No looks, I think that's it. I'm going to try getting one bolt started. As always, I'm not going to tighten it down completely until I get the other bolts started as well, but I am going to get this one a good amount of threads so that hopefully this won't fall out of place on me. Yeah. The other bolt hole is up higher. It's a little harder to get to, so I started with the lower one, of course. Why not? Just going to put on a little bit of penetrant on this bolt here. Might help me out getting it in up there. That's the size of the head right there. I believe it was a 14. Yes, 14 millimeter head.
Nice. Okay. That one started in. Awesome. Let's go ahead and tighten these down. We've got both these pretty close to bottomed out. I'm just using a wrench here. Get this as tight as I can. Yeah, that's nice and tight. The upper one's a little harder to get to. Let me give my hand a second here. Get my wrench up there. If you're lucky enough to have a swivel headed ratchet wrench like I am, you're not really struggling as hard as somebody that maybe doesn't, but basically just get it so it's bottomed out, and then get it as tight as possible. You could try to use a ratchet like what we used to take it off, you know a ratchet with extensions and wobbly whatevers. You could do that if you want.
I'm going to see how tight I can get it with this wrench and if I feel comfortable with it, that's the way it's going to be. If not, maybe I'll go ahead and set up a little contraption here. I've got my little contraption up there. Being very careful for my O2 sensor wiring. That's nice and tight. I'll show you what I built here.
Did a little bit of everything there. I'm gonna patent it. That's the tool you need to go ahead and do that one bolt.
All right, now we can start cleaning up the wires here and get those situated. Now to clean up our positive lead right up here, this is the one that has the constant battery power, I'm going to use this tool right here. It's available at 1AAuto.com, performance tool. I've got a little sanding disc on there. It's going to do that. It's going to clean it up real nice. That's my plan. You could also use sandpaper or whatever you have access to. You do you booboo. I'm just going light here. It's got a lot more power than I'm giving it, just so you know.
Let me see if I can turn it to show you. I'm not sure if you could see it or not, but it's nice and clean. I would say that that's clear to go ahead and go on to the starter. What we're going to do, I'm going to remove this nut right here. It's got the little washer built right onto it so you don't have to worry about trying to find one. Okay, I've got my 12. Get this on here. My nut. If I can get it started on the stud there. Okay. I'm going to tighten this up. Once I feel like it bottomed out, with the ratchet, once I feel like it's bottomed out, I'm just going to go, like let's say that's bottomed out, I'm just going to give it a little bit more. That's it. I'm not going to keep going. You don't want to break off that stud into the starter. Just keep that in mind.
See if I can get this. Okay. That feels, a little bit more here. Okay, so it's bottomed out. We'll give it a little wiggle. That feels pretty great. We've got our connector right there. We already checked it out. It's in good condition. You could use a little bit of dielectric grease if you wanted to, help keep moisture out of there. For the purpose of this video, I'm not going to worry about it. Just push that in. Give her a little tug. It's not going anywhere. Double check to make sure your wires aren't dangling, they're not going to get caught on anything. They're pretty secured. If they're not getting too close to the steering shaft right here, they're definitely not hanging down anywhere near here. I mean that would be impossible, but just make sure they're not in a point where they can get caught on anything. I would say that those look great.
We'll grab our little cover here. Okay. This is just going to go over that nut right there, and then up over the wiring. Yup, there it is. Okay, that's nice and covered. That just protects anything metal from hitting up against that positive lead and grounding out causing an issue. All right, let's move along.
Okay, so we've got our skid plate. We're going to go ahead and put it up. We've got a bolt hole there, there, there, and there. And of course here, here, there, and there. Let's do it. I'm just going to get it so it's hanging out up there where it wants to be. I should show you, there's a hook here as well. That hook goes inside this. Okay. Let it be known. There it is. See if I can find that bolt hole. I'm just going to go crisscross to start these. That way there I can let go of the shield and grab my other two bolts. There we are. It's not going anywhere. It's not going to fall down hurt me.
There it is. Start my last one. I'm not going to tighten any of them down until we got them all started of course. Cool. All right, now you can use your air gun, or your ratchet, or whatever you want, tighten them up. This is our last one here. Good to go.
Here we are. We're back up top. We're going to take this negative terminal and we're going to put it on here. It's going to arc a little bit. Don't be scared and jump it back off and then go ahead and try to do it again. Just go one and done. Okay. If you're not ready for it, get yourself jazzed up. All right. You can check it out, make sure it's not green or debris filled or anything like that. We're going to connect it right on there. We've got our 10 millimeter wrench ready to go. Here we are. Okay. Push it down as far as we can. Now we're just going to tighten it up. There we are. Let's see if I can get it. There we are. Nice and tight. Make sure that positive is covered. All right, let's start her up.
All right, here we go. Let's start her up. That sounds pretty great. Give it a couple of tries. Bob's your uncle.
Thanks for watching. Visit 1AAuto.com, your place for DIY auto repairs, for great parts, great service, and more content.
STA03046
877-844-3393
Monday - Friday 8:00am - 9:30pm ET
Saturday - Sunday 8:00am - 4:30pm ET
Specify your vehicle's year, make and model to guarantee fit.
This part does not fit a .


