Replaces
Frequently bought together
Item Condition:
New
Lifetime Warranty
This item is backed by our limited lifetime warranty. In the event this item should fail due to manufacturing defects during intended use, we will replace the part free of charge. This warranty covers the cost of the part only.
FREE Shipping is standard on Orders shipped to the lower 48 States (Contiguous United States). Standard shipping charges apply to Hawaii, Alaska and US Territories. Shipping is not available to Canada.
Expedited is available on checkout to the United States, excluding Alaska, Hawaii and US Territories as well as P.O. Boxes and APO/FPO/DPO addresses. Final shipping costs are available at checkout.


Created on:
Tools used
Hi, I’m Mike from 1A Auto. We’ve been selling auto parts for over 30 years!
In this video, we are replacing a Radiator Overflow Bottle in a 2010 Volkswagen GTI. If you need this part, or any other part for your vehicle, click the link in the description and that'll bring you over to 1AAuto.com.
This is the coolant reservoir we're going to be removing. We want to start by taking out this 10-millimeter bolt for the washer fluid fill. 10 mill out. Now we're going to pull the washer fill out of the way.
Next we're going to pull off the cap, make sure this is cold, because otherwise you're going to have pressure and it's going to have a lot of coolant come out. We're going to pull this hose off. You need some pliers to take off the clamp. We're going to use a right-angle pick and get in underneath here to break the seals. Sometimes you can just twist the pipe back and forth the hose. We'll go right around, that'll break the seal, and pull right off.
Next we're going to disconnect this connector. You're going to use a small flat-bladed screwdriver, pop it and pull it right out. We're going to pull this wiring harness out of your way. We're going to use a T-25 and an extension and a small ratchet. I'm going to get these two fasteners back here.
Make sure you want to have a drain bucket underneath because you're going to lose a little bit of coolant. Pull this out of the way. We are going to put a hose clamp on here so that we don't lose too much coolant, but there is going to be coolant in the reservoir you're going to lose. Take this clamp off, I'm going to use pliers again. Push down the hose. Grab the hose and pull, twisting. There's our reservoir.
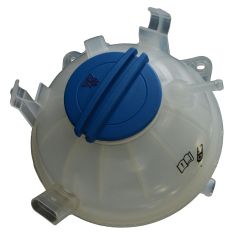
As you can see this is our old one. This is our new coolant reservoir from 1AAuto.com. They look identical. You can see the minimum coolant level specs right there. You can see it comes with a cap. It's the same as the original, they look identical. Coolant level sensor right there, you can see the connectors are the same. All the mounting brackets are all the same. You can order this at 1AAuto.com and be ready to rock and roll.
Hook up the lower pipe to the reservoir. Push it on. Once it's on, we can pull off this clamp, get it out of the way. We can move this hose clamp with a pair of pliers, just get it lined up and squeeze. Get it on there. It's best to try to get it in the same grooves that it was in before, or close. Get this down in here. Install this hose. With the pliers, move this hose clamp. Before we install these wires around here, we're going to install our T-25s. Snug it down. Remember, it's plastic, so you don't want to go too tight.
Install this wiring harness into these clips. Plug in our connector, until it clicks. Install the washer fill to the bracket. You can use a 10-millimeter socket and ratchet.
Now we're going to top off our coolant. You want to make sure you use Volkswagen approved coolant. When doing this, you're going to want to make sure you run your engine for a while before you drive, and recheck the level to make sure it's okay. In theory, there should not be any air in the motor, but just in case, the vehicle burps and we need to add coolant, we should do so. Install our cap, until it clicks.
Thanks for watching. Visit us at 1AAuto.com for quality auto parts, fast and free shipping, and the best customer service in the industry.
Tools used
Brought to you by 1AAuto.com, your source for quality replacement parts and the best service on the Internet.
Hi, I'm Mike from 1A Auto. I hope this how-to video helps you out, and next time you need parts for your vehicle, think of 1AAuto.com. Thanks.
In this video, we're going to show you how to replace the radiator overflow bottle on this 2005 Volkswagen Jetta. It's the same part and similar process on these Jettas from 2005 to 2009. The items that you'll need for this is a new radiator overflow bottle from 1AAuto.com, 10mm socket and ratchet with an extension, T25 Torx bit or driver, along with a pair of pliers.
First, you want to remove these three 10mm bolts. We'll fast-forward as Mike does that. Push the tab on the harness and disconnect it. Pull this hose free, and then remove these two T25 Torx screws. Now push the teeth together on the hose clamp, slide it back, pull that hose free, pull this hose off the radiator overflow bottle, and pull the bottle up and out.
Then, using your pliers, slide this hose clamp down and off this hose. Then you need to pull this hose free. You want to just twist it, and it helps to use the pliers to do this, but you want to just twist it and kind of break it free. Then you just move it back and forth and pull it the rest of the way off.
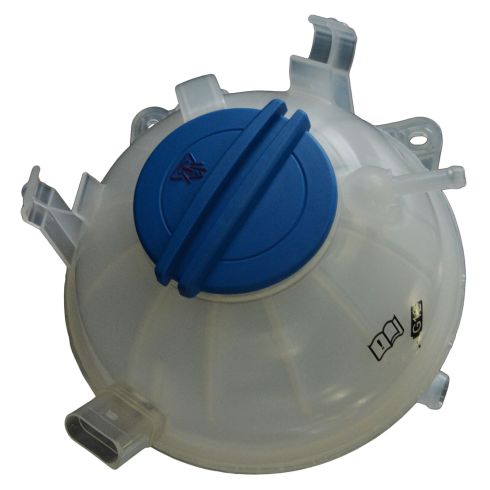
On the right is the old radiator overflow bottle; on the left is the new one from 1A Auto. You can see they're identical and will fit exactly the same.
Take your new radiator overflow bottle, reconnect the hose, and slide that hose clamp up. You'll notice we're actually just reinstalling our old radiator overflow bottle because it's still in good shape, but you would just put the fluid into this new radiator overflow bottle after you've connected everything.
Now you just want to lower the radiator overflow bottle back down into place. Then you can push this hose back into place, and, using your pliers, slide up that hose clamp. Get it lined up, and there is a lineup pin on the bottom. Once you push that into place, you can replace those two T25 screws. Then push this hose back into those clips, reconnect your harness, and then replace those three 10mm bolts and tighten them up.
Thanks for tuning in. We hope this video helped you out. Next time you need parts for your car, please visit 1AAuto.com. Also check out our other helpful how-to and diagnosis videos.