Hi, I'm Mike from 1A Auto. We've been selling auto parts for over 30 years. We're dedicated to delivering quality auto parts, expert customer service, fast and free shipping, all backed by our 100% satisfaction guarantee. Visit us at 1AAuto.com, your trusted source for quality auto parts.
On the top of the engine is a cover that we'll want to remove. There's a 10-millimeter on the passenger's side, and then there's two 10-millimeters on the driver's side. I'll use a ratchet with an extension to crack all these loose. Once they're loose, you can usually just twist them out by hand.
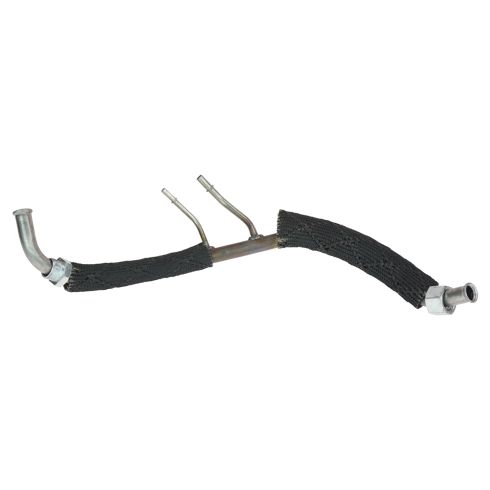
Right here is your EGR valve and connected to it is this large EGR valve tube. It comes off of your exhaust manifold and it actually brings exhaust gasses up into your intake, and they get burned a second time through your intake manifold when you're at highway speeds. The place to start is by disconnecting the vacuum hose right on the top of it, and then we're going to take this brake booster hose and we're going to get that out of they way as well, just 'cause we need to work in this area and it's a little easier.
We'll take out this 10-millimeter nut right here, and then we're going to pull this hose out of the way. You can use a 10-millimeter socket, ratchet, and extension to get the nut off. And then once it's loose, you should be able to just spin it off by hand, depending on your rust of course. And then the vacuum line just pulls right off of the back of the intake. So we'll get that out of the way, set it aside. The nut right here on the crossover pipe is around an inch and 1/16, though I'm not exactly sure. We are just going to use an adjustable wrench because it's just easy. With the adjustable wrench on there, should be able to crack it loose, just like that. You just basically continue spinning it until it's completely released from the EGR valve. It's actually at a point where I can just spin it out by hand now, which is great. And there you are.
Right here on the EGR tube, we'll need to pull these two hoses off. They just slide right off. Our truck has a lift kit, so it's a little bit easier to get in here and get a wrench on. We're going to start by putting some rust penetrant on this nut 'cause I'm pretty confident it's going to give us a little bit of a fight. Once we do that, we'll try our adjustable wrench on it and see if it is going to release its grip or not.
The adjustable wrench wasn't really working out for us. It was kind of flexing, so we're moving onto the actual 26 millimeter wrench that is the proper size for this. It's still pretty tight. The 26-millimeter wrench was not enough to release this bolt, so we're going to move onto fire and we're going to start right here. With it nice and hot, then you can get your wrench on it and hopefully crack it loose. We're going to start this process by putting anti-seize on the threads of the manifold, because whoever the next person is to take this off is going to be very happy that I did that, because it's going to come off a whole lot easier. It's just a nice thing to do. And then you can feed the new tube up to the top of the engine. You want to loosely thread it onto the exhaust manifold. Before you tighten it up, you want to go up to the top and make sure it's in the right spot.
On the upper portion, we're going to do the same thing. We're going to put a little anti-seize on the threads and that'll make it so it comes out again at a later date. The best way to install this is to pull the actual threaded part away from the tube and get the tube into the EGR hole itself. Once it's in there, you can feed the threaded portion over to it and start tightening that up. I'm just going to turn this a couple of times with the adjustable wrench, just to make sure it's threading in properly. Feels like it is. And then we'll go back down to the bottom to make sure that that's in the right spot. All right. Back down here in the wheel well, we can use an adjustable wrench to tighten this up. The other wrench that I was using on the old one was 26 millimeters. This one is actually a little bit larger. That's probably because the old one had rusted so much that the metal came off and it became smaller. So I would bet that a 27 millimeter is probably the right size for this but adjustable wrenches are just an easy way of getting around all that.
With the bottom one tightened, we can now go back to the top, tighten that one up. If you were to do them one at a time, you'd have to really fight getting the second one in. So I like to get them both in loosely and then come back and tighten them both. Just makes the job a lot easier. All right. At this point, you can slide the rubber hoses on to the EGR pipe. And then if you disconnected any hoses up above to get them out of the way, you'll want to plug them back in.
There's the other hose we need to put back in place. You can use your 10-millimeter socket and ratchet to get that hose bracket right back on. Set this generally in place. Once they're all finger tight, can use your 10-millimeter socket and ratchet to tighten it up.
Thanks for watching. Visit us at 1AAuto.com for quality auto parts, fast and free shipping, and the best customer service in the industry.